Creating Your Account
Password Reset
If you forget your password, you can reset it here. If you're still facing issues, contact support.
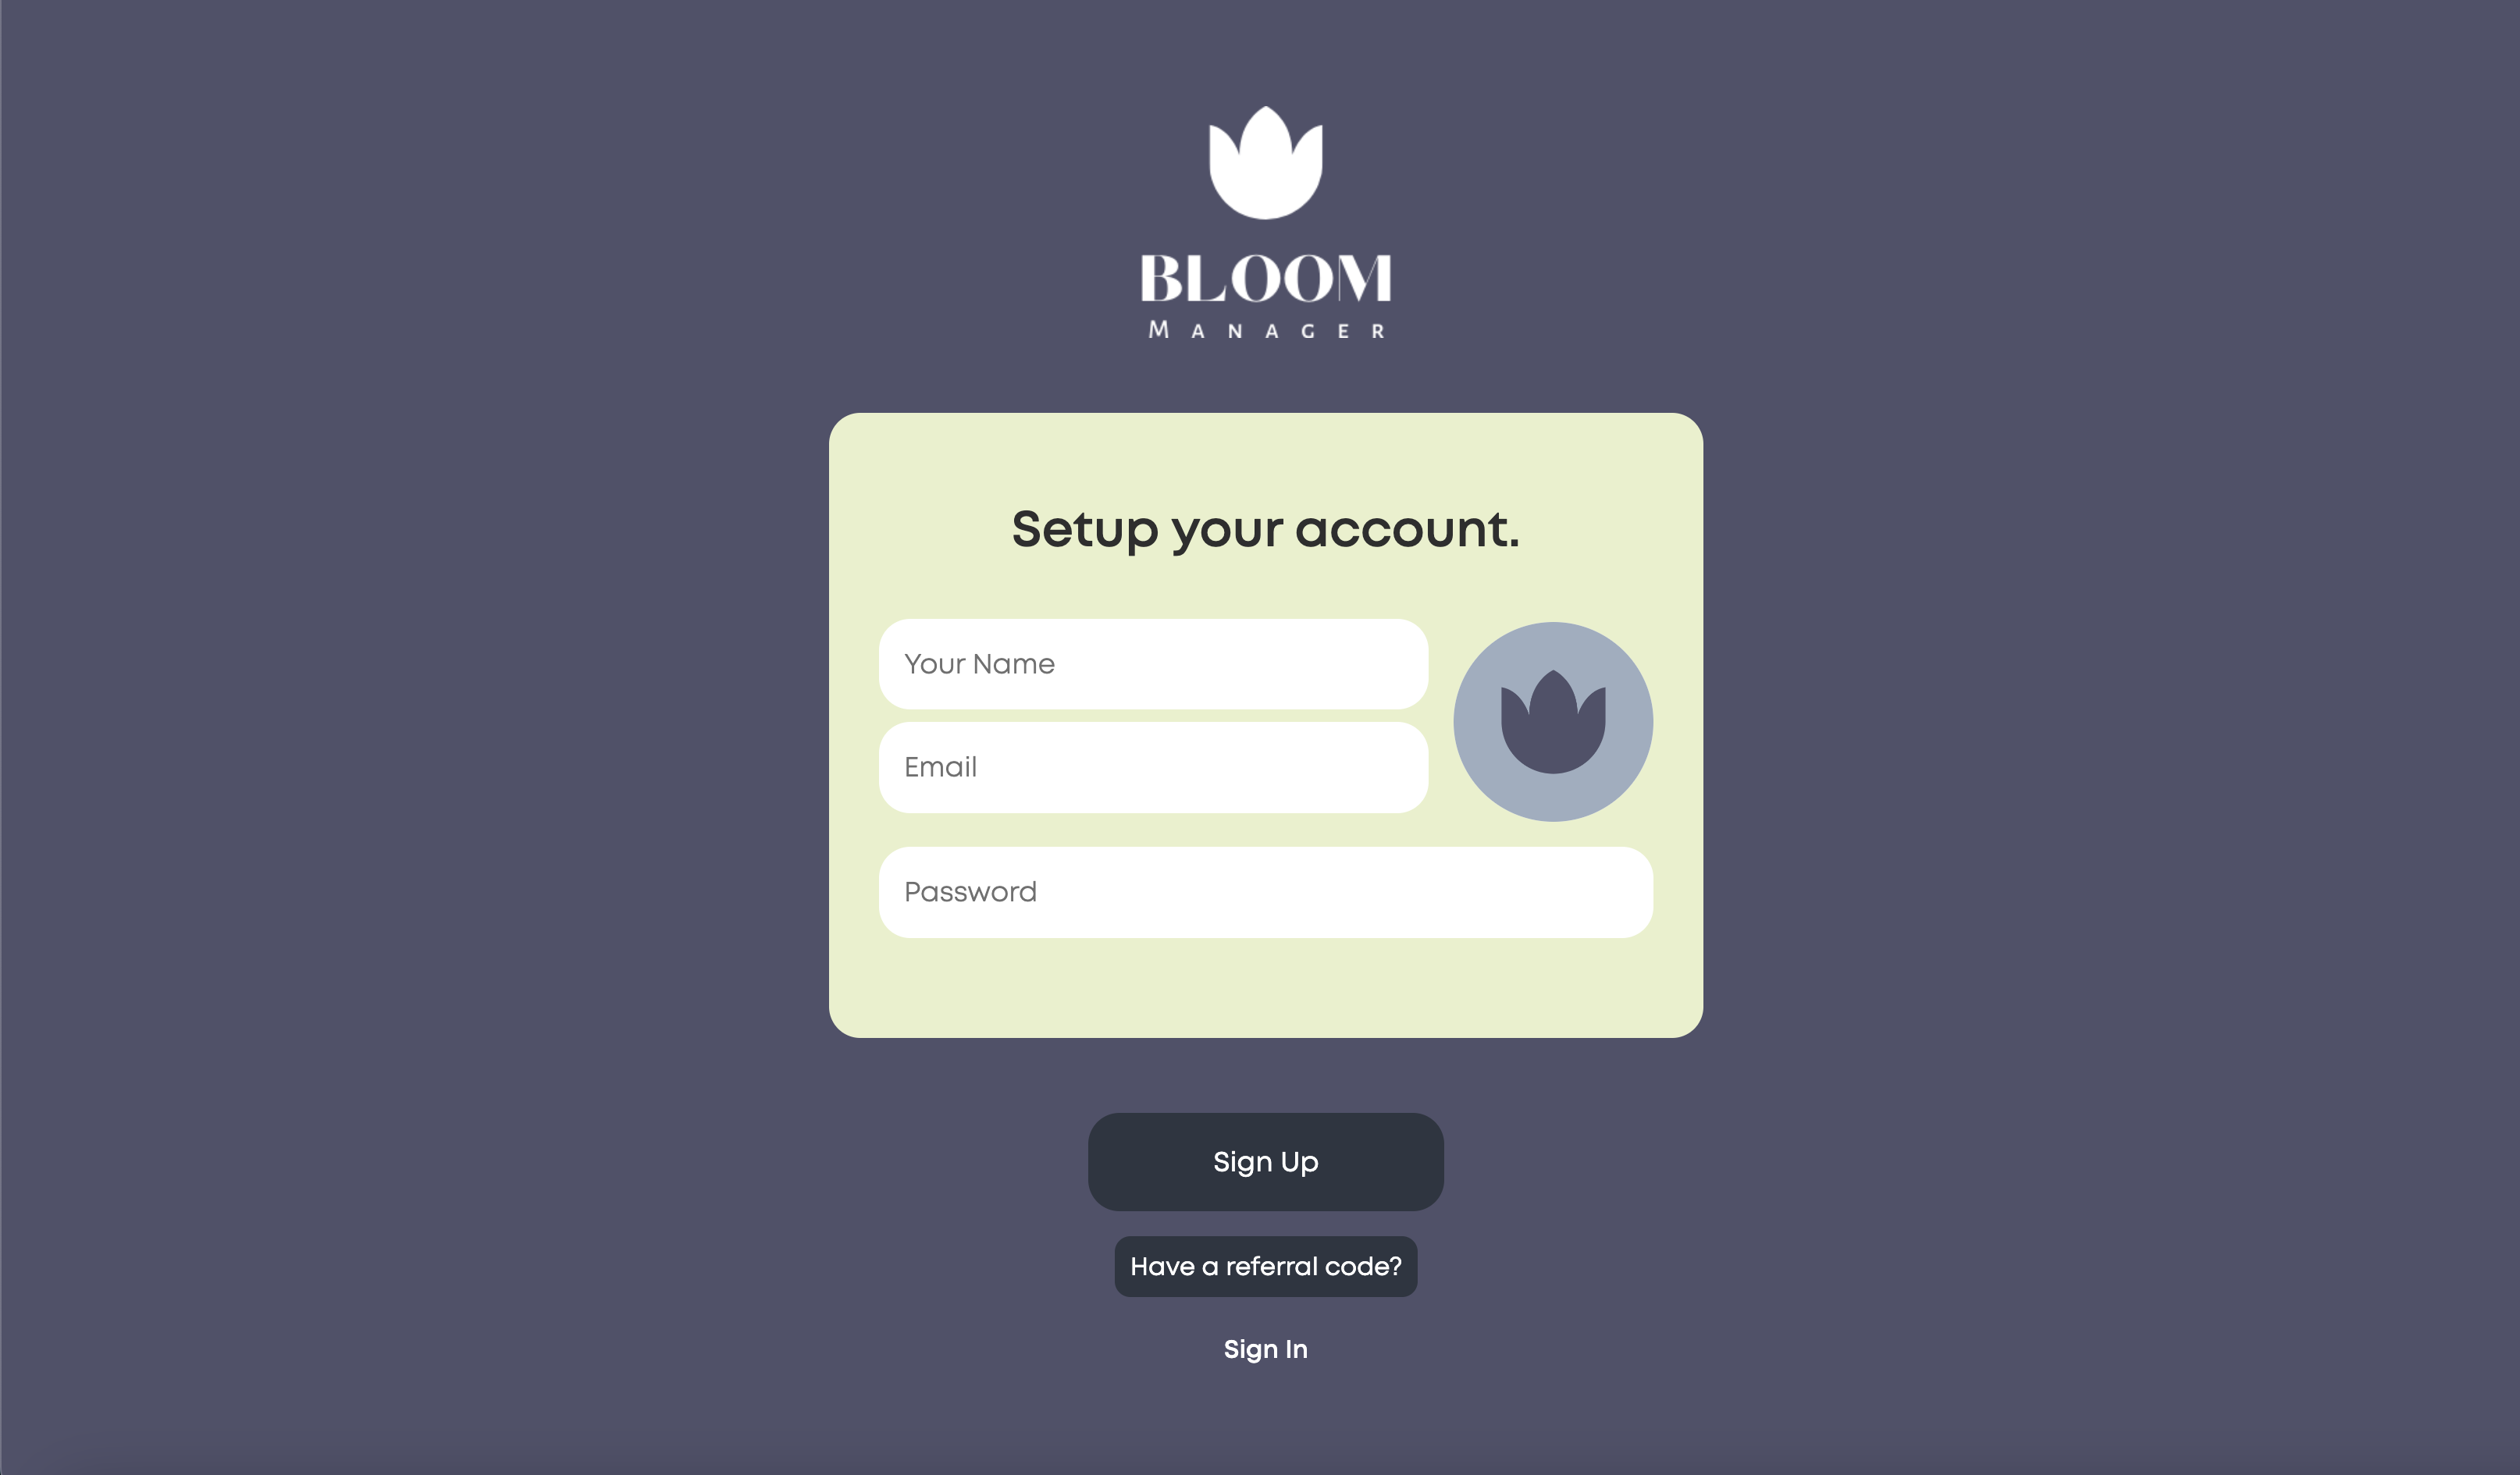
Creating an account is simple.
Just enter your name, email and a password. You can also add a profile photo by clicking or tapping on the blue logo.
If you have a referral code, click "Have a referral code?" and enter it in the text input that appears.
Creating Your Plan
Add Plan Name & Frost Dates
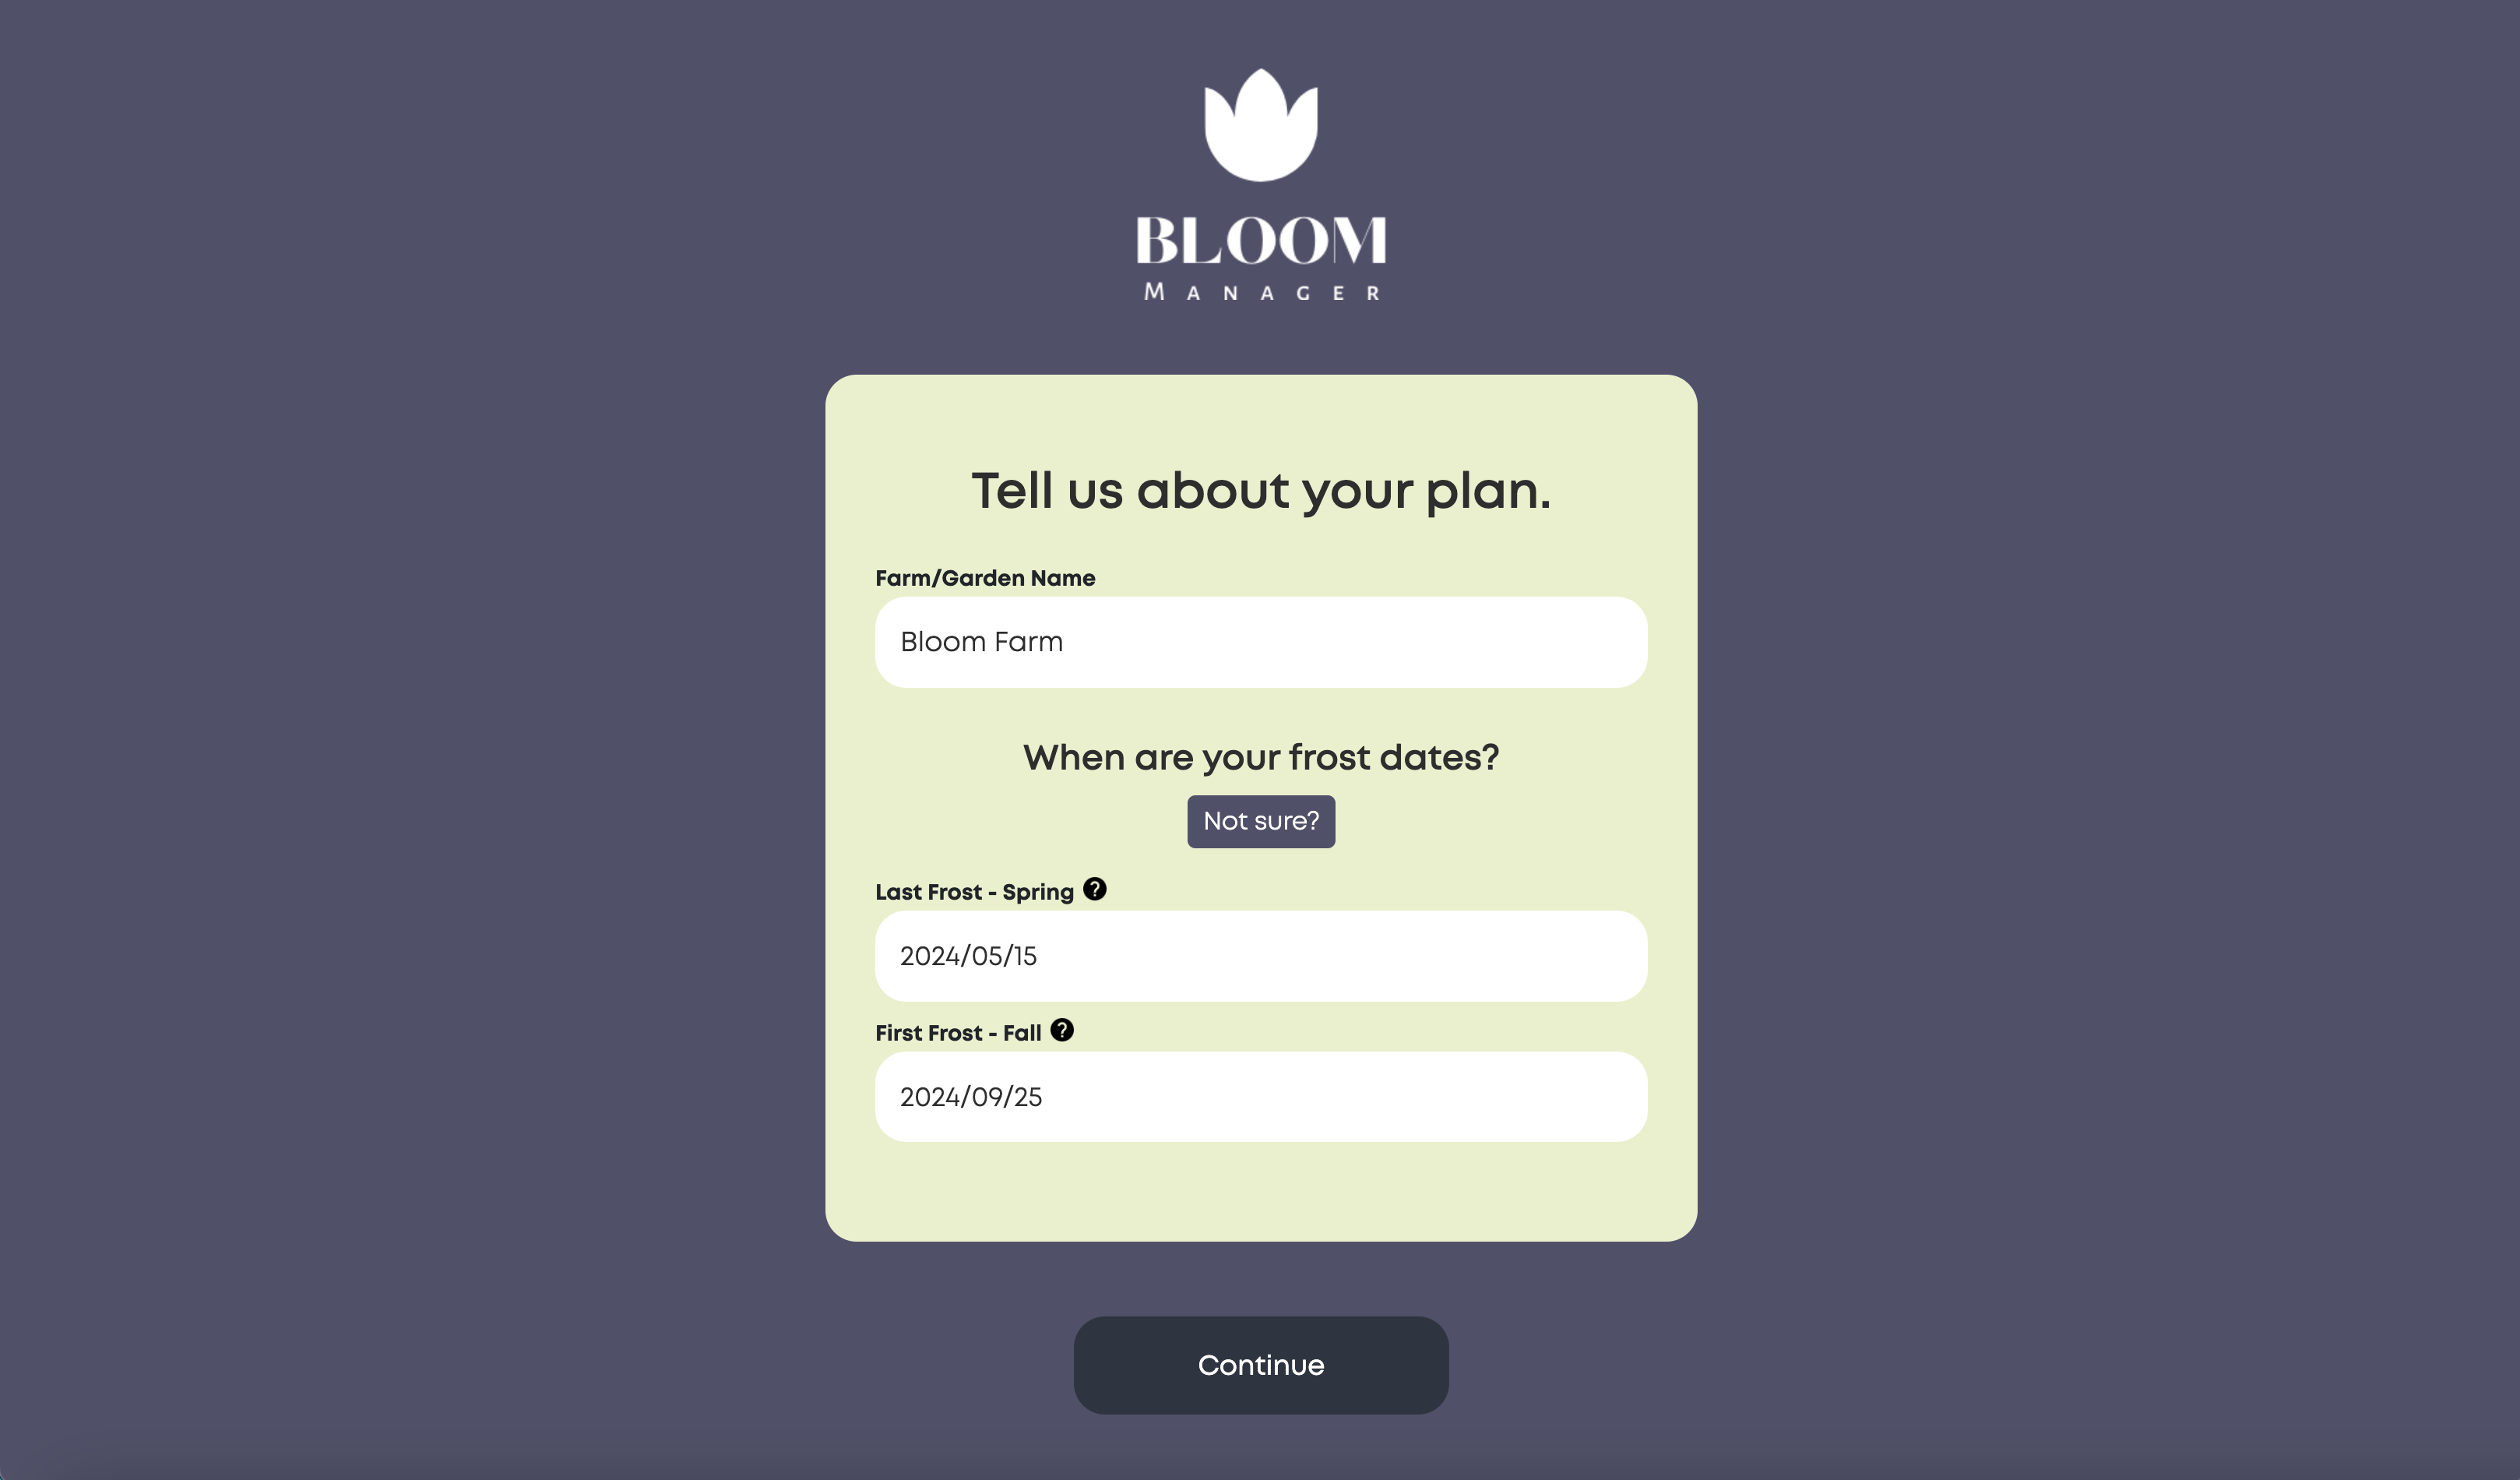
Now that you've created your account, you need to add a season plan. Simply enter a name for your plan (such as your farm or garden name) along with your first and last frost dates.
If you're not sure when your frost dates are and are in the United States or Canada, you can use our free tool that uses your location and historical weather data to calculate your frost dates. You can always change your frost dates later.
Frost Dates
The Last Frost date occurs in SPRING, before your First Frost date that occurs in FALL
| Last Frost |
This is the date in the Spring when the last frost can be expected in your growing area. |
| First Frost |
This is the date in the Fall when the first frost can be expected in your growing area. |
Choosing Your Account Type
Pick between CORE and PRO
We want to make growing cut flowers accessible and affordable for small flower farmers and gardeners alike. That's why Bloom Manager is free-to-use with our CORE plan - which is perfect for most users.
At the same time, we recognize that some flower farmers have greater needs - which is why we also offer a PRO experience. Our PRO users help to support the costs of running Bloom Manager and to develop new features.
Compare Options
|
CORE |
PRO |
| Cost |
Free |
$9/mo |
| Presets |
Access to 55+ free variety presets |
Access to 750+ PRO variety presets, with easy duplication and editing |
| Plantings Limit |
Limited to 25 plantings |
UNLIMITED plantings |
| Plans |
Limit of 1 plan |
UNLIMITED plans for different seasons or growing areas |
| Custom Plants |
Up to 25 custom plants |
UNLIMITED custom plants |
| Print Plan |
Not Available |
Available |
| Support |
Standard support, up to 7 days response time |
PRIORITY support, committed to 24hr response time |
Creating Plantings
There are two ways to create plantings with Bloom Manager
Creating a planting is how all of your growing tasks are automatically generated.
The easiest (and recommended) way to create a planting is with Visual Planner, but you can also add a planting manually via the "Modify Plan" page.
Create via Visual Planner
Add Growing Space
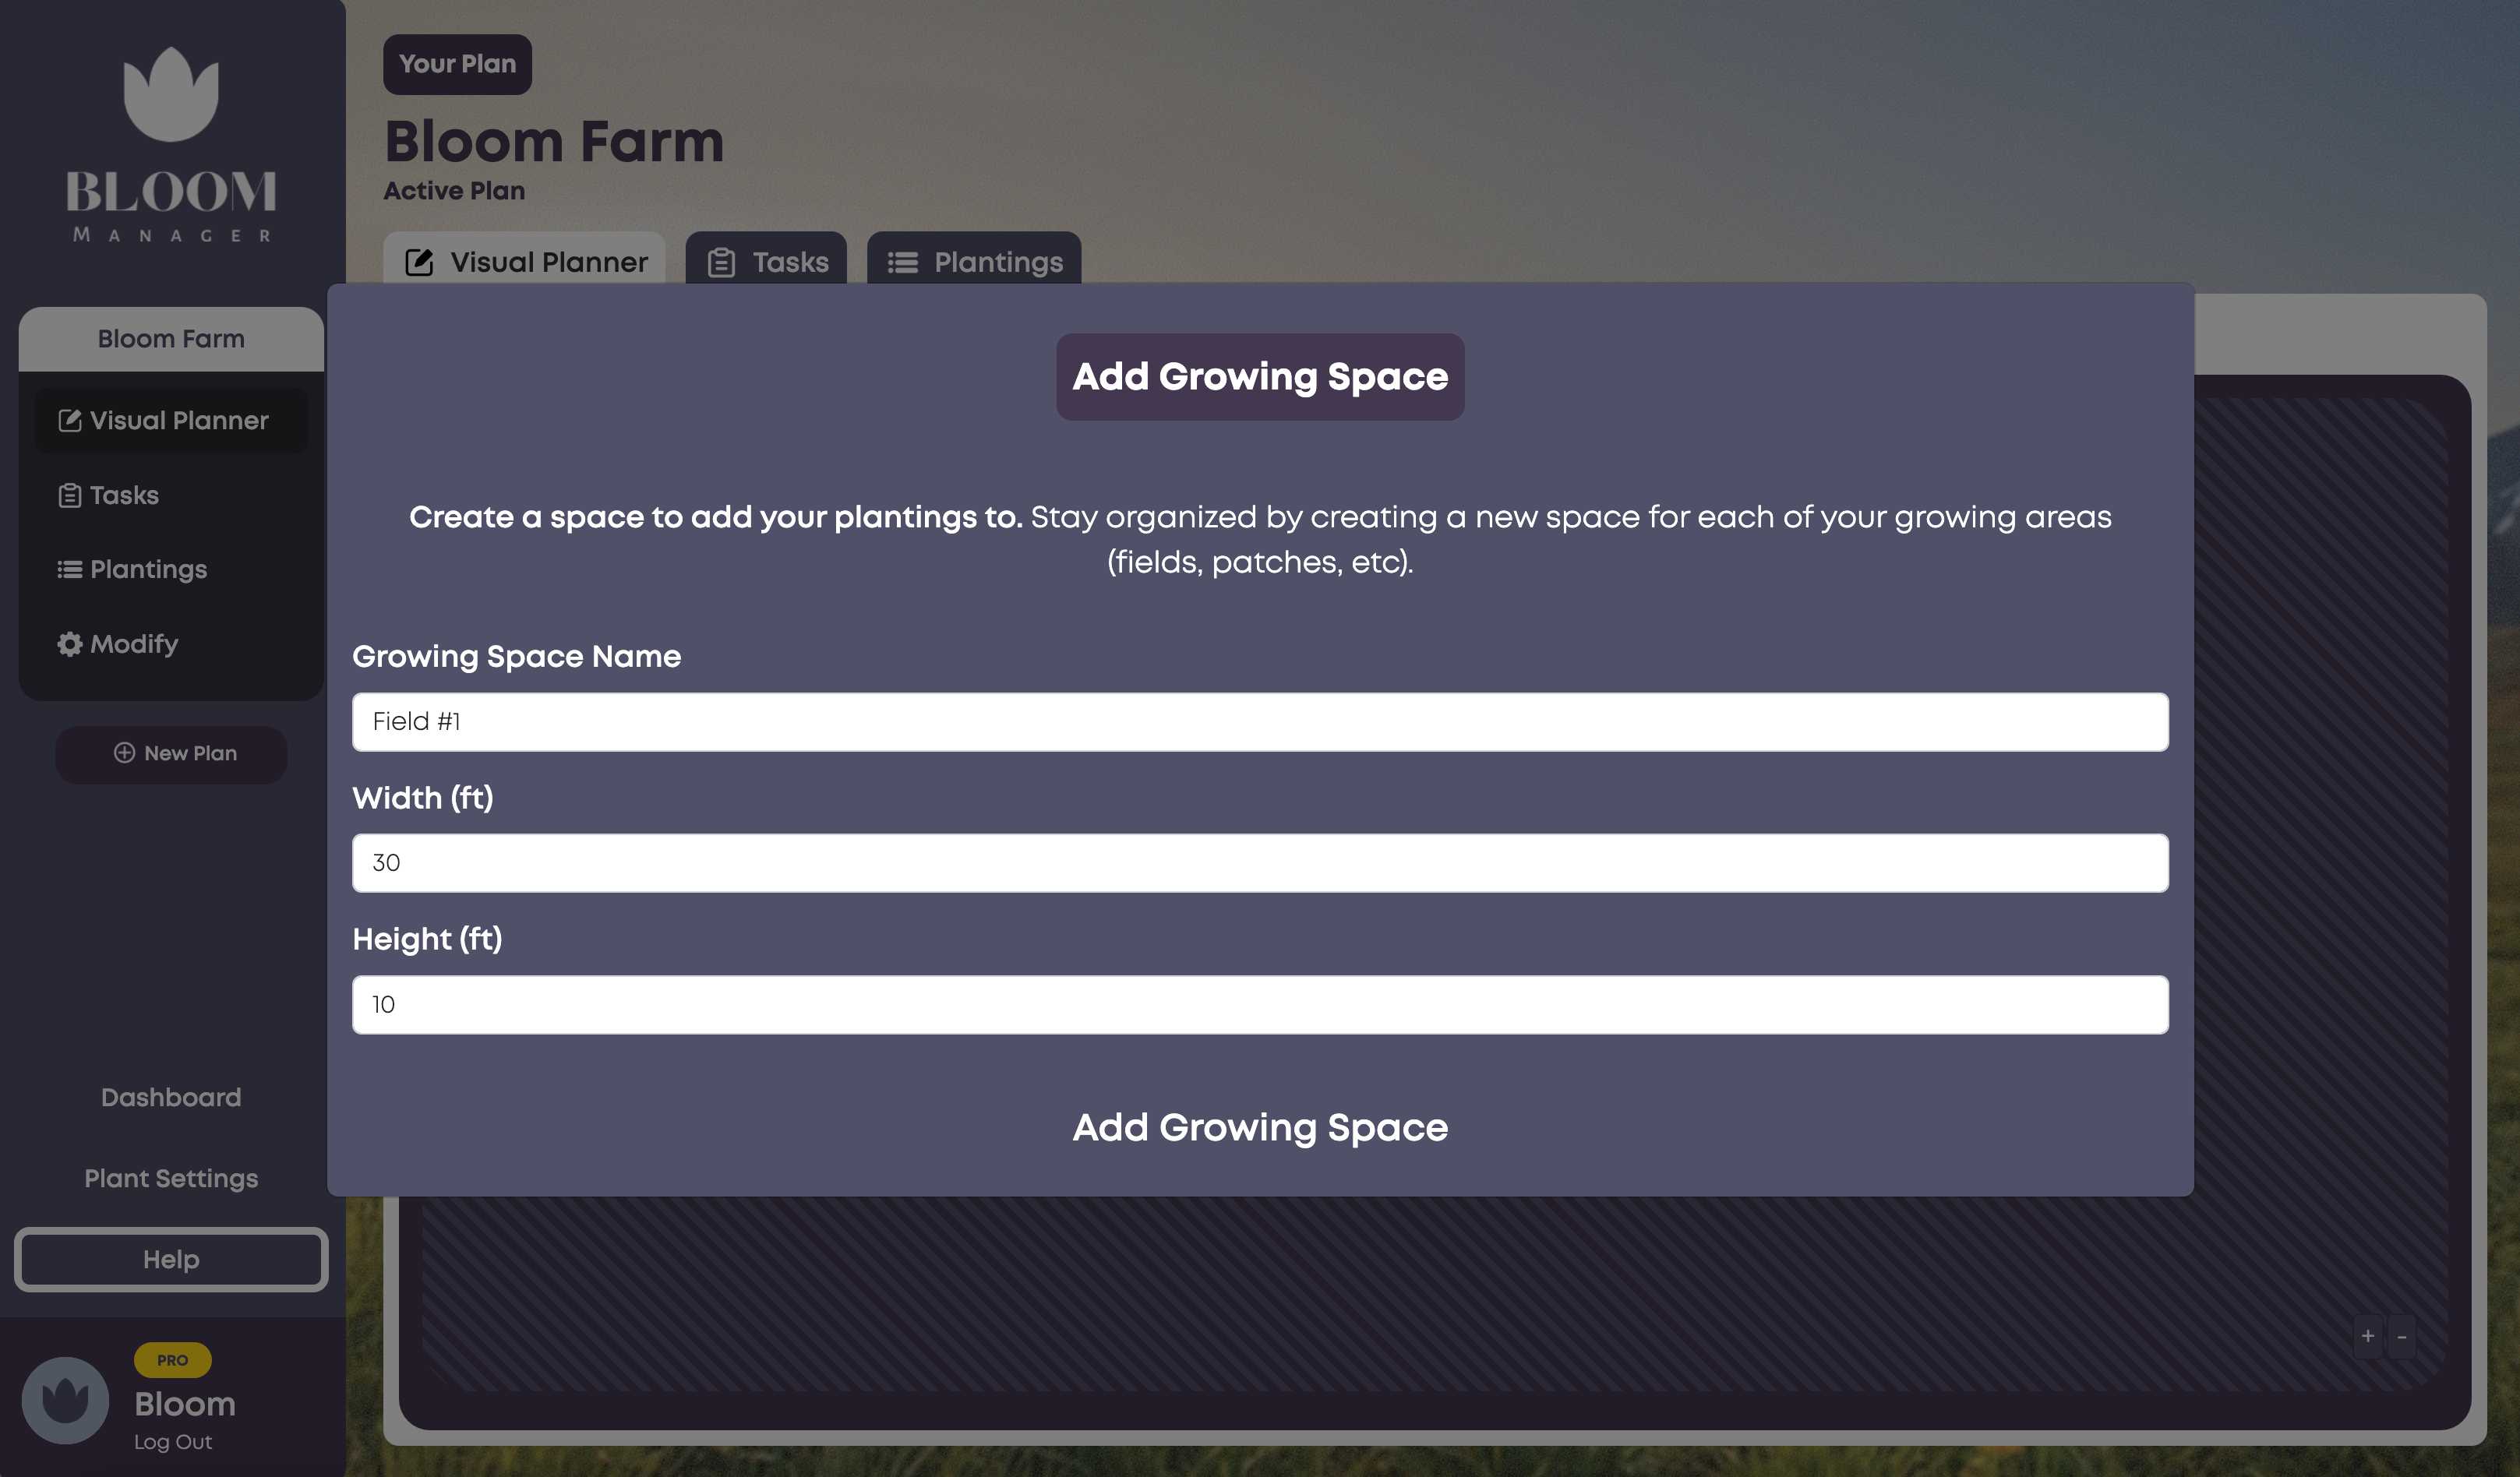
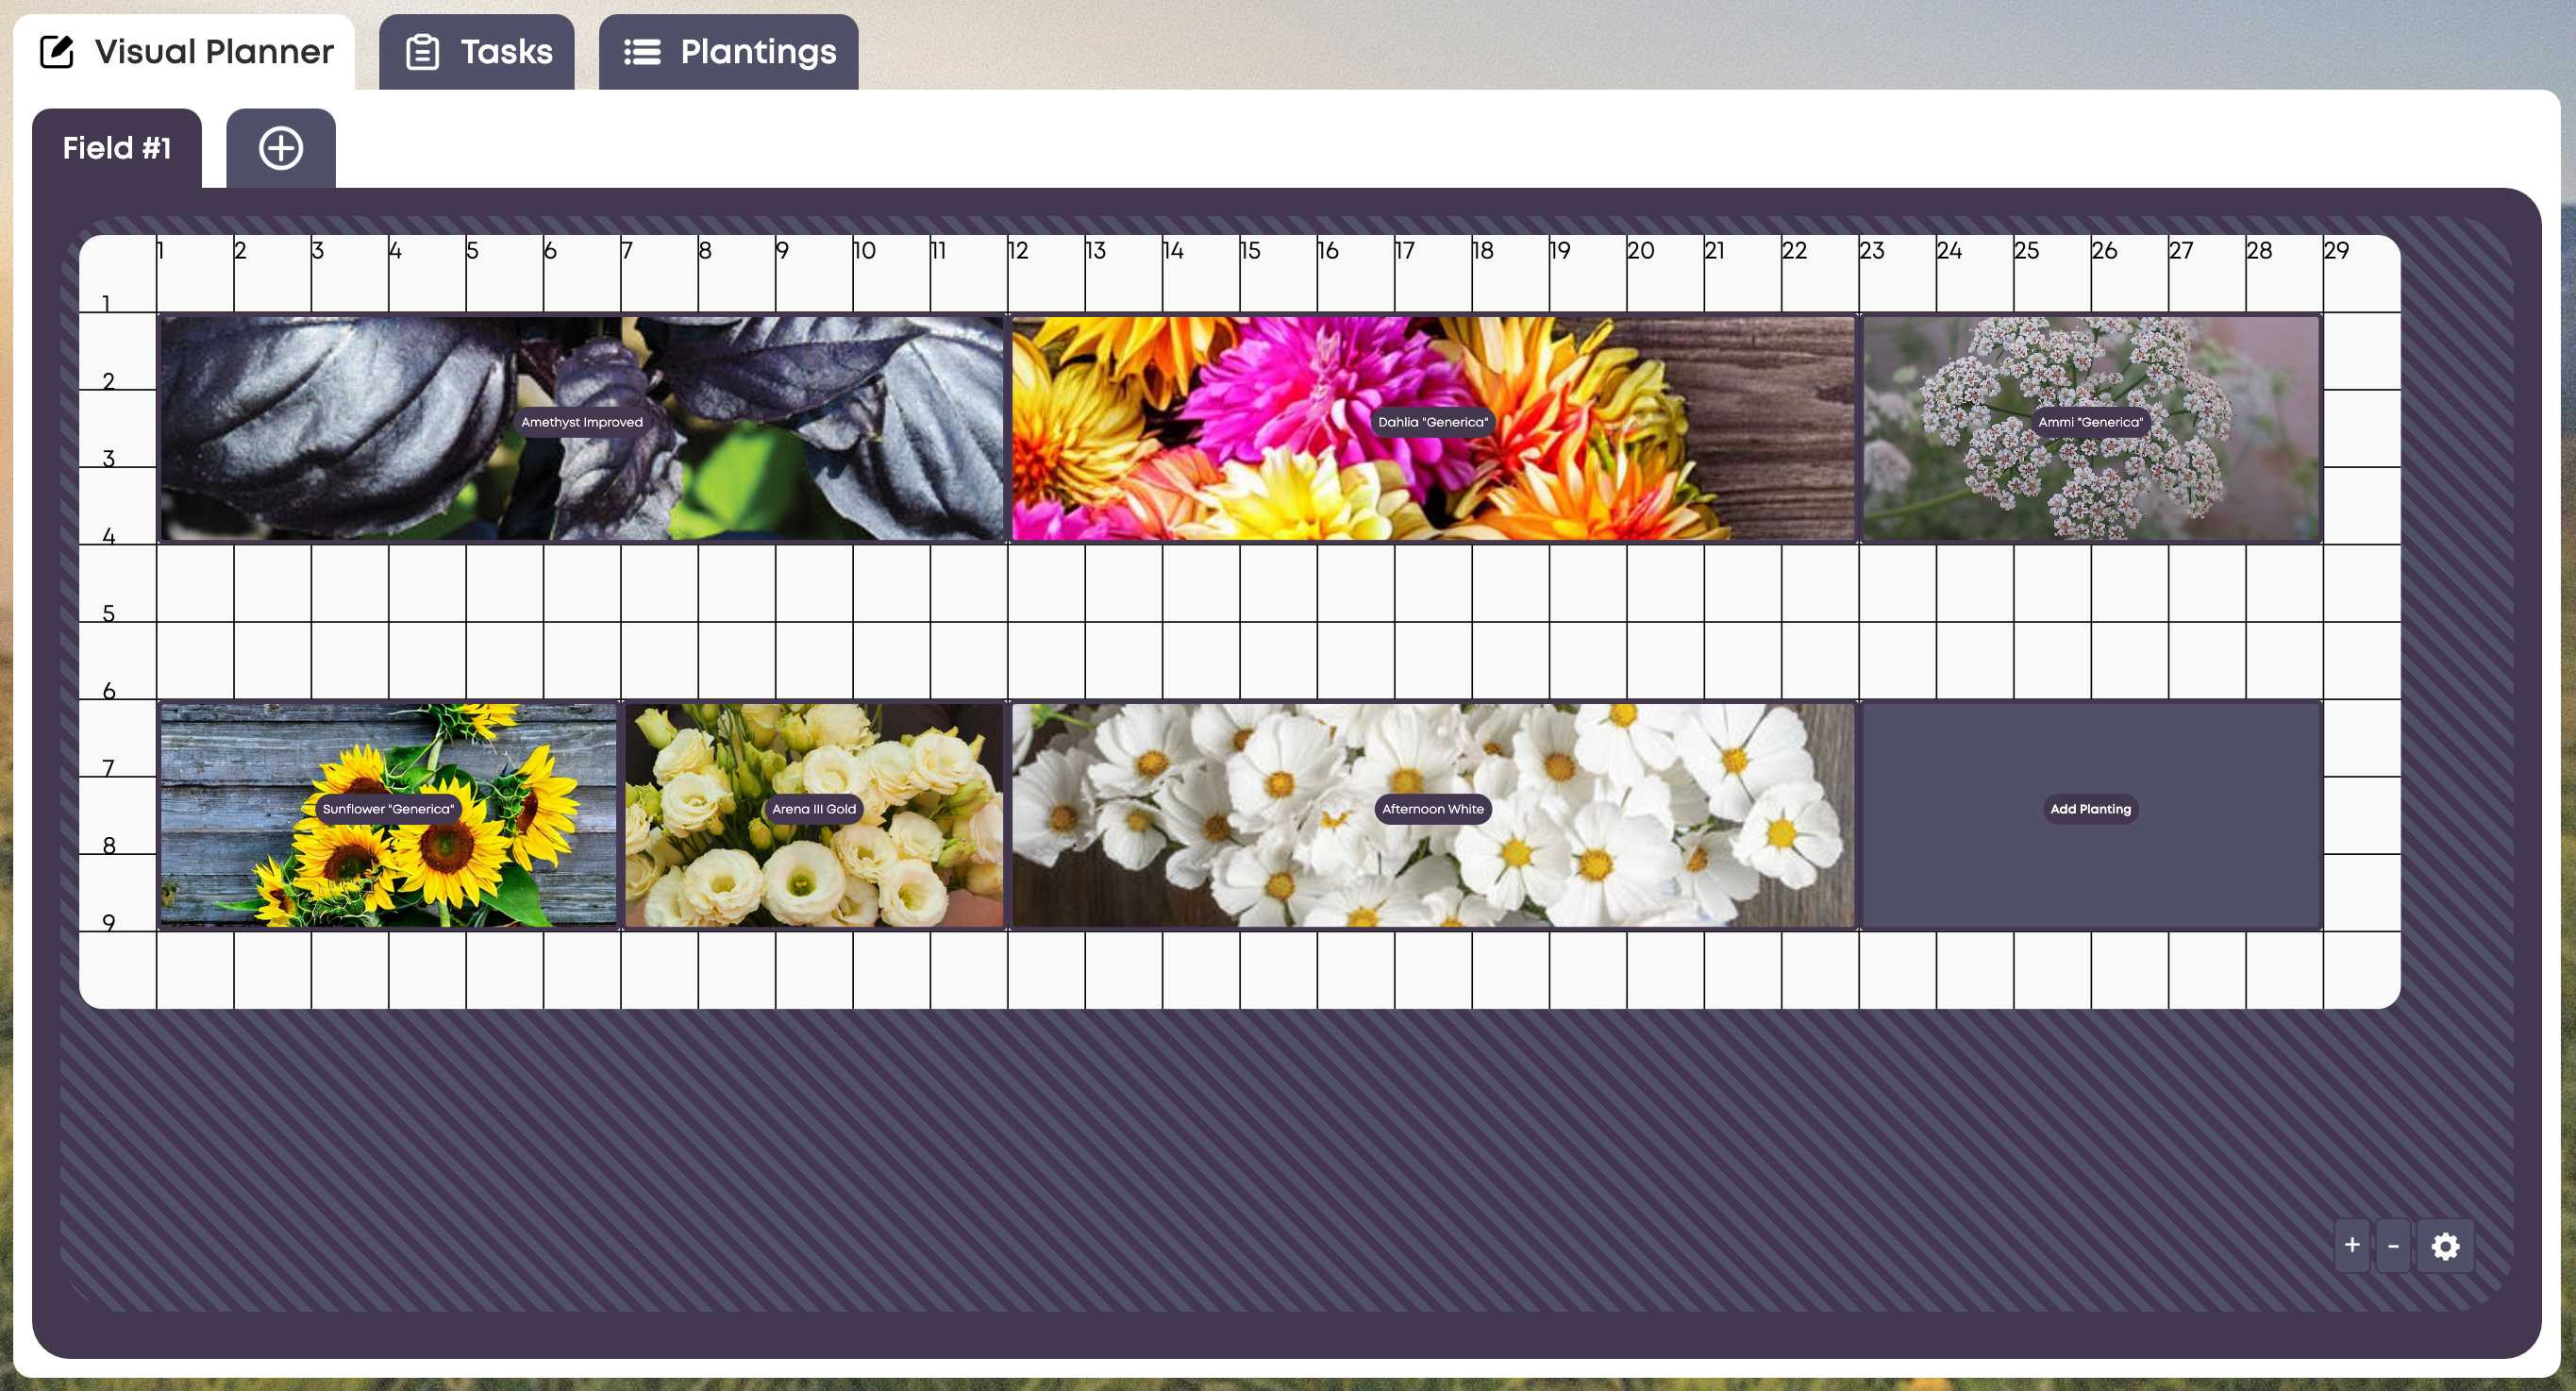
To add a planting with Visual Planner, you first need to create a growing space.
Simply enter a name for your growing space (e.g. Field #1 or Back Garden) and define a length and height, in feet. This should be the length and height of your growing space. We recommend erring on the side of making the space larger rather than making many smaller spaces.
Define Options
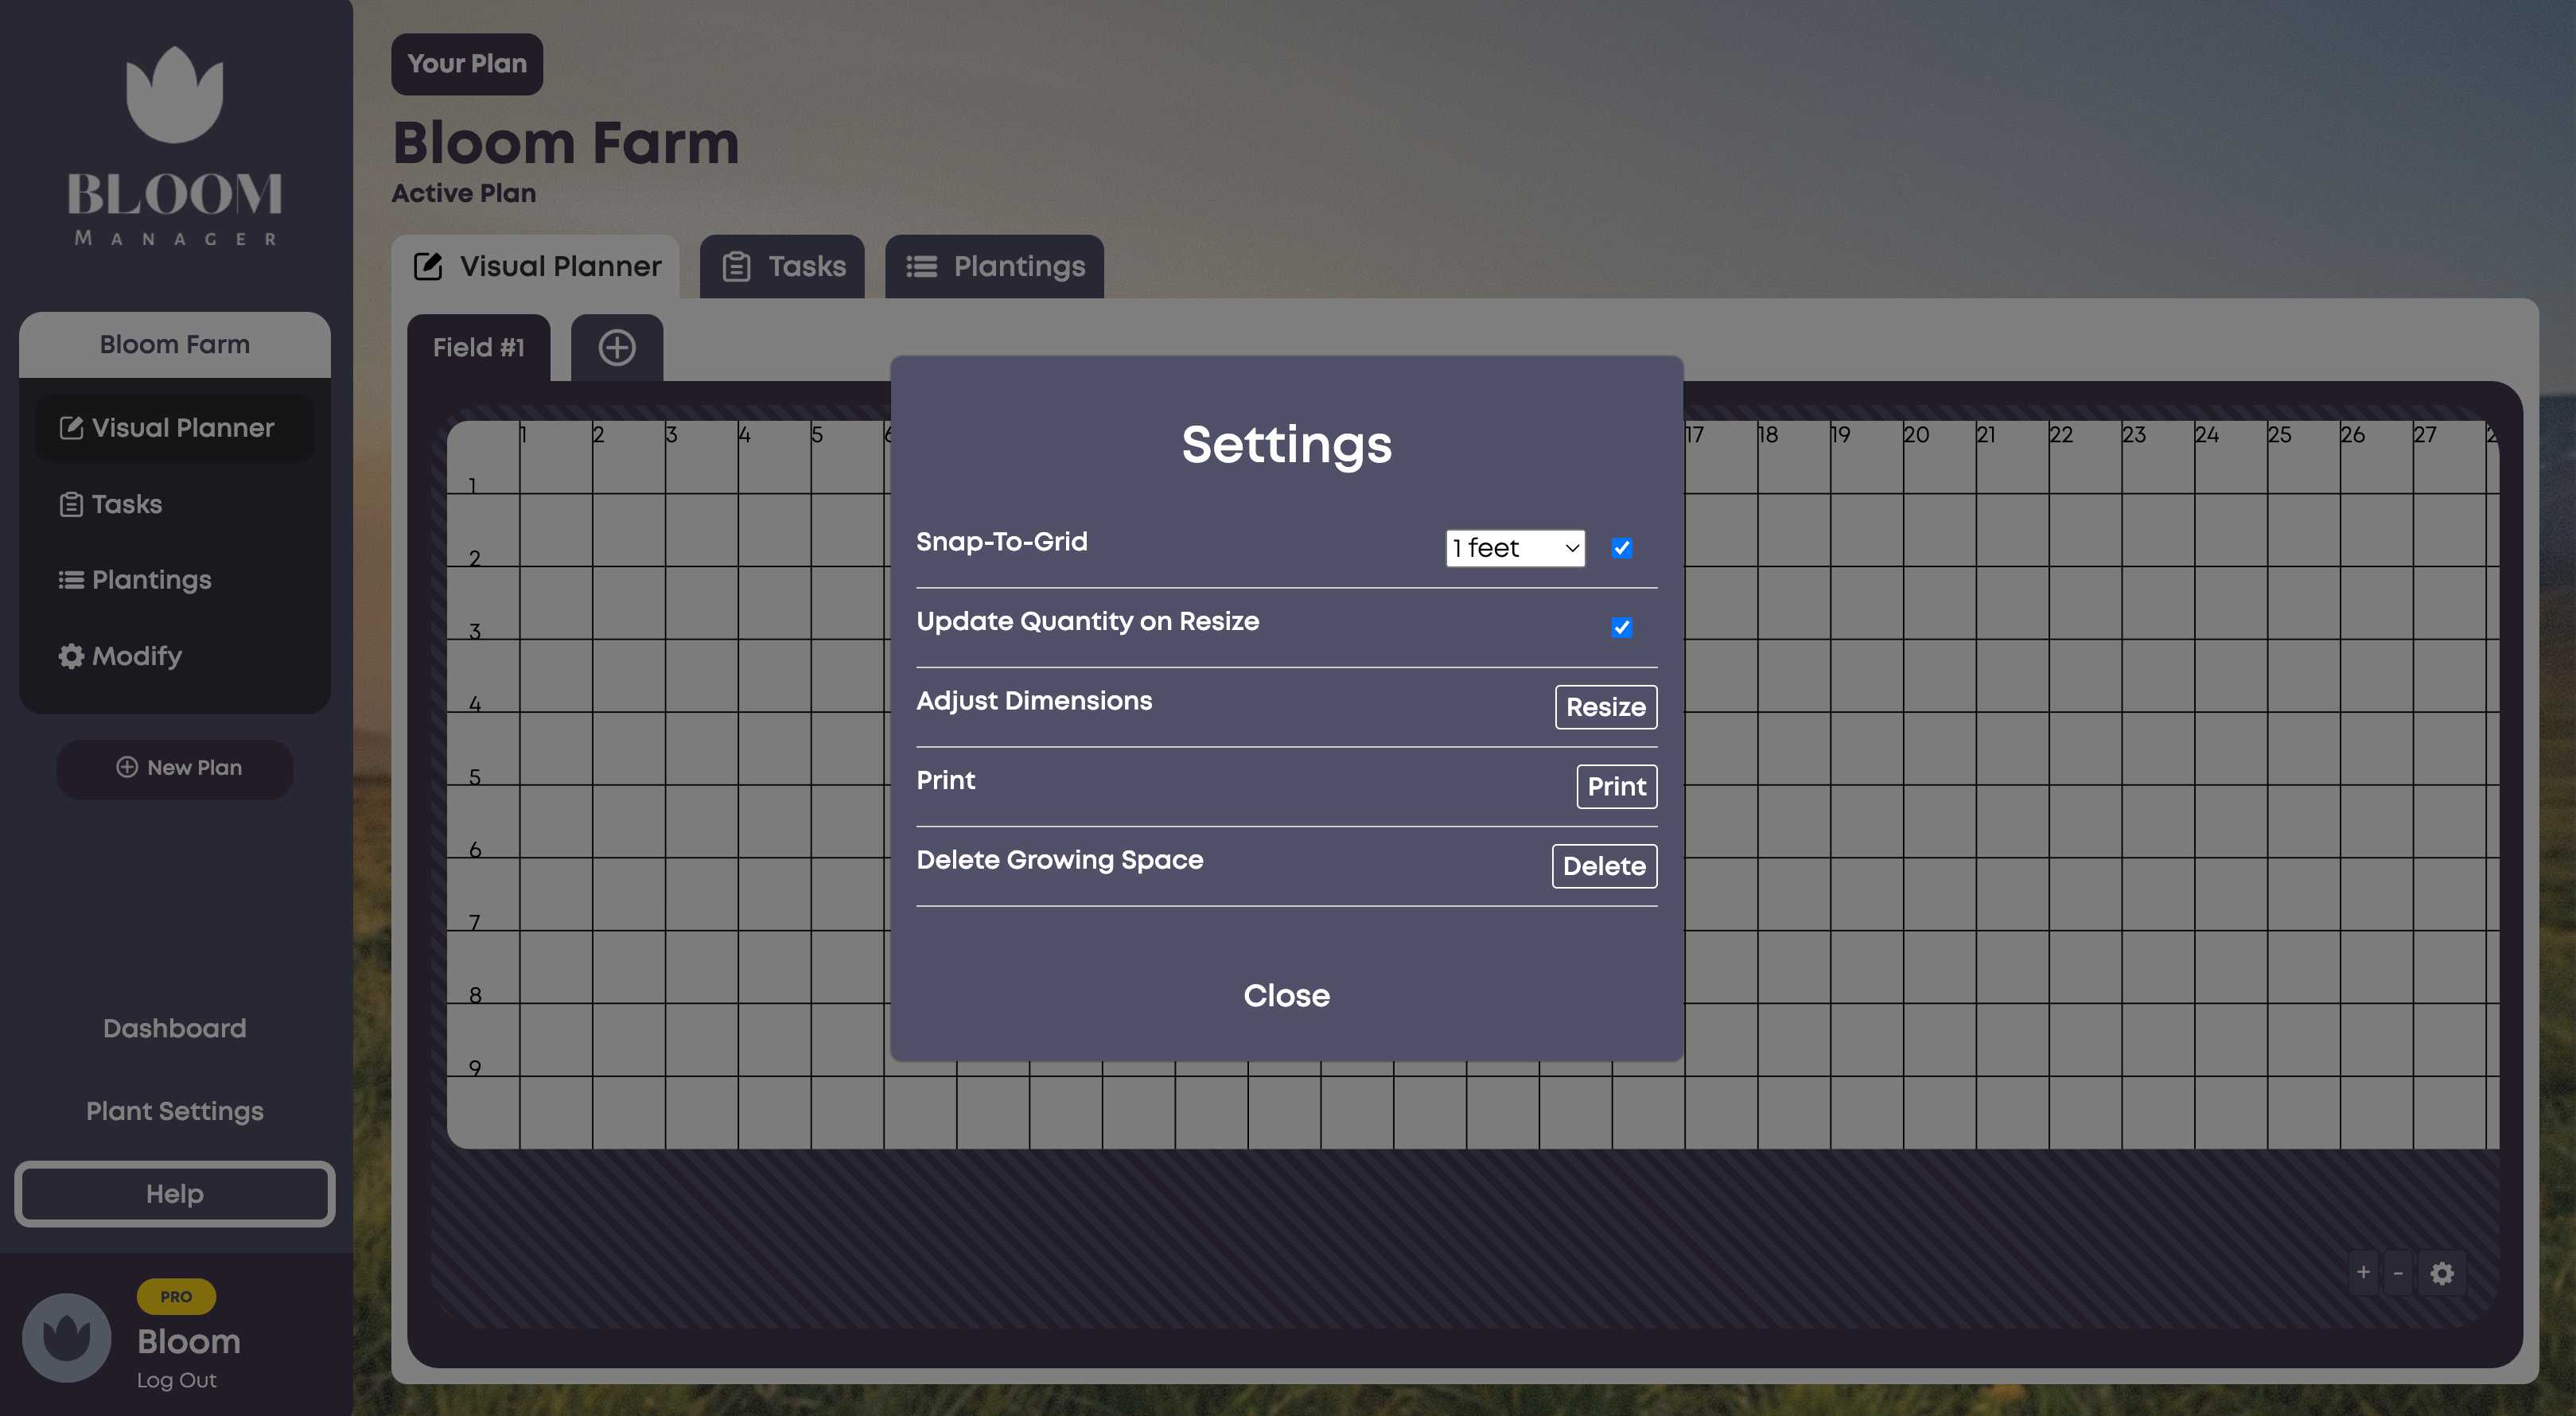
Click on the gear icon in the bottom right to manage different options while using Visual Planner.
We recommend enabling Snap-to-Grid to make creating your selections easier. You can also specify the grid size.
You can also enable Update Quantity on Resize; this is important for later, after you have created your plantings. Having this option enabled will automatically update the plant quantity when you resize the planting.
Other options include Adjust Dimensions, Print and Delete Growing Space.
Create Planting
Once you've created a growing space, click and drag your mouse to create a planting. Or, if you're on mobile, double-tap and drag your finger to create a planting.
Once you've created a planting, you have a few options.
|
Desktop |
Mobile |
| Add Planting |
Click "Add Planting" |
Tap "Add Planting" |
| Resize |
Click and drag the resize icon in the bottom right OR click the resize icon in the top right to manually enter dimensions. |
Tap the resize icon in the top right to manually enter dimensions. |
| Move |
Click and drag the move icon in the bottom left to move. |
Not Available |
| Reorder |
Click the swap icon in top left to move the planting backwards, in case it's overtop of another planting. |
Tap the swap icon in top left to move the planting backwards, in case it's overtop of another planting. |
| Delete |
Click the trash icon in the top right to delete the planting. |
Tap the trash icon in the top right to delete the planting. |
Let's click "Add Planting" and continue.
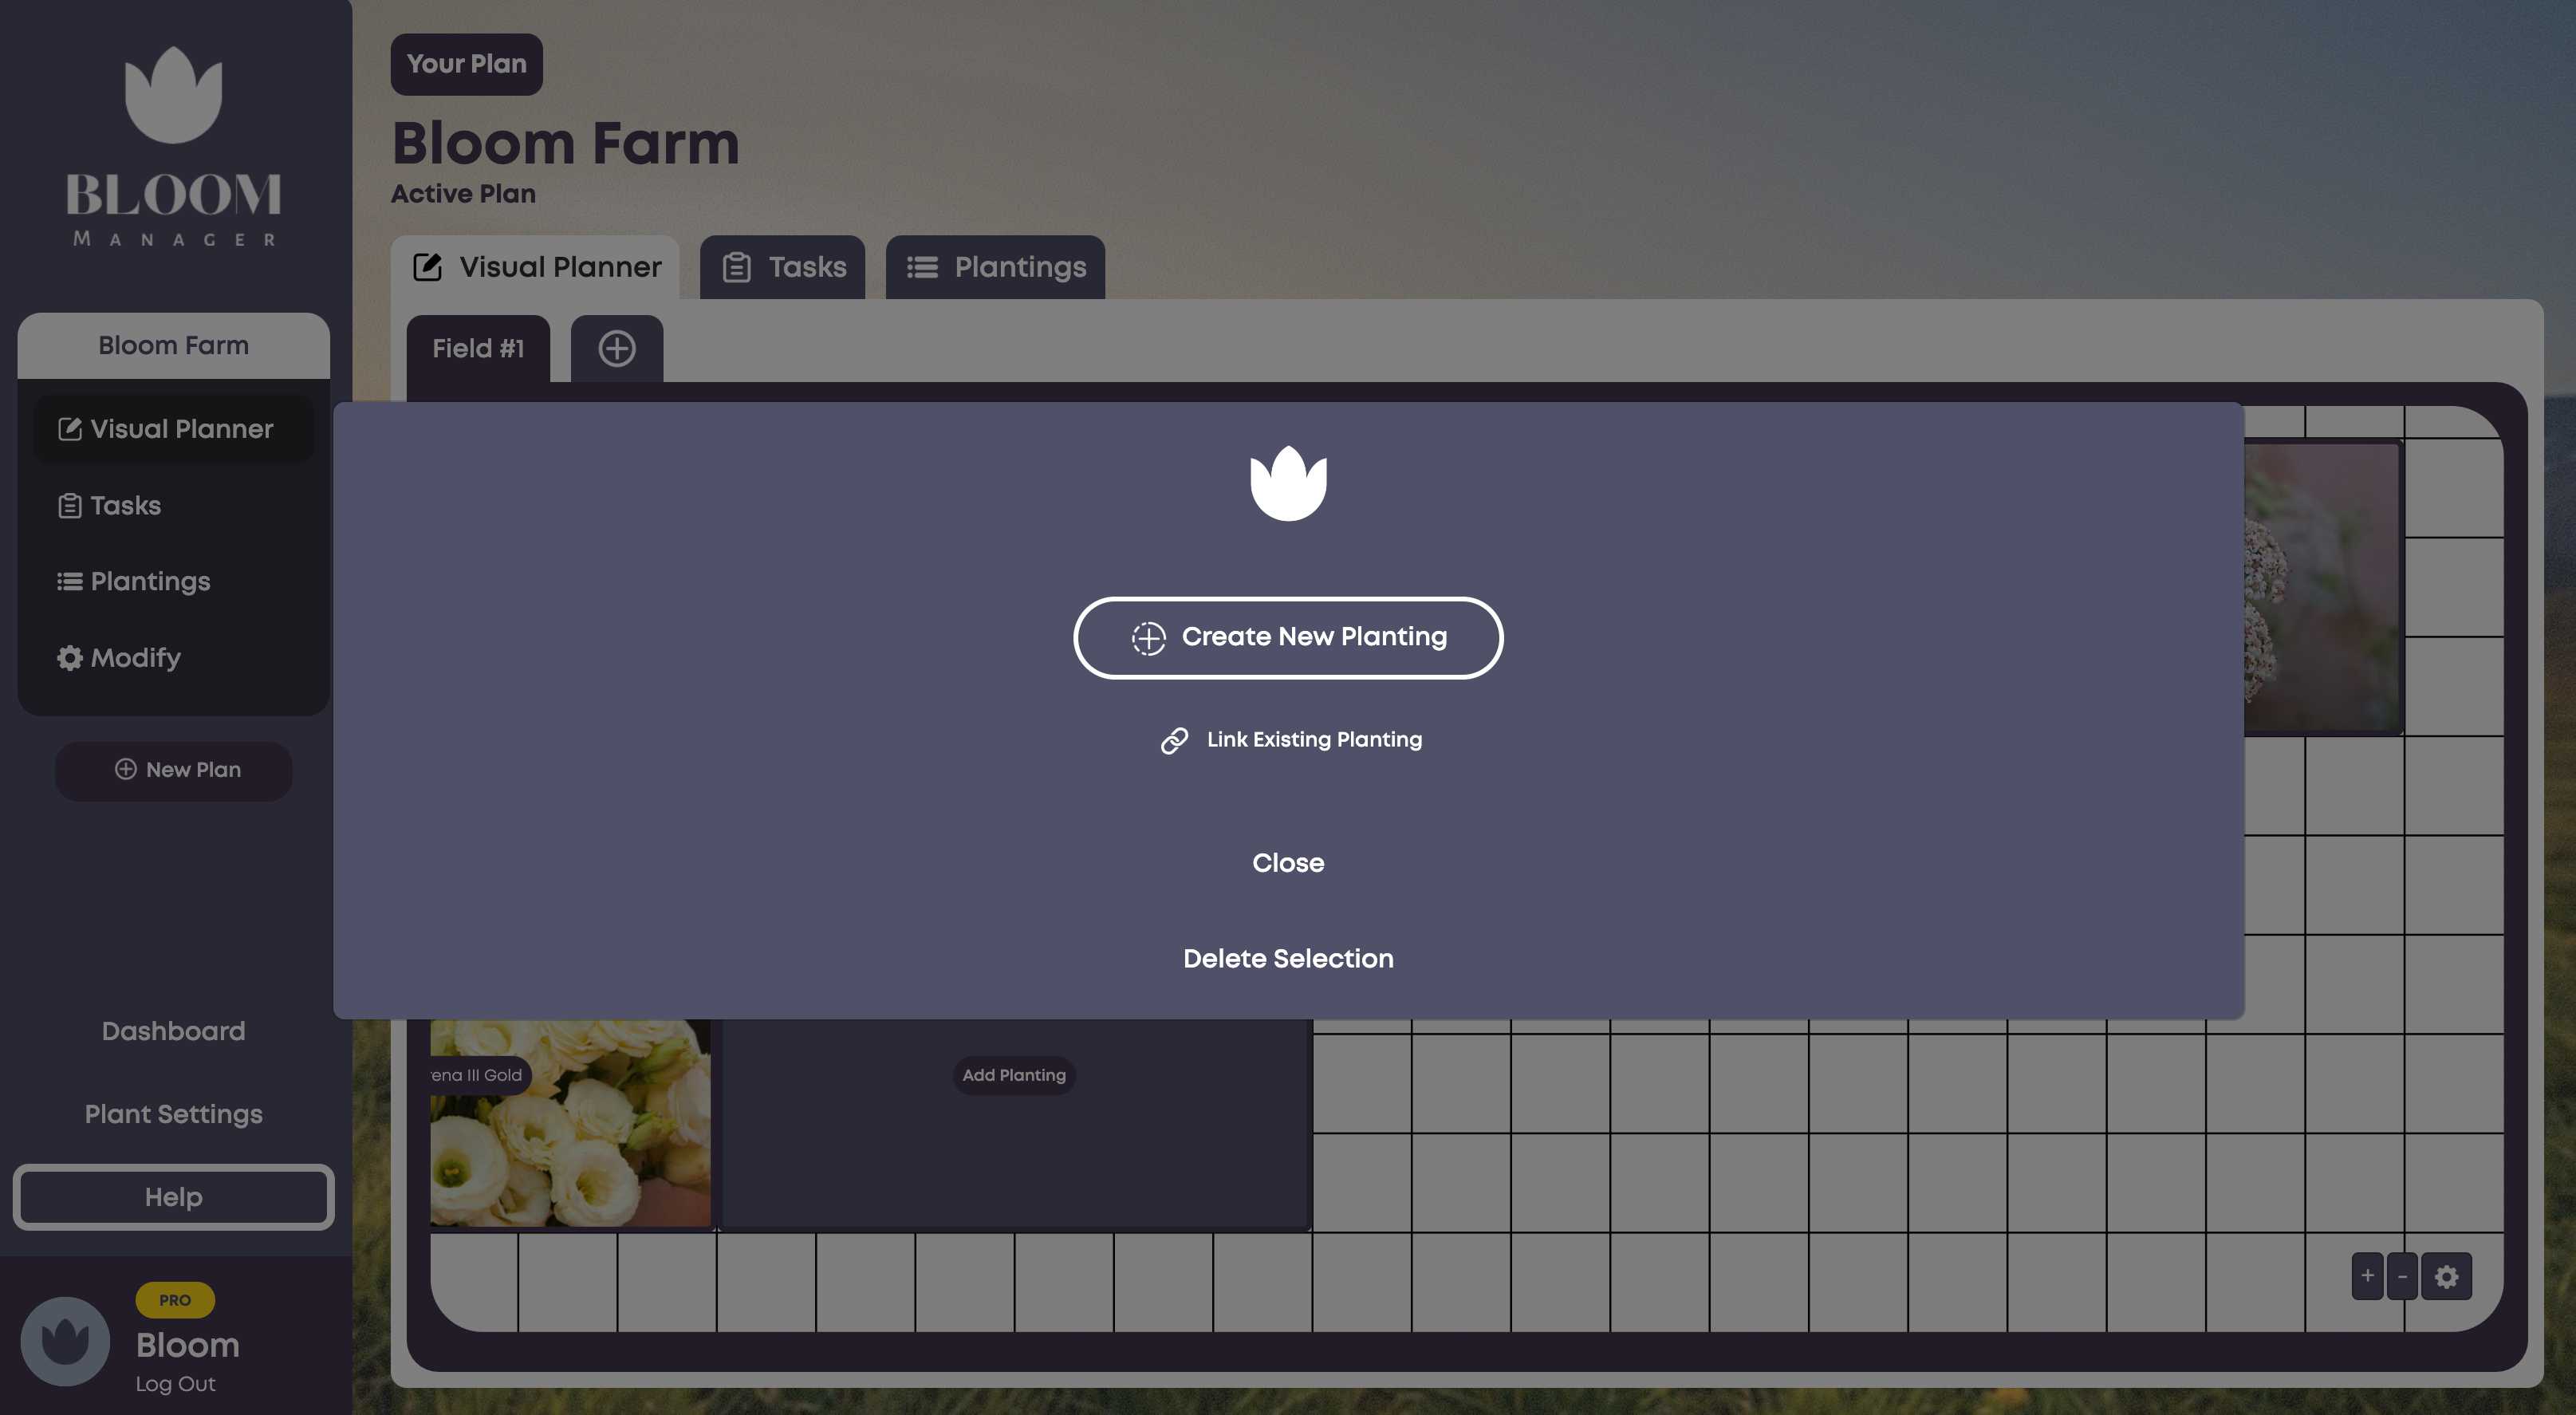
Now, you can choose to add a New Planting or link an existing one. Existing plantings will be available if you've created succession plantings (only the first planting will be linked to the physical planting, the remaining plantings will be unlinked) or if you've created plantings manually through Modify Plan.
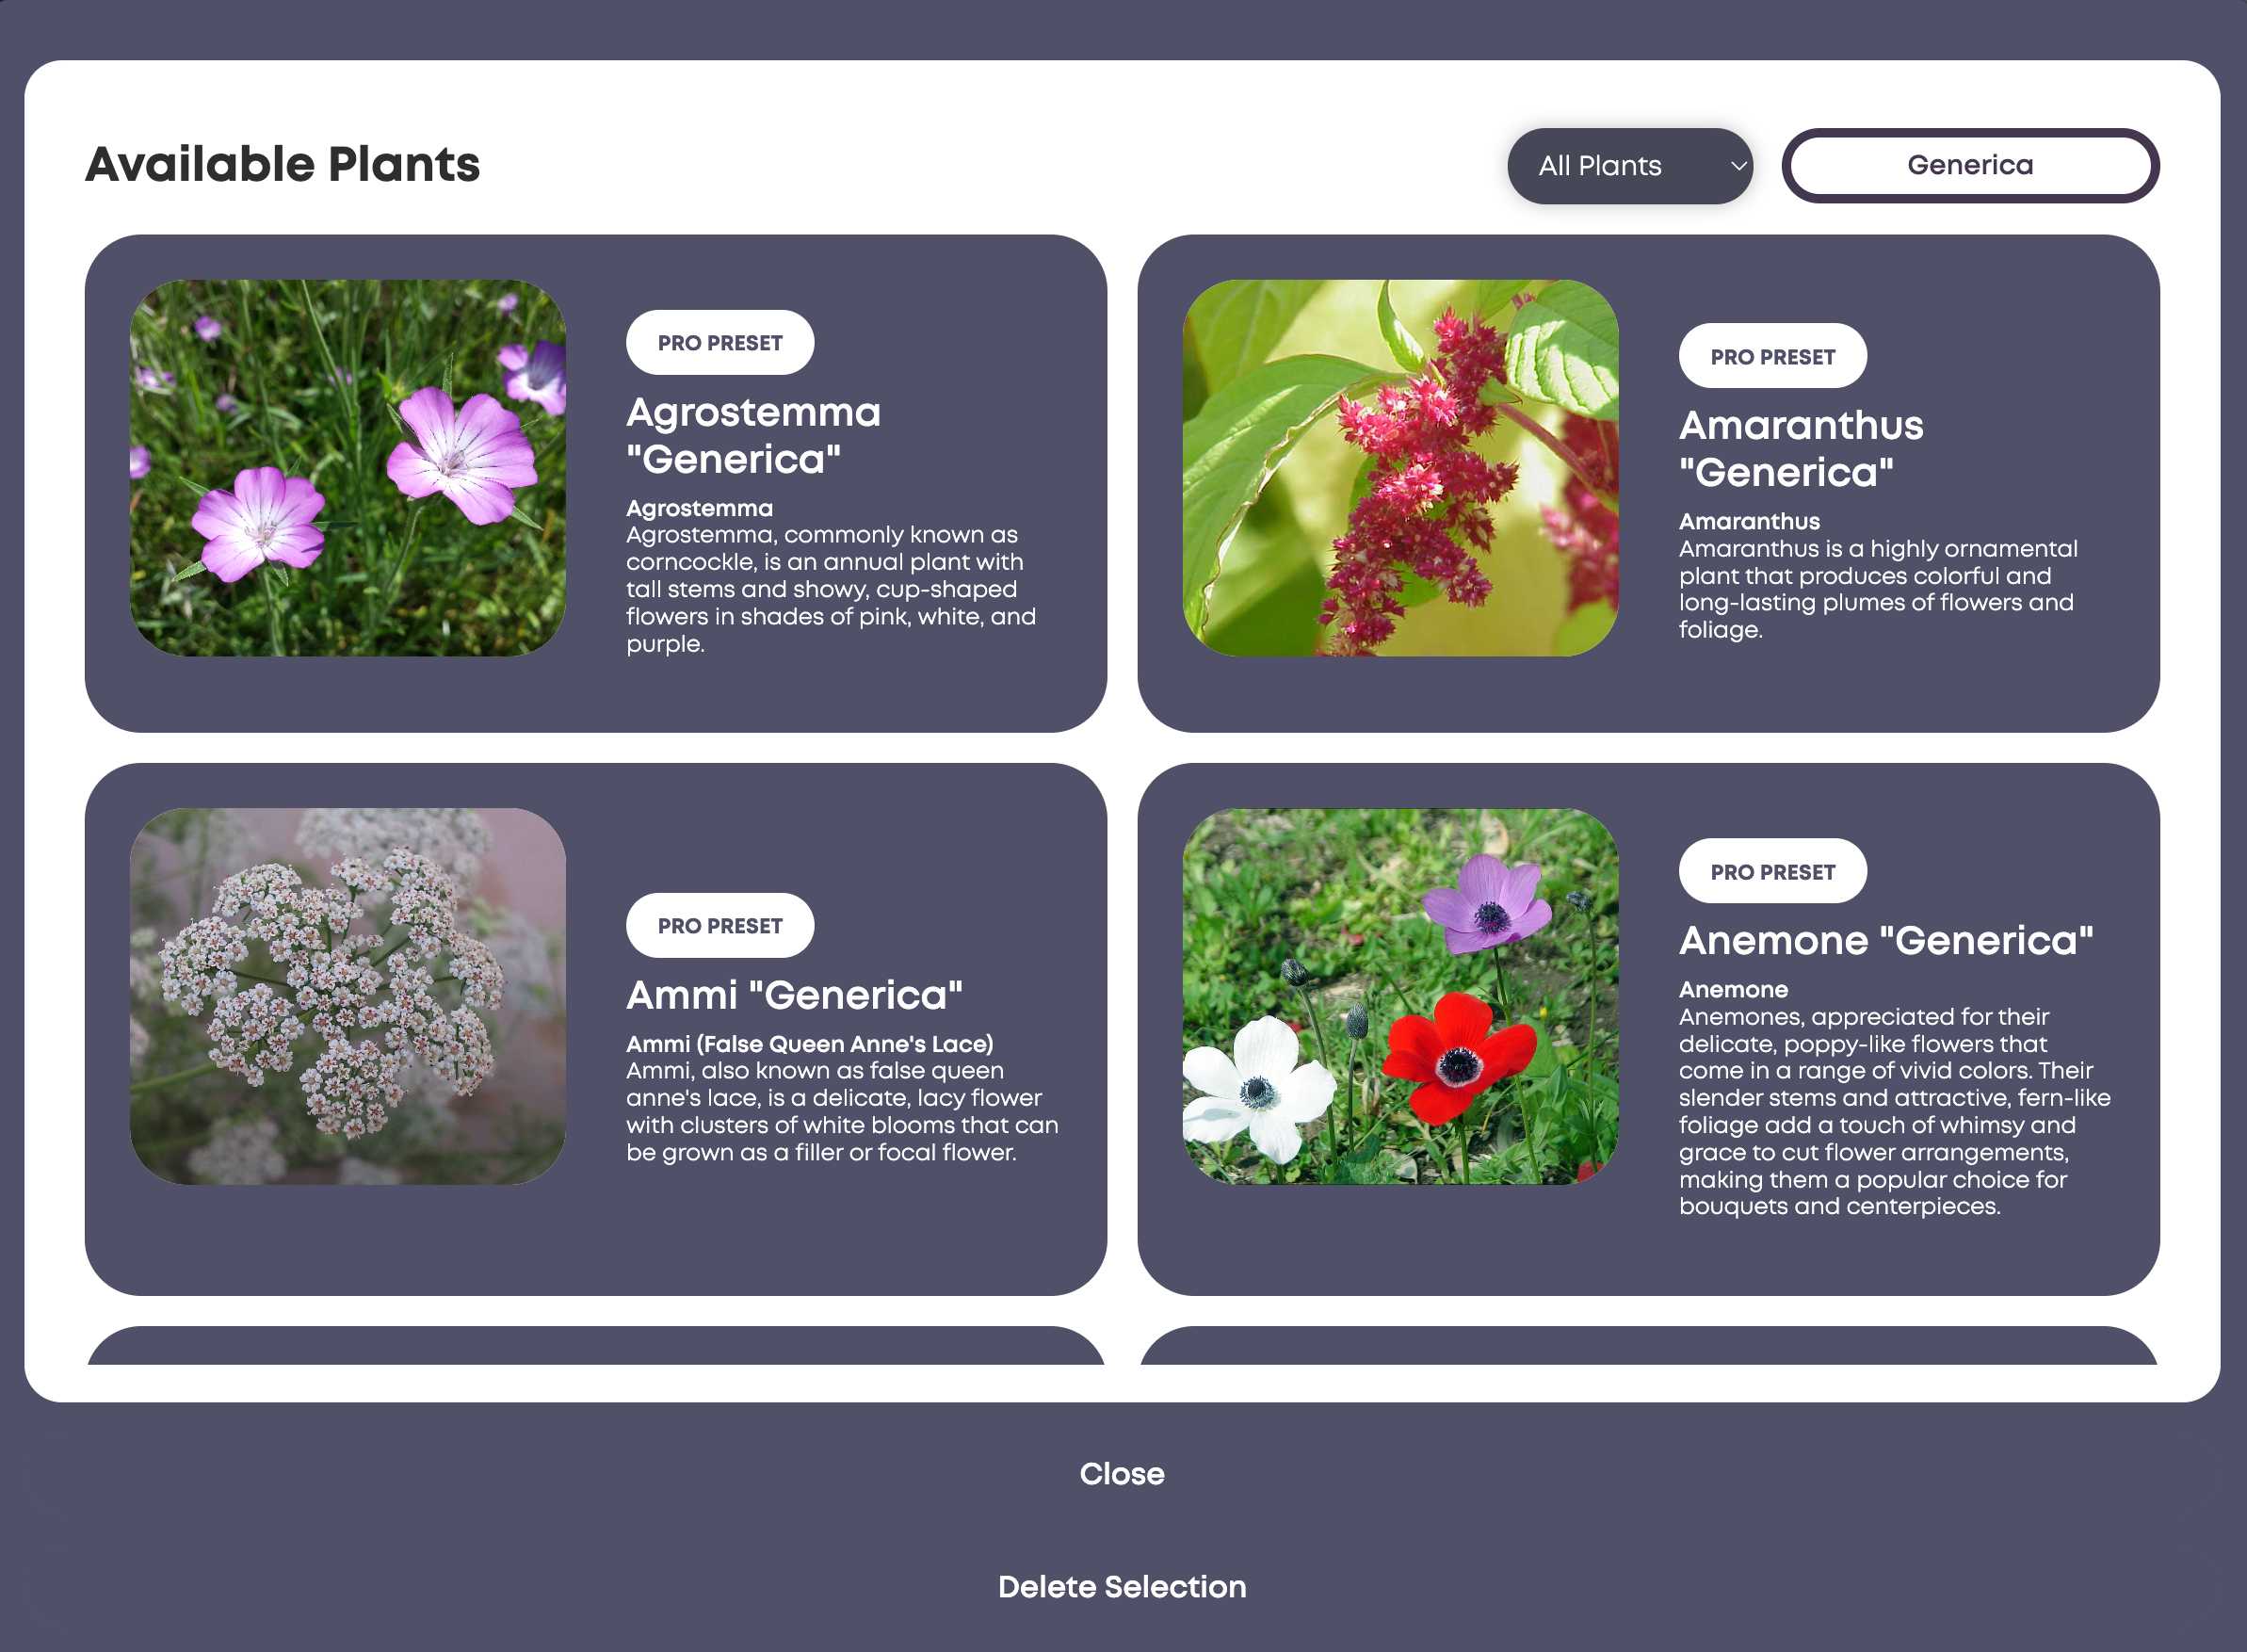
Now, choose from available plants to add to the planting. Plants are sorted alphabetically and can be searched; they can also be filtered by presets and your custom plants.
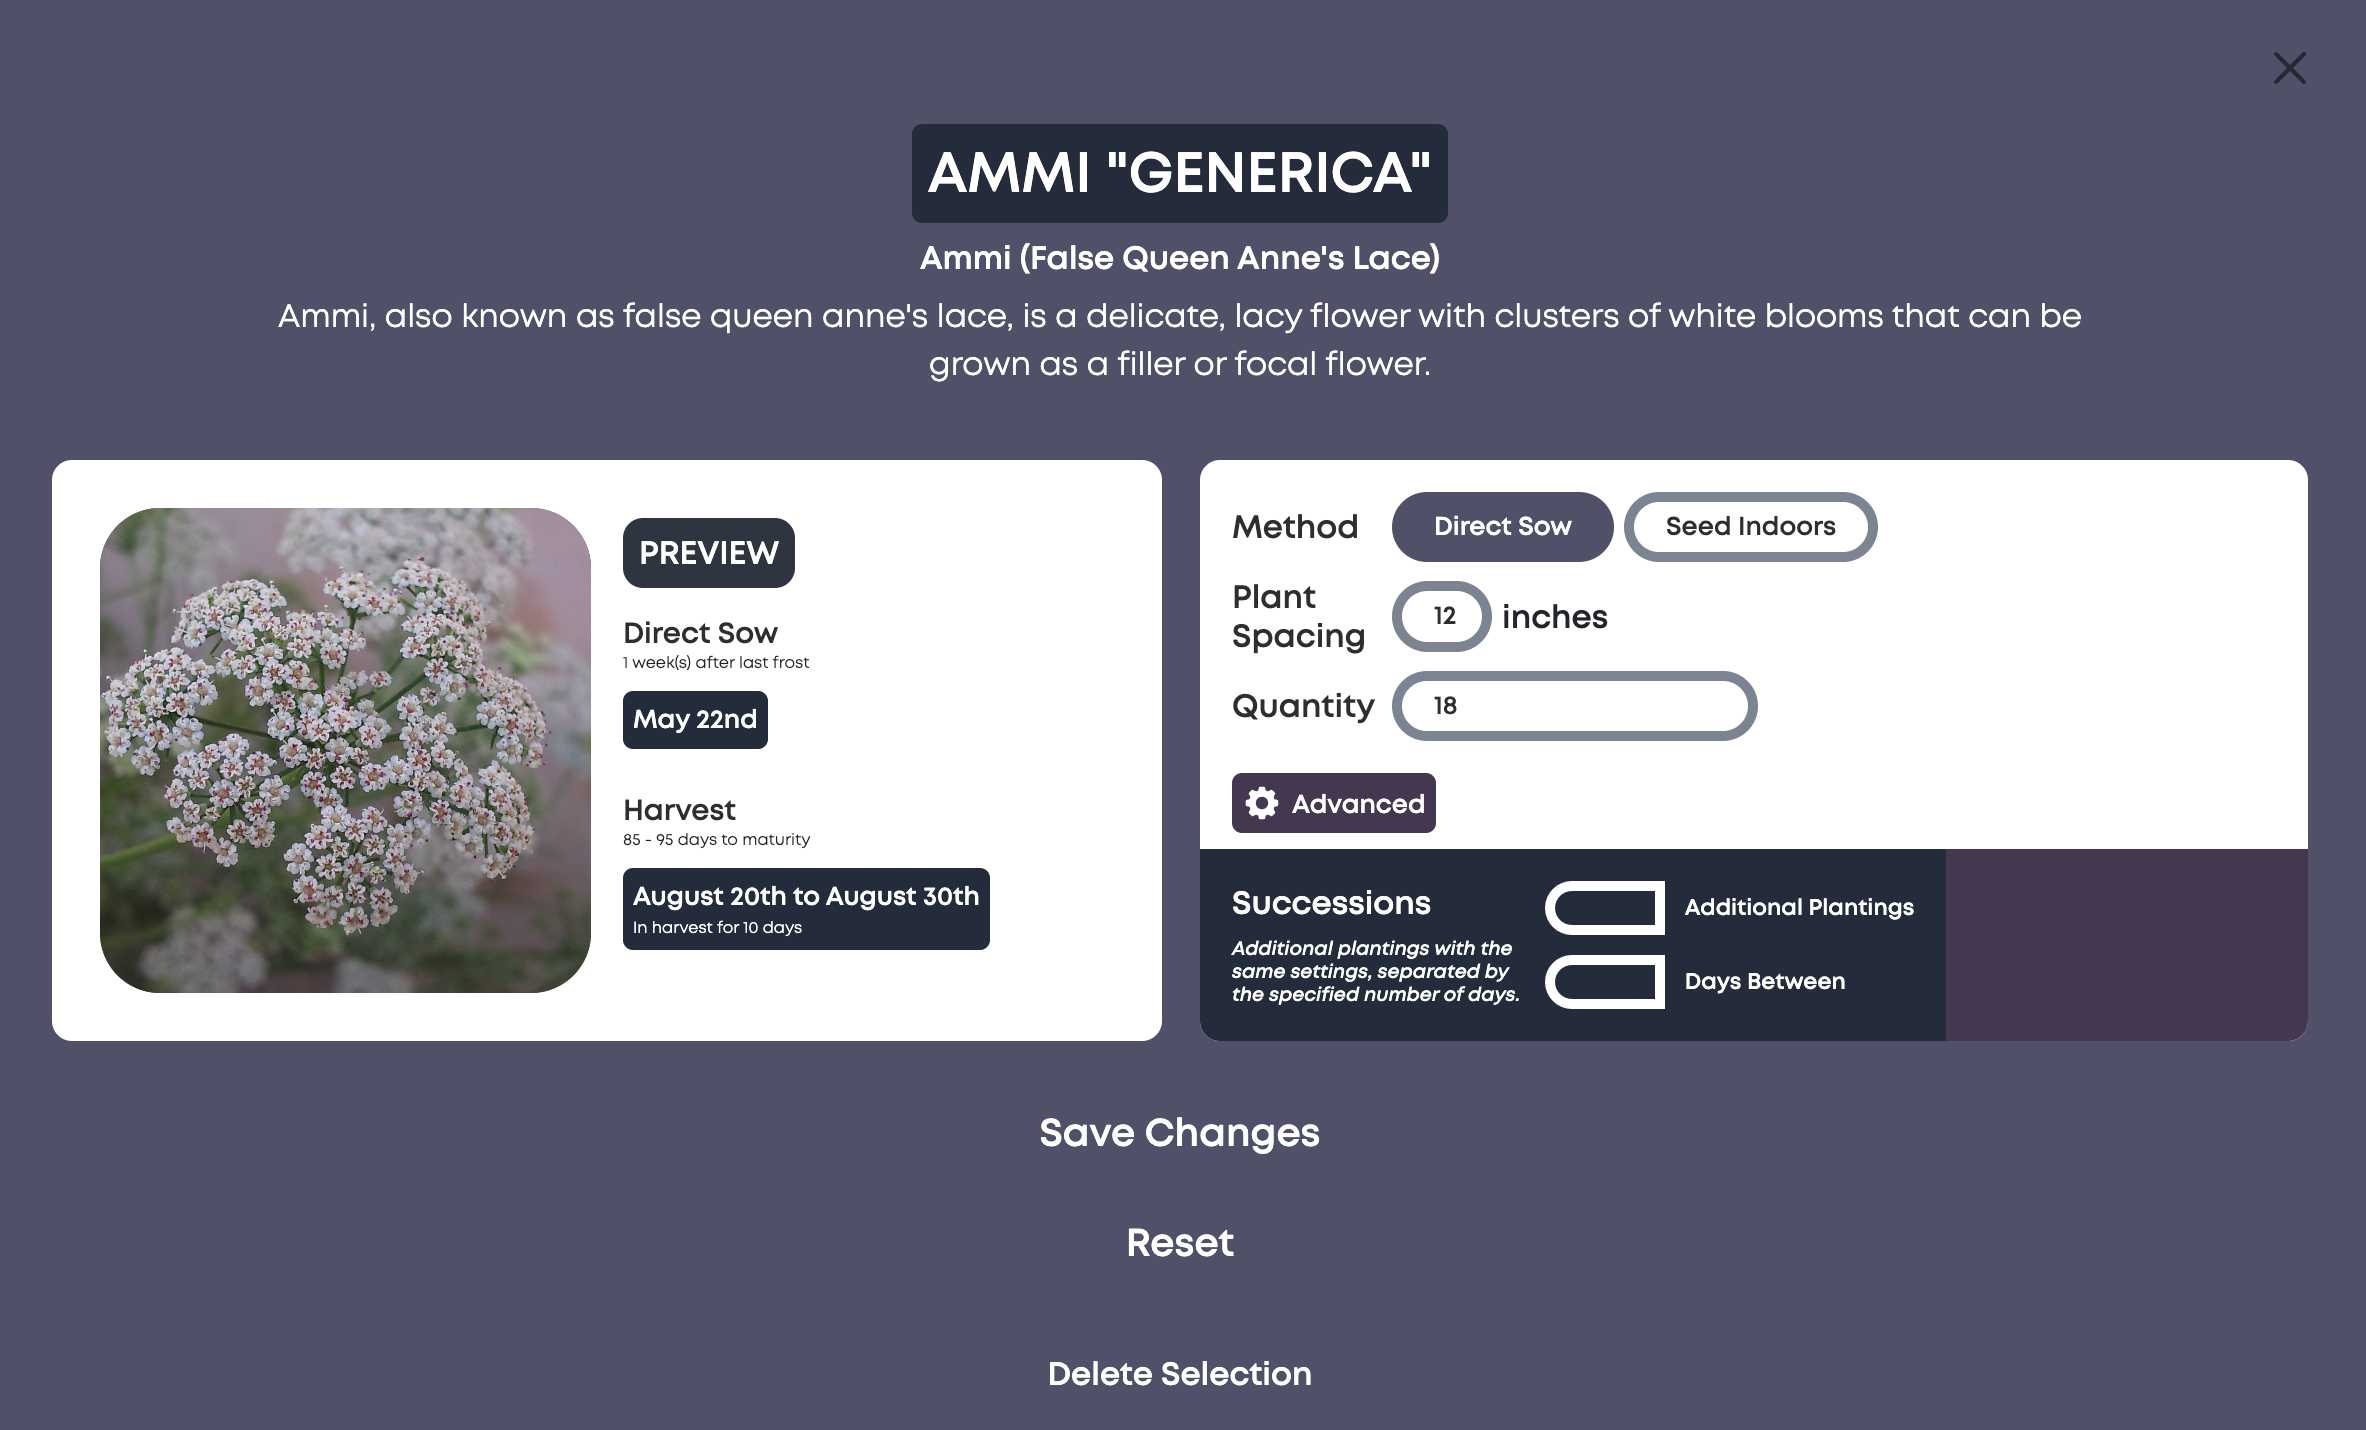
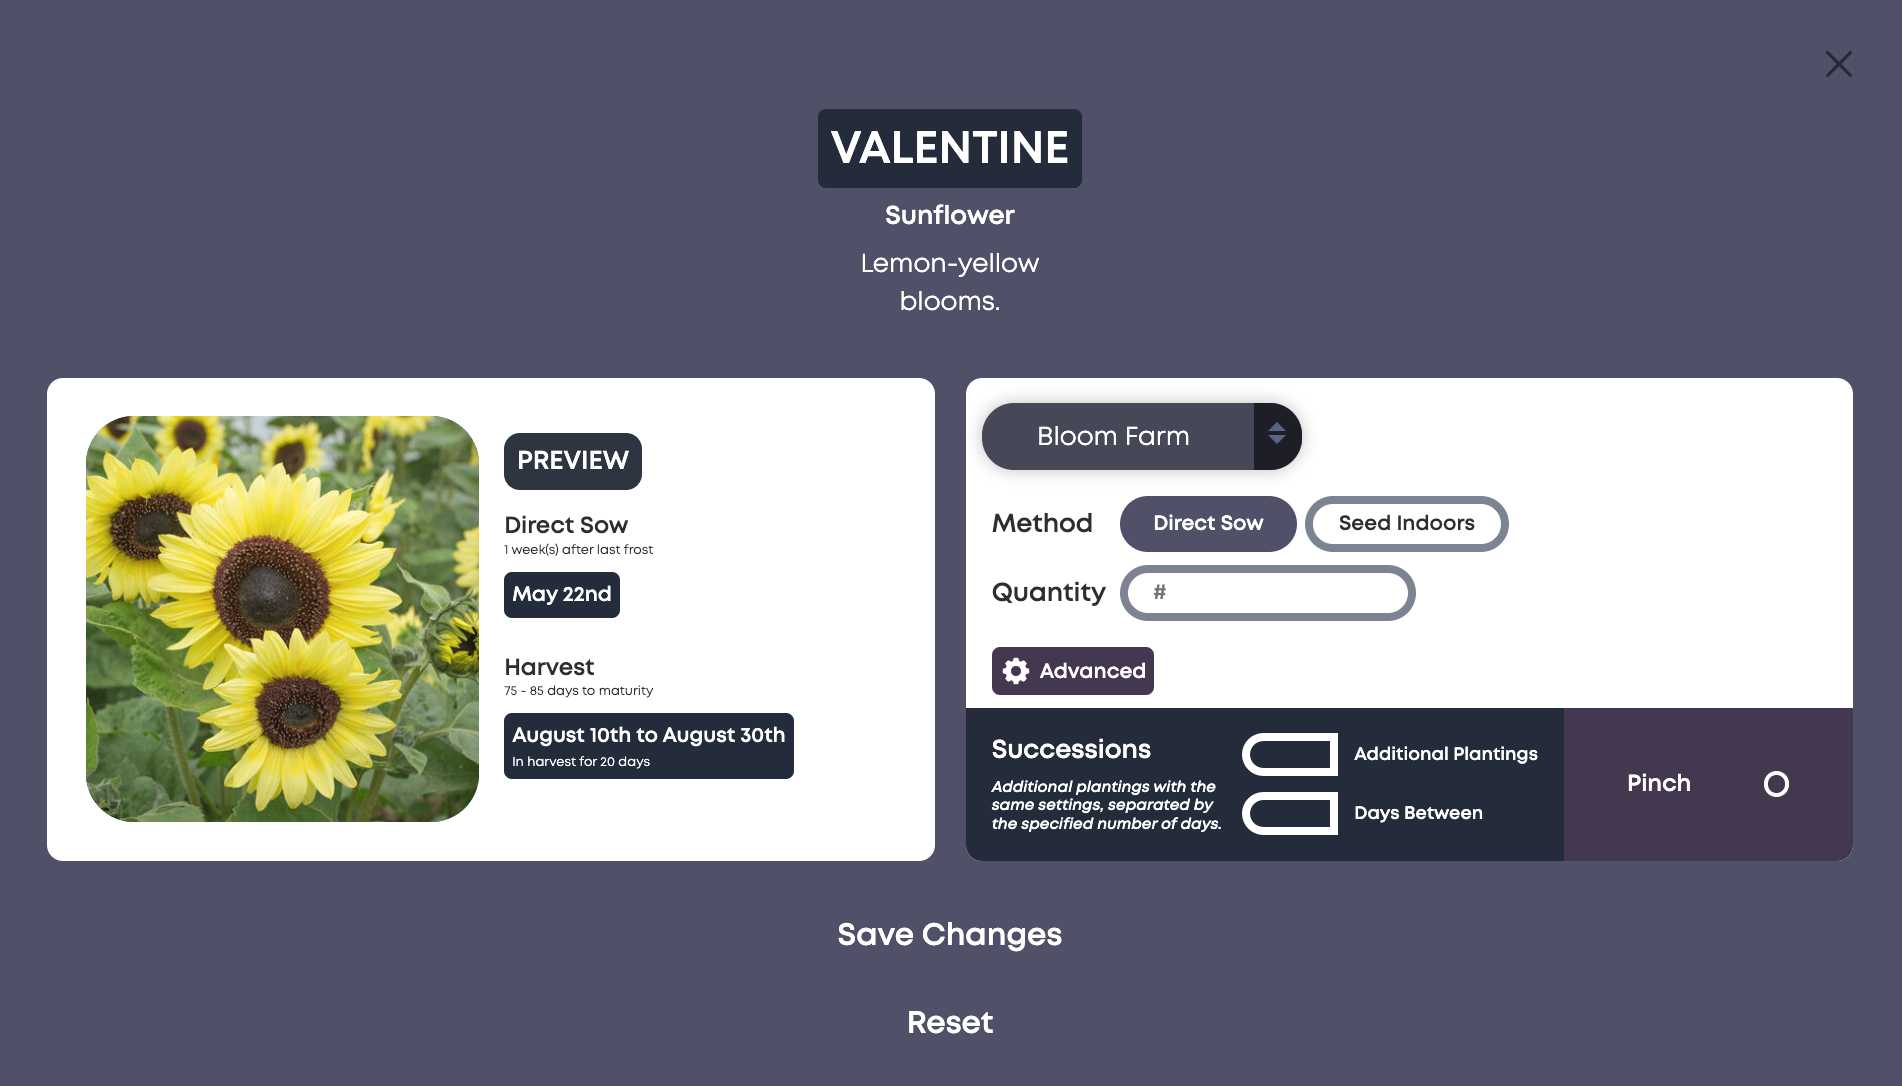
Once you select a variety, you can define the planting method.
The available methods (based on the plant data) will be displayed for you to choose between. The plant spacing will be pre-filled with the suggested spacing for the variety.
The quantity is calculated based on the size of the selection and the plant spacing. You can manually adjust the quantity, or you can manually adjust the plant spacing and the quantity will re-calculate to reflect the change. You can choose to skew
harvest early or late (for seed indoors only) and you can also add successions.
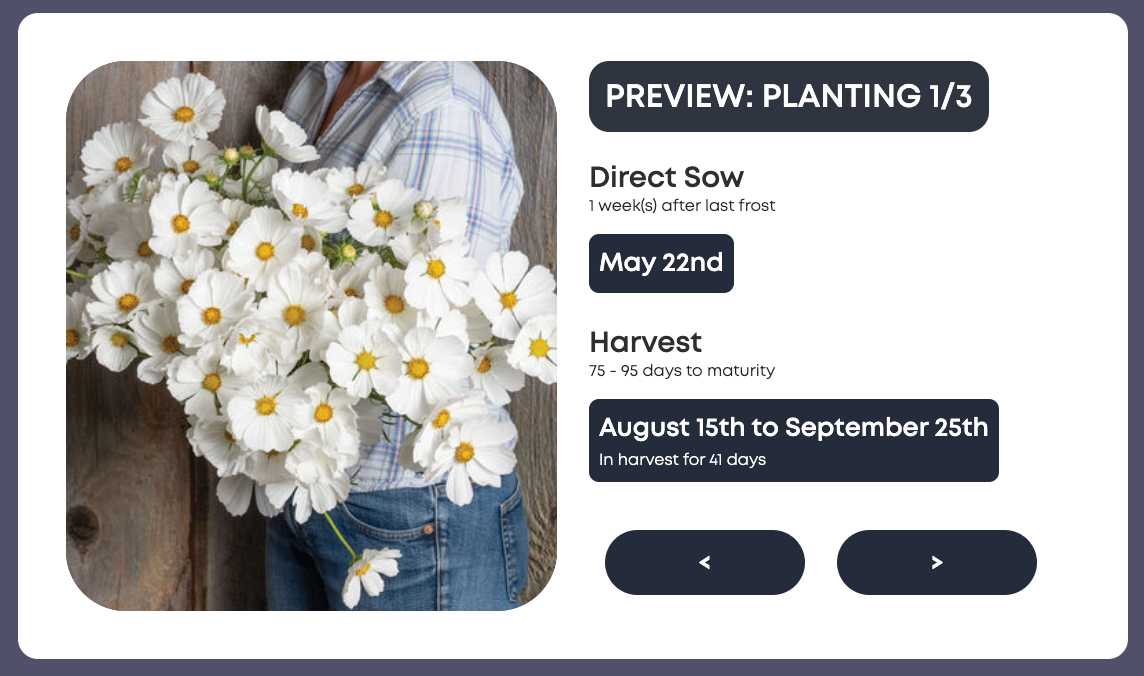
Preview
As you're choosing options, the preview on the left will automatically update. The preview shows the planting date and the harvest range.
Advanced Options
You can manage advanced options by clicking on "Advanced".
You can adjust the last frost date manually, just for the current planting. This is useful if you're planting out under cover, or just want more customizability. The preview will automatically update as you adjust the last frost date here. Changing this date will NOT change your plan's last frost date.
Congratulations! You've created your first planting. You can view and manage your growing tasks by clicking on the planting in Visual Planner, or in the Calendar, Timeline and List views in the Tasks tab, or in the Plantings tab.
Or, you can adjust your plantings in the "Modify Plan" page, accessible in the left sidebar.
Create via Modify Plan
Creating Plantings via Modify Plan
If you create plantings via the Modify Plan page and want to add them to your visual plan, you will have to link them manually. If you're planning to use Visual Planner, it's recommended to create plantings via the instructions above.
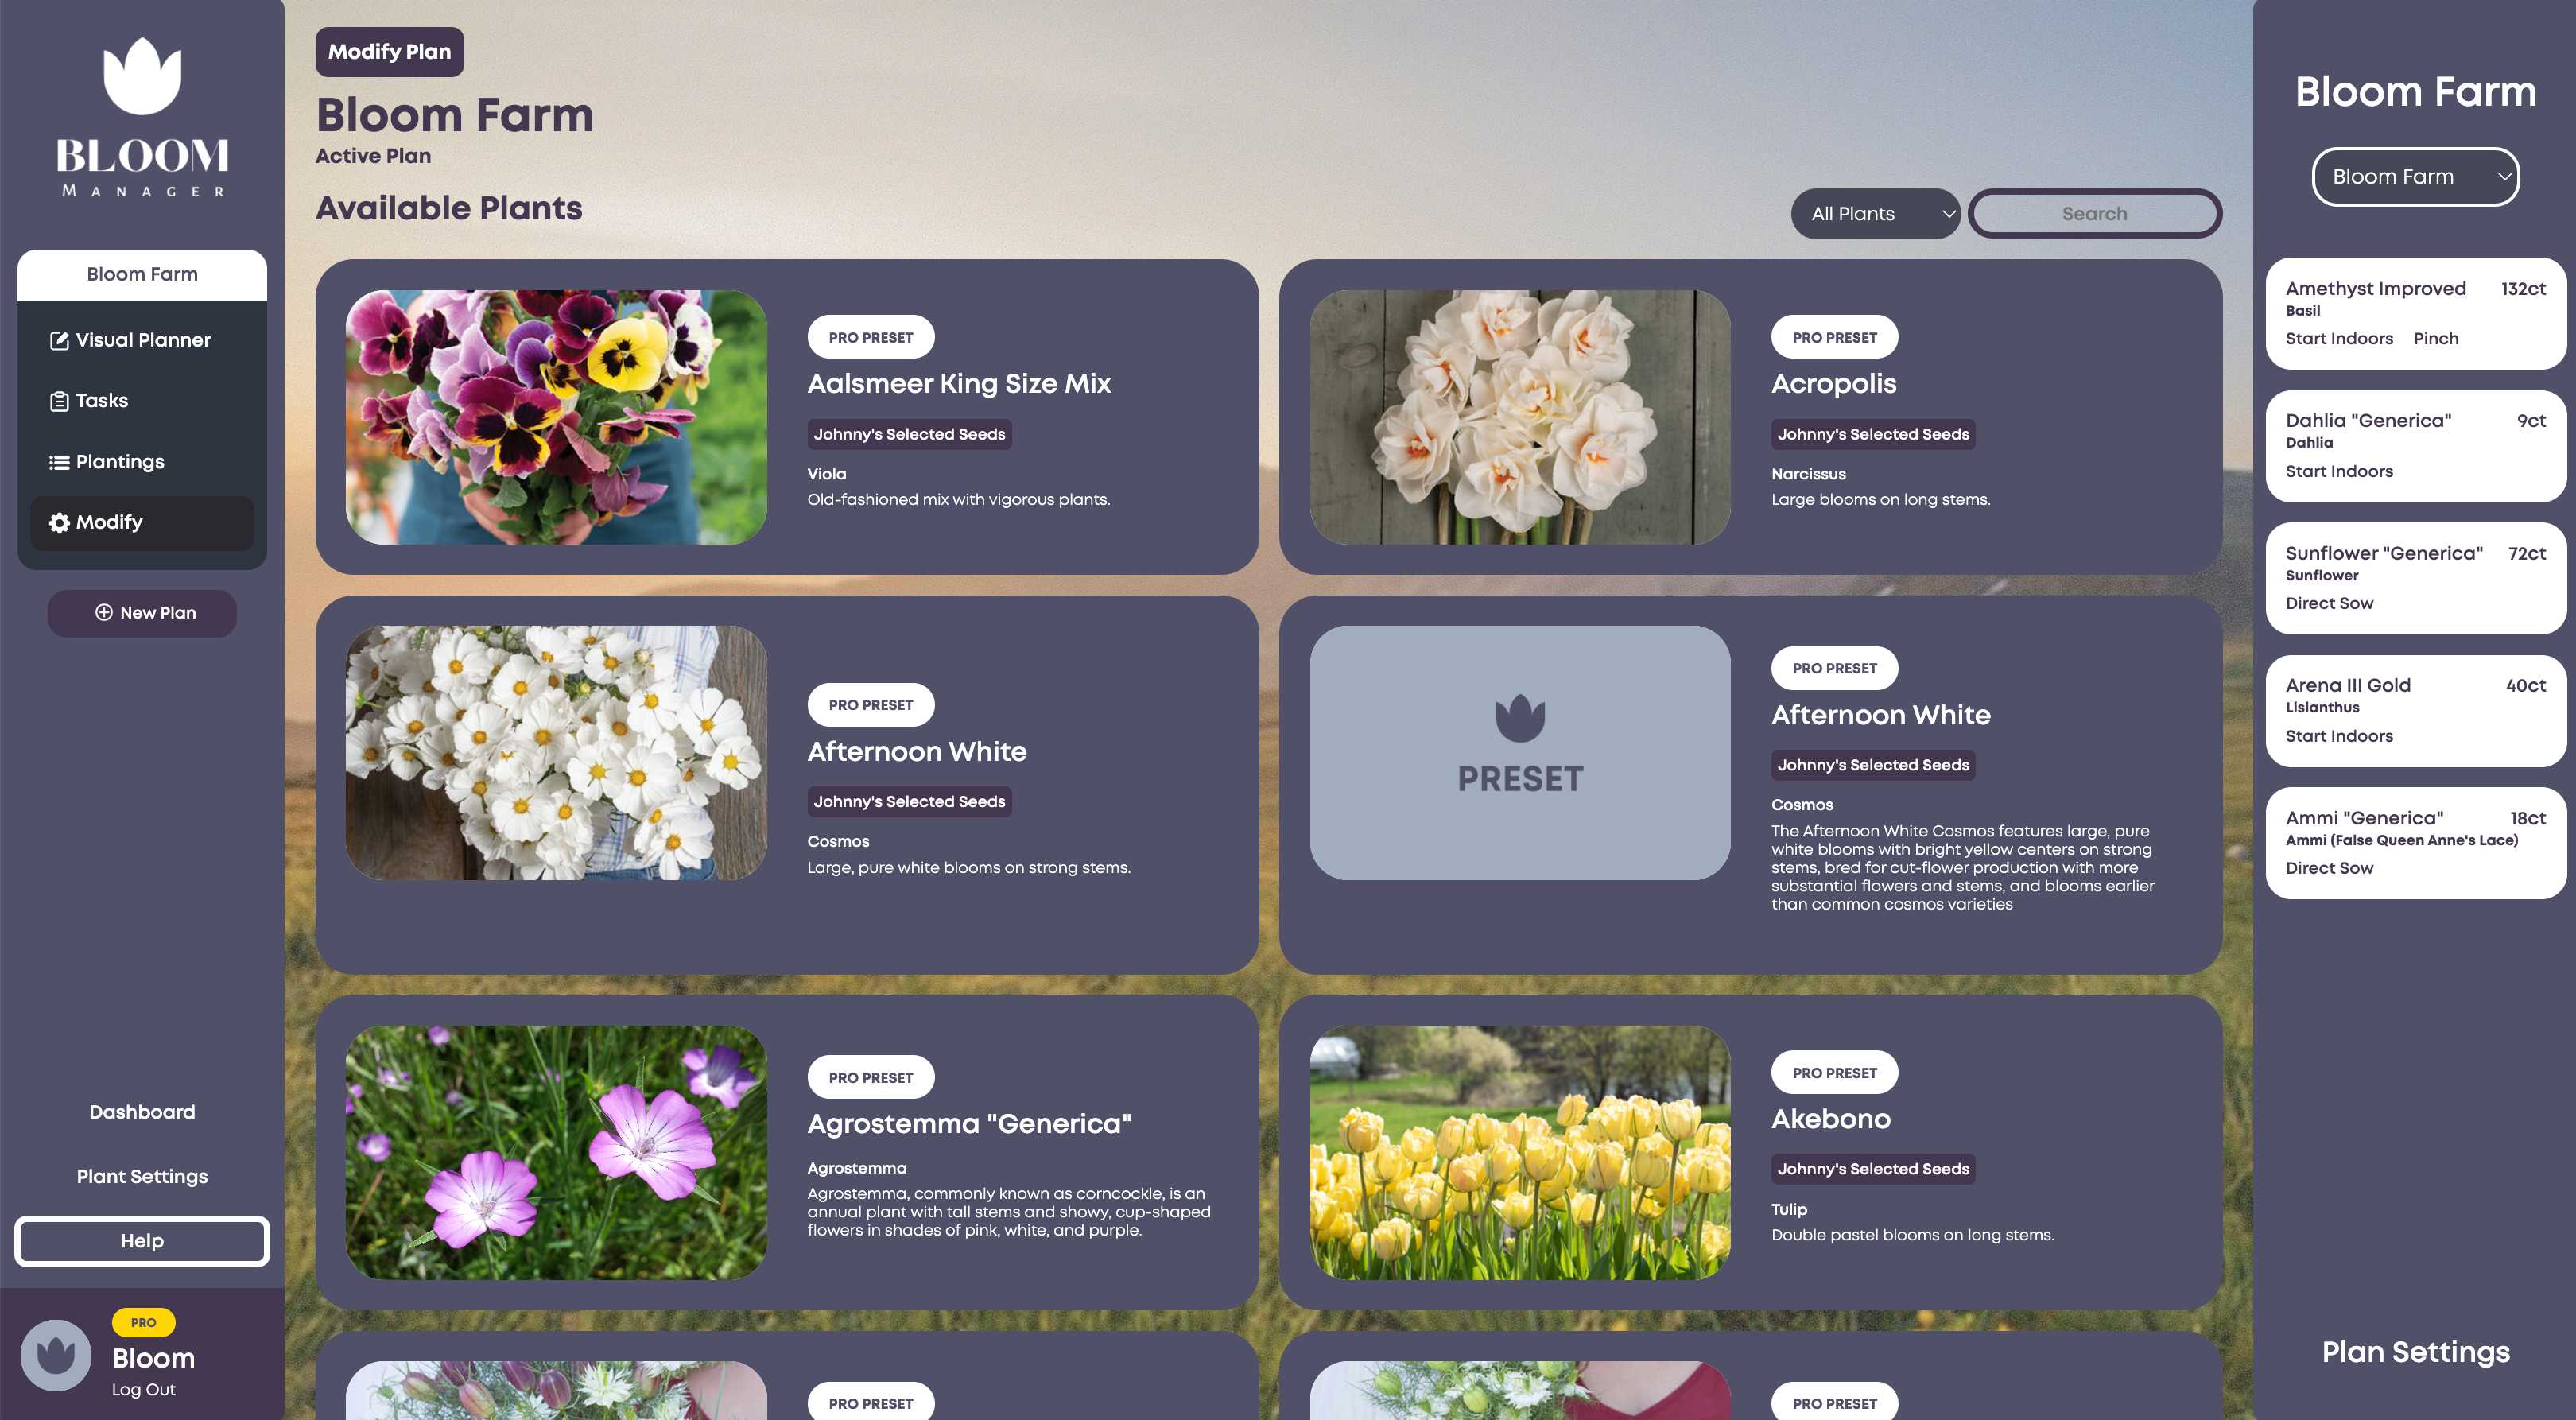
You can also add a planting via the Modify Plan page. Simply click "Modify" under your plan name in the left sidebar.
Before you get started, make sure you're on the correct plan. The plan name should be highlighted in the left sidebar, appear on the top of the page and also on the right sidebar - both as text and in the dropdown. If you're a PRO user and have more than one plan, you can navigate to another plan via the dropdown in the right sidebar or by selecting another plan in the right sidebar.
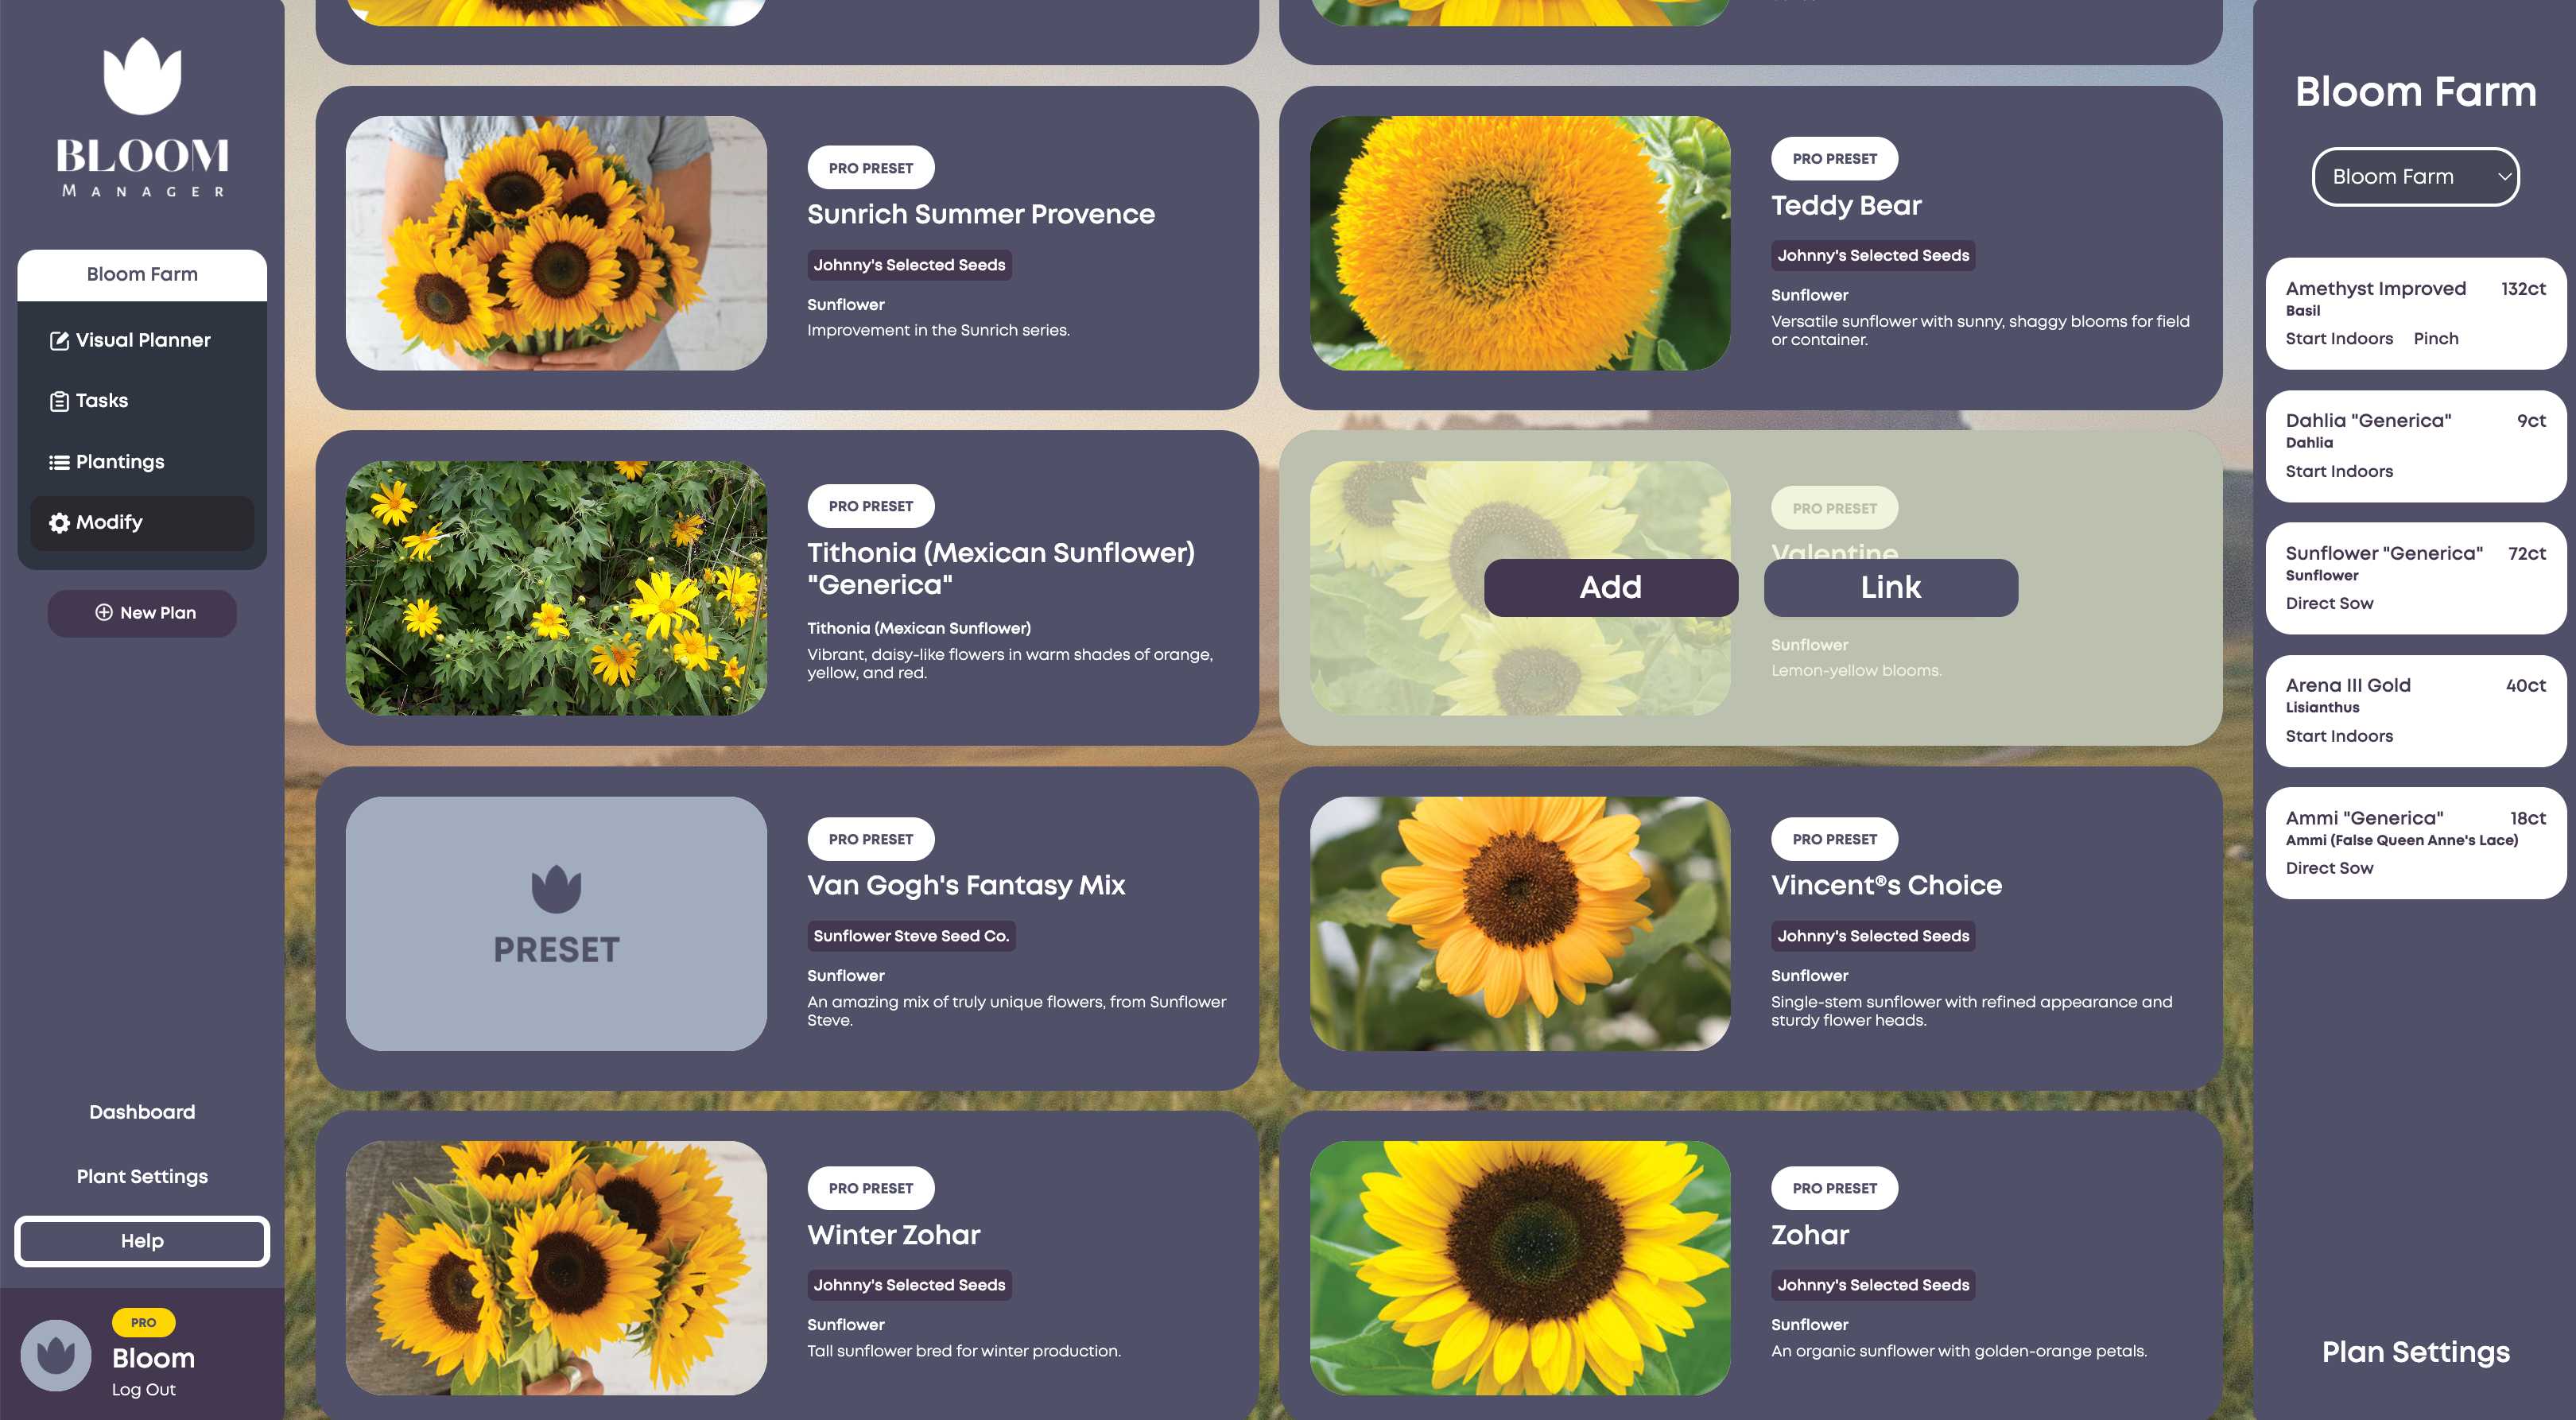
Search for your desired variety, and click "Add".
Now, define the growing method, quantity, and other options. Also, ensure the dropdown displays the desired plan to add the planting to. There's no option for plant spacing when plantings are manually created via Modify Plan, and an appropriate quantity must be manually determined for your growing area.
Congratulations! You've created a planting via Modify Plan. You can view and manage your growing tasks by clicking on the plan name in the left sidebar and viewing the Tasks and Plantings tabs.
Adding Plants
PRO Users
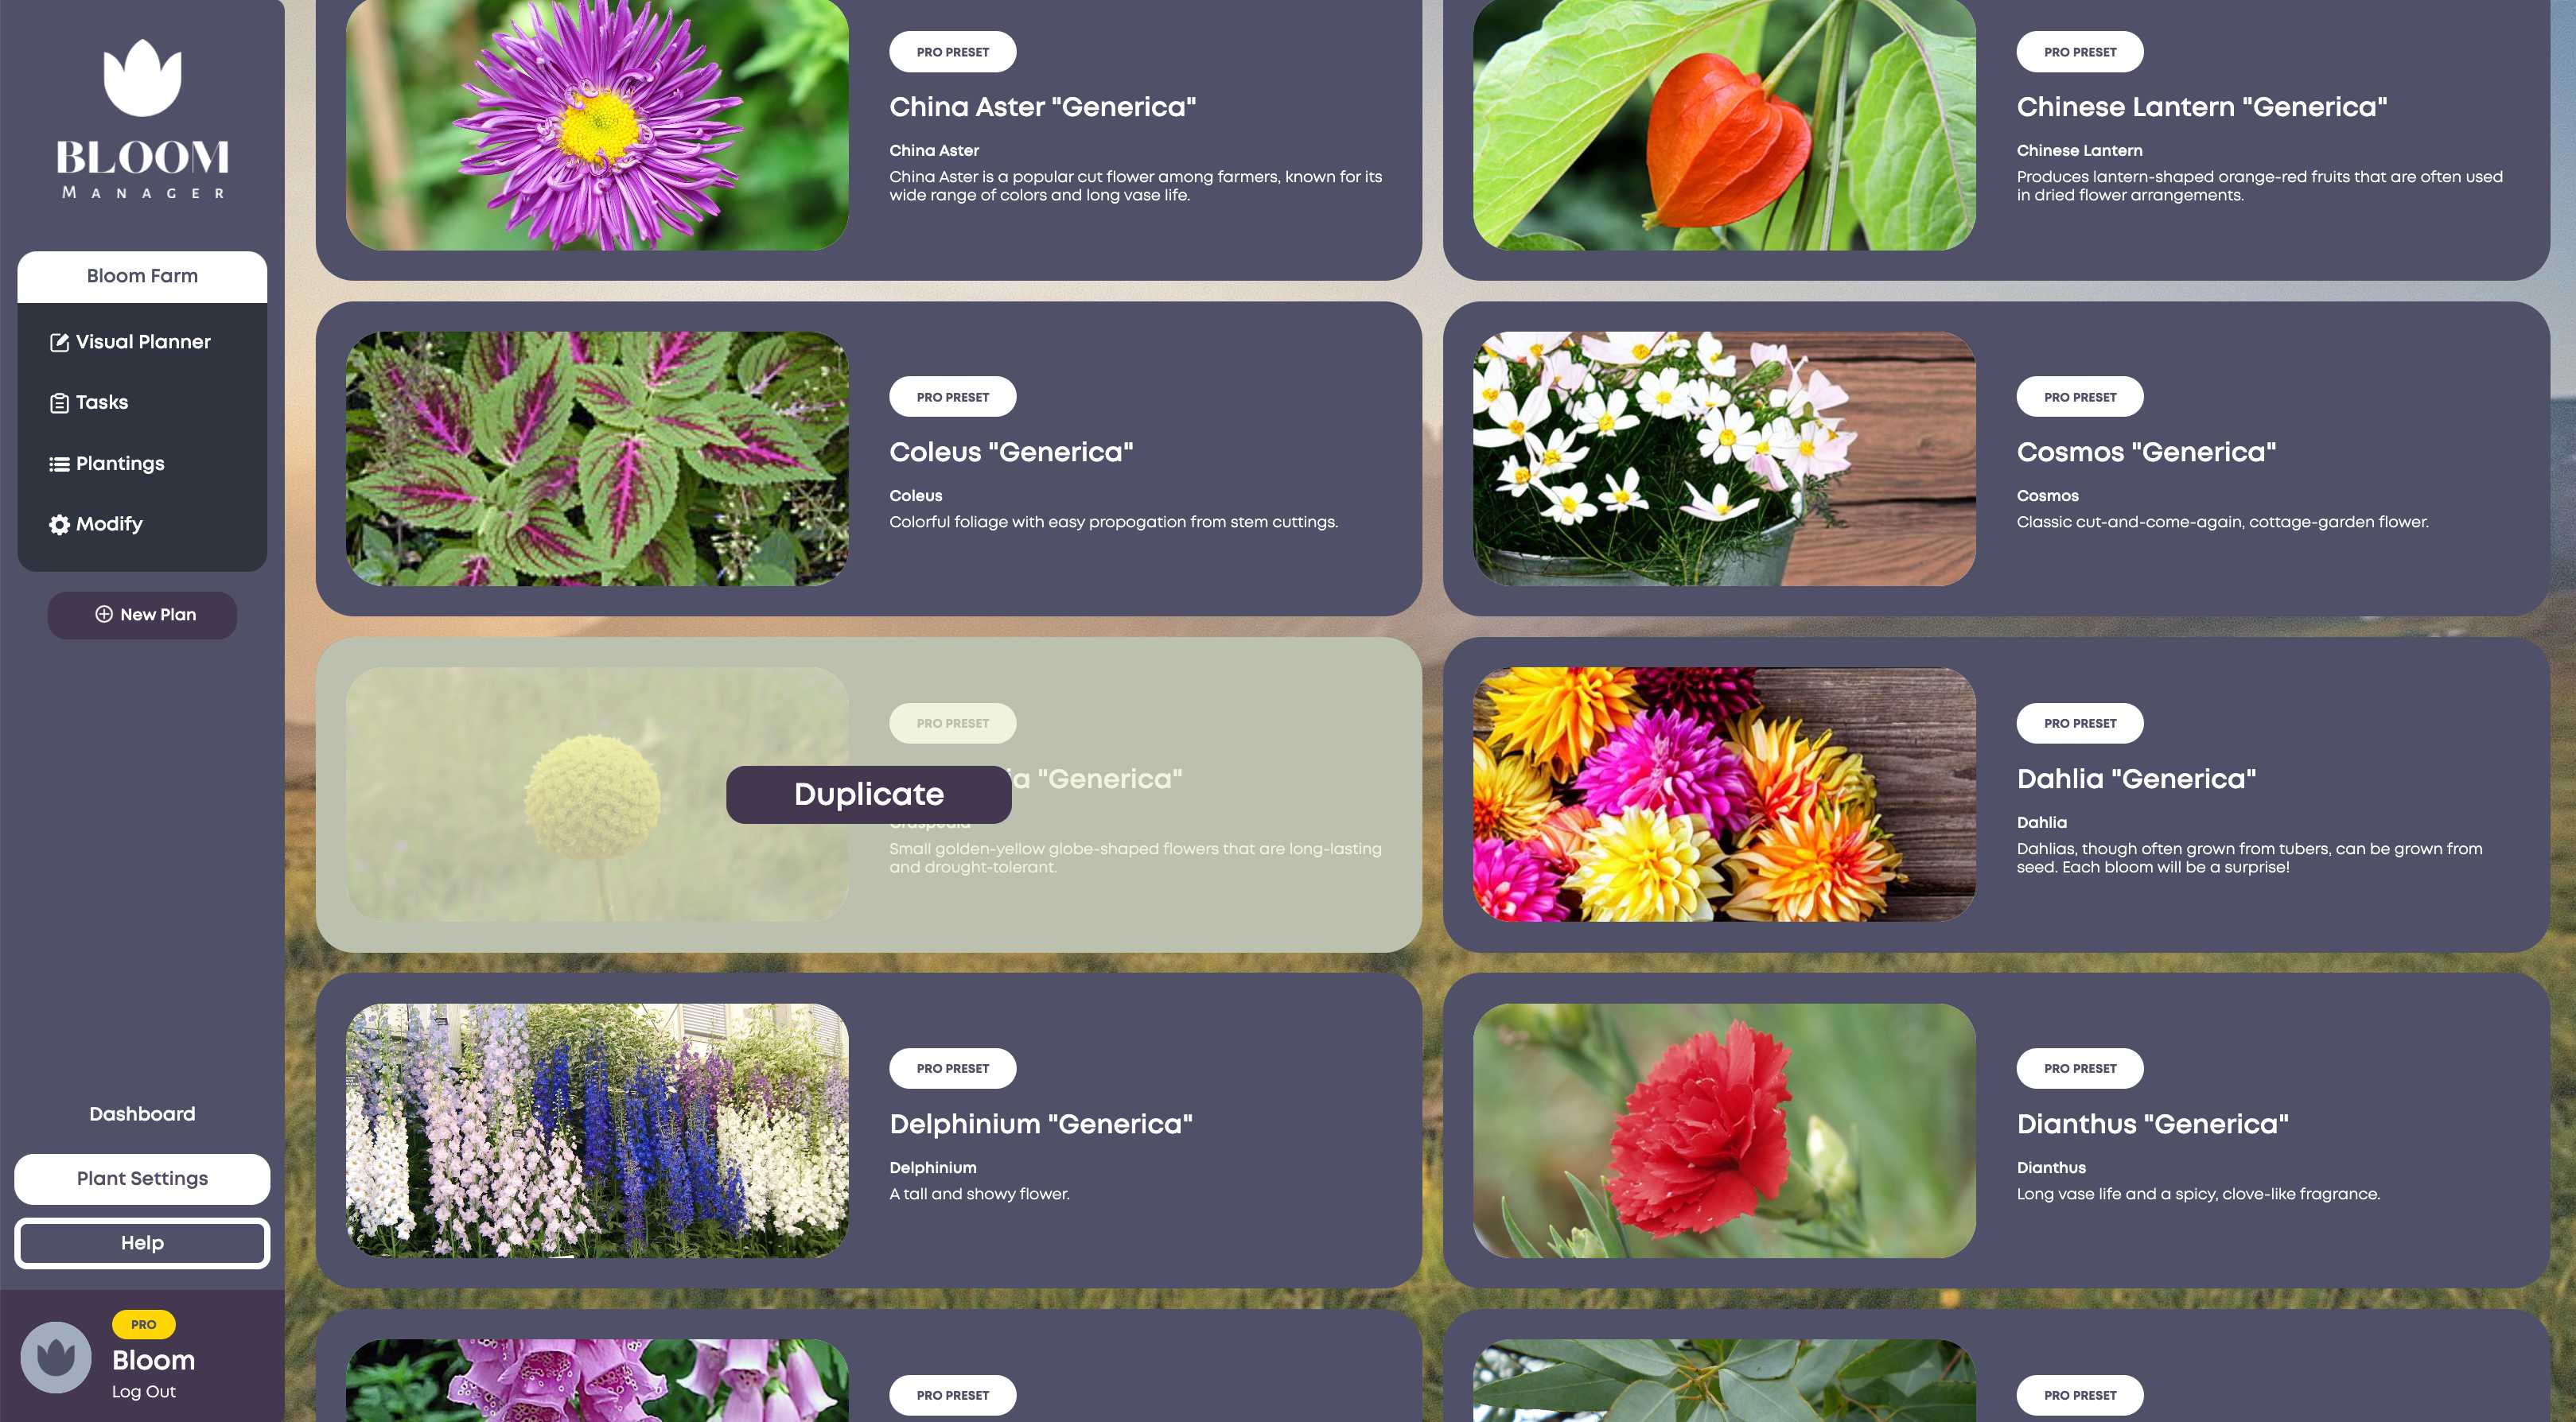
If you're a PRO user, you have access to our PRO Presets. CORE users have access to a limited number of FREE Presets.
Plant Settings
You can view, edit and add new plants by navigating to the Plant Settings page. Here, you can define the 'settings' for each variety.
It's important to note that when you create plants, you're not adding them to your season plan. Instead, you are making them available to be added to your plan, later on.
Editing Plants
Editing Presets
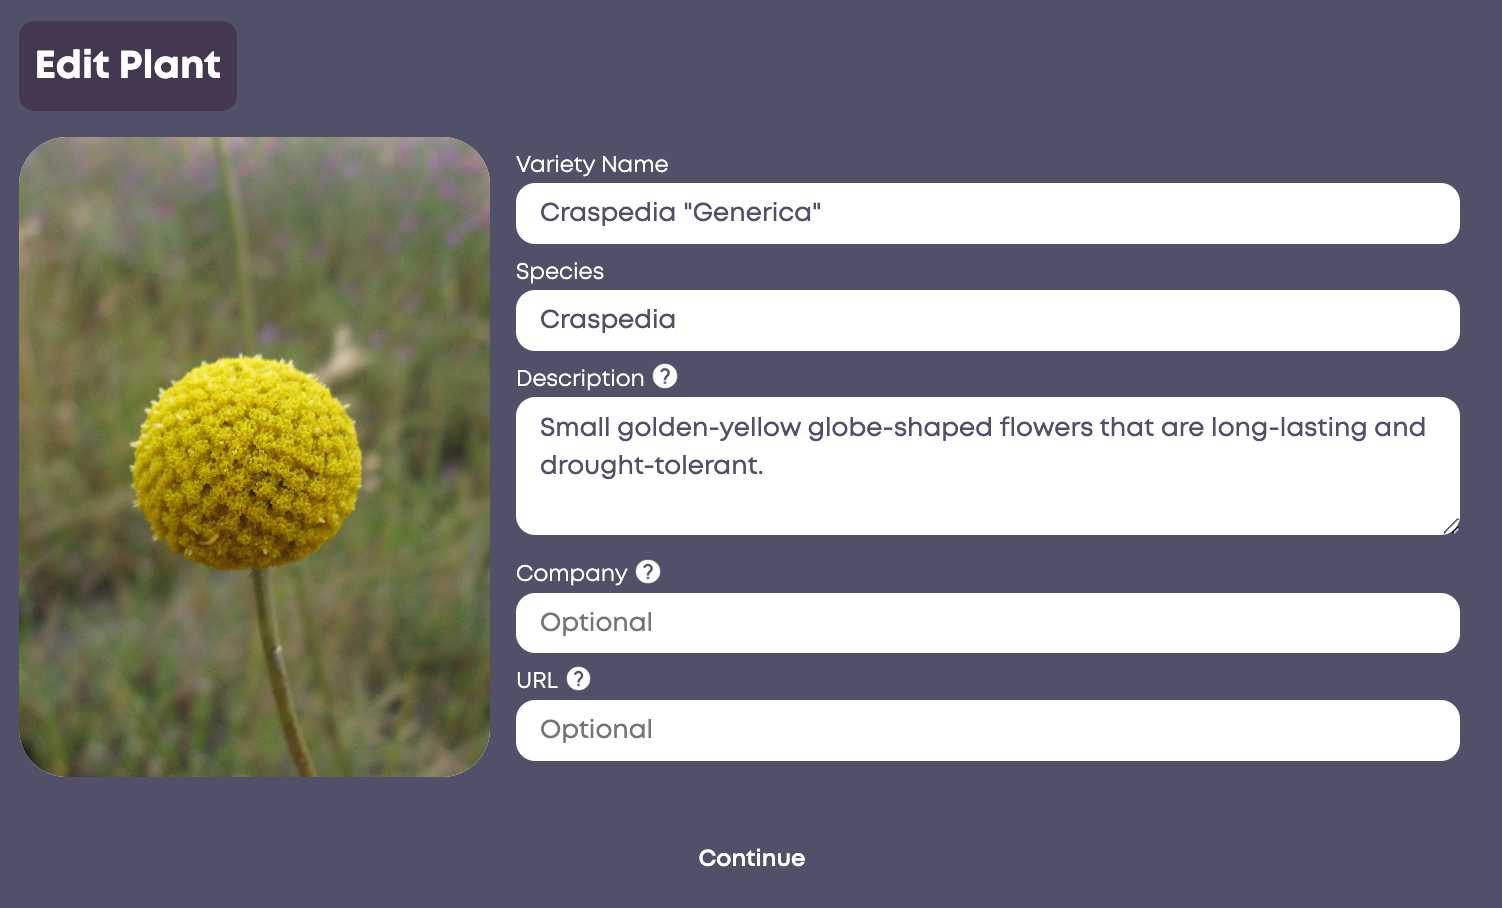
If you want to adjust any preset varieties, you may notice there is no option to edit. Instead, you must first duplicate the plant and then edit your duplicated version.
Existing Plantings with Edited Plant
If you adjust plant settings for a variety that has already been used in plantings, it will not change the existing plantings. To update the existing plantings with the new plant settings, you must navigate to "Modify Plan", find the planting, click "Edit" and click "Save" without making any changes. This will regenerate the tasks with the new parameters.
Creating Plants
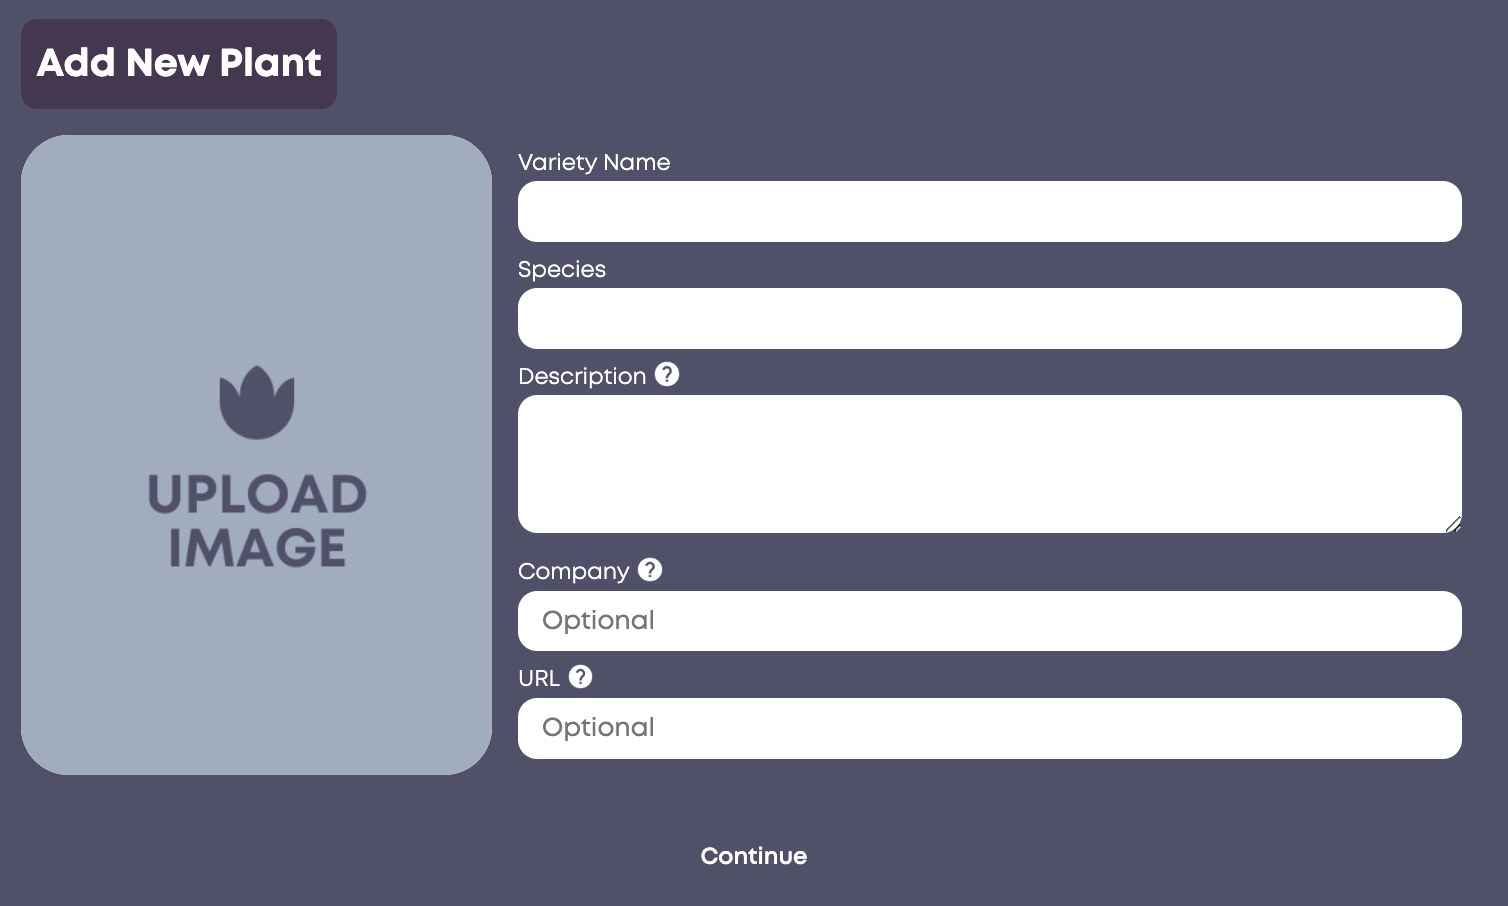
When you create a plant, add the variety name, species, and description - along with a photo of it. You can also add a company name and URL.
Now, it's time to define the growing settings for your variety.
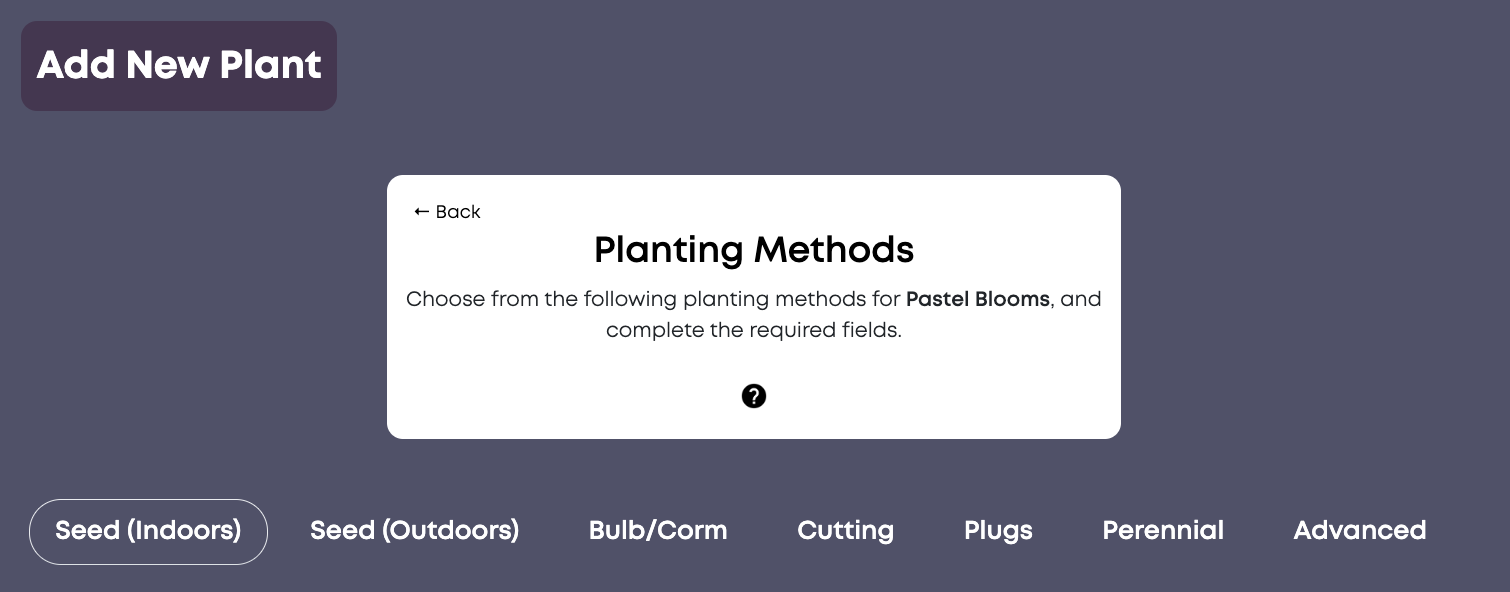
There are multiple tabs for different growing types.
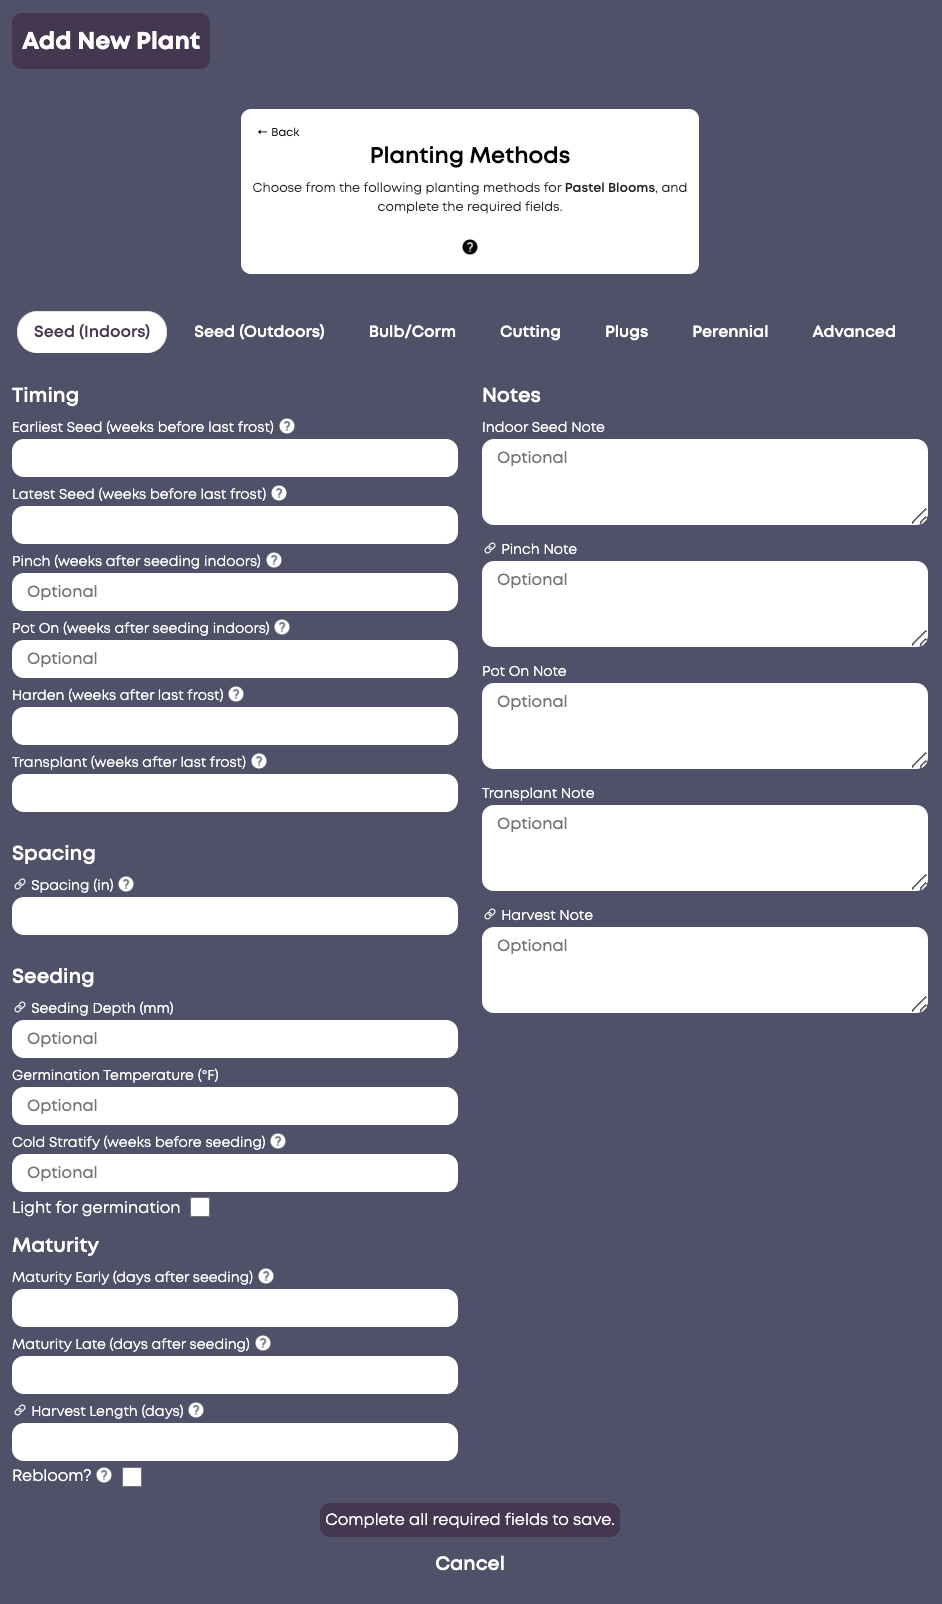
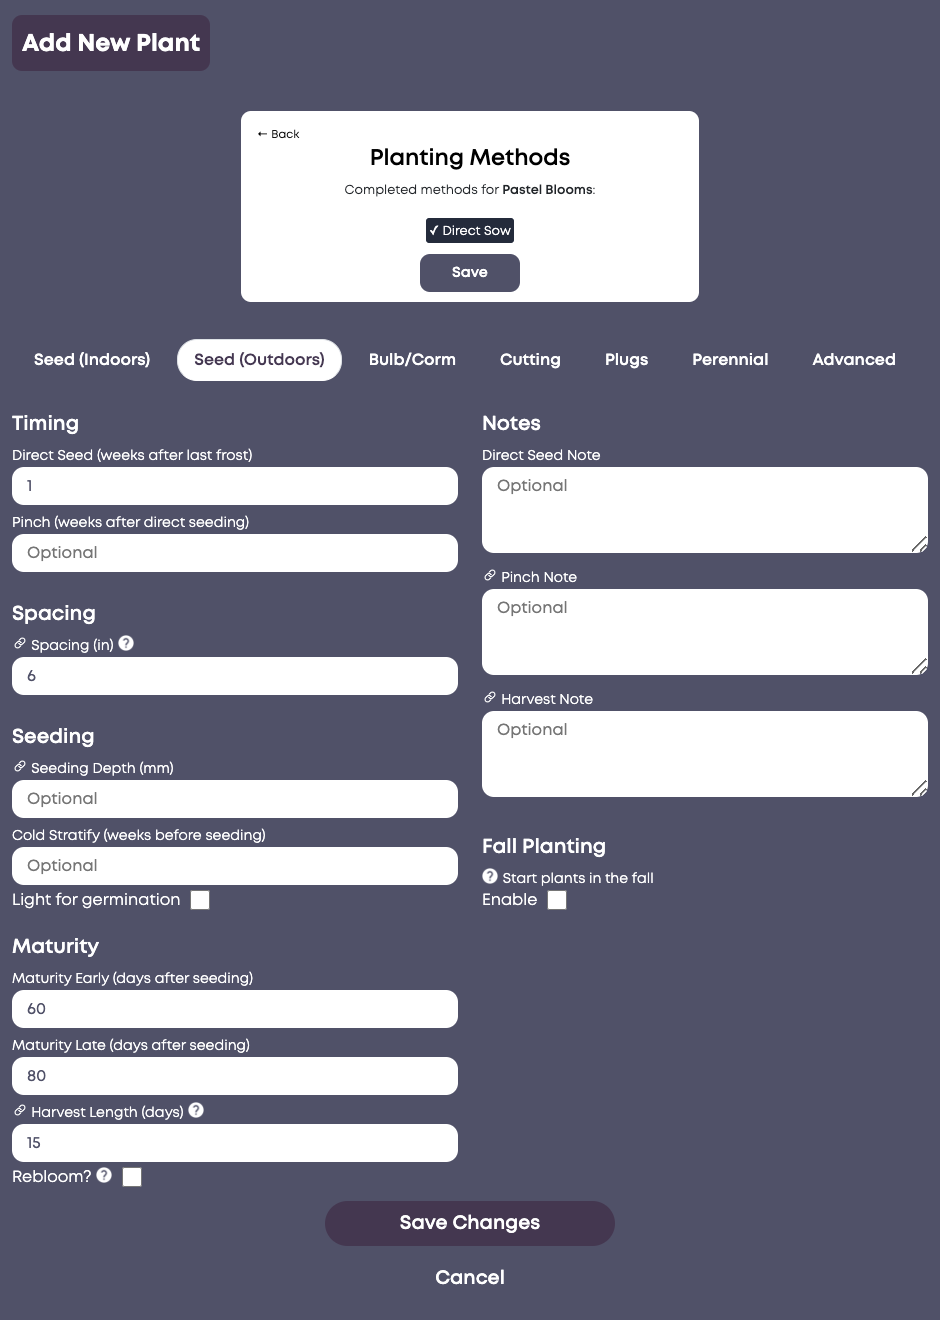
Select the types that apply to your plant and fill out the non-optional fields. Bloom Manager will not allow you to save until you have completed all required fields for a method. Once you have filled out required data for a method, the planting method will appear above as an available method. In this example, we're adding a sunflower variety - so we'll only fill out the fields under seed outdoors. If it were a dahlia or ranunculus or something that could alternatively be started from tubers/corms/bulbs, we would fill out the fields under those categories too.
Here, we've filled out info under Seed (Outdoors). Any fields with a "link" icon carry over across planting methods, such as days to maturity and the harvest note.
All Settings
| Earliest Seed |
The earliest you would start the plant indoors, weeks before last frost; if a seed packet says 4-6 weeks before last frost, you would enter 6 here. |
| Latest Seed |
The latest you would start the plant indoors, weeks before last frost; if a seed packet says 4-6 weeks before last frost, you would enter 4 here. |
| Pinch |
Only fill this field if the variety can be pinched. If so, put the number of weeks after the seed date that the variety should be pinched. |
| Pot On |
Only fill this field if the variety can be potted on. If so, put the number of weeks after the seed date that the variety should be potted on. |
| Harden |
The number of weeks after last frost when the variety should be hardened off. Note that this can be 0 or even negative values. For example, if you start to harden a plant 2 weeks before last frost, you would enter -2 here. |
| Transplant |
The number of weeks after last frost when the variety should be transplanted. Note that this can be 0 or even negative values. For example, if you transplant a plant 1 week before last frost, you would enter -1 here. |
| Cold Stratify |
Only fill this field if the variety can/should be cold stratified. If so, put the number of weeks before the seed date when cold stratification should begin. |
| Maturity Early |
The earliest number of days after planting when the variety reaches maturity; if a seed packet says 90 to 110 days, you would enter 90 here. |
| Maturity Late |
The latest number of days after planting when the variety reaches maturity; if a seed packet says 90 to 110 days, you would enter 110 here. |
| Rebloom |
Select this option if the plant is a 'cut and come again' variety; if enabled, the duration for harvest will last from maturity until first frost. |
| Direct Seed |
Fill this option if the plant can be direct seeded, as the number of weeks after last frost. You can put 0 or even a negative value here if you direct seed the variety before last frost. |
| Pre-sprout |
This option is for bulbs/tubers/corms that can be started indoor, or for those varieties from which cuttings are taken. Input the number of weeks before last frost when you wish to start pre-sprouting the variety. |
| Prepare Cuttings |
This option is for varieties from which cuttings will be taken. Input the number of weeks after pre-sprouting when you wish to take cuttings. |
| Perennial |
Enabling this option allows you to simply define the date range when this specific variety is in bloom, so it is included in your plan. This includes flowering trees and perennial flowers. |
Fall Planting
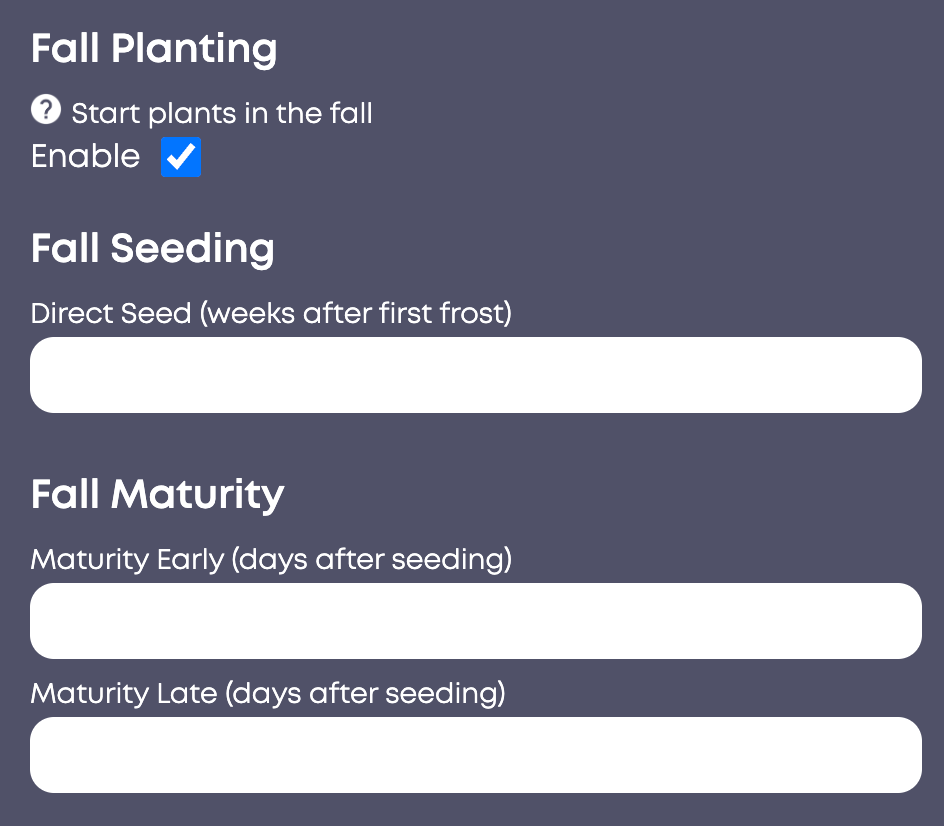
Bloom Manager also supports fall planting.
Intended for hardy annuals (plants started outdoors in the fall), enabling this will add the option to use the first frost date instead of the last frost date. For example, if your last frost date is May 15 2025 and your first frost date is September 15 2025, your direct seed task will be based on a 'Last Frost' date of September 15th 2024.
In the Direct Seed box, define how many weeks after First Frost you want to seed. Note that you can enter a negative value to seed before first frost.
The days to maturity will be based on your inputs in the Fall Planting maturity fields, if First Frost is enabled when creating a planting. You can also define maturity in terms of relation to Last Frost date.
Succession Plantings
Creating Succession Plantings
When creating a planting, you can add additional plantings.
If you enter 3 in the Plantings field, a total of 4 plantings will be created (the original and 3 succession plantings)
Successions allow you to create multiple identical plantings, separated by a specified number of days.
For example, if you wanted to have three plantings of sunflowers (each separated by two weeks), you would put 2 in the plantings box and 14 in the days between box.
The preview will be updated to show each succession planting.
Editing Succession Plantings
When you edit a planting, changes are only applied to the individual planting and any related succession plantings will not be changed.
Successions via Visual Planner
While you can create succession plantings from Visual Planner, only the first planting will be associated with the growing space. Additional plantings will be unlinked until added to another selection on Visual Planner.
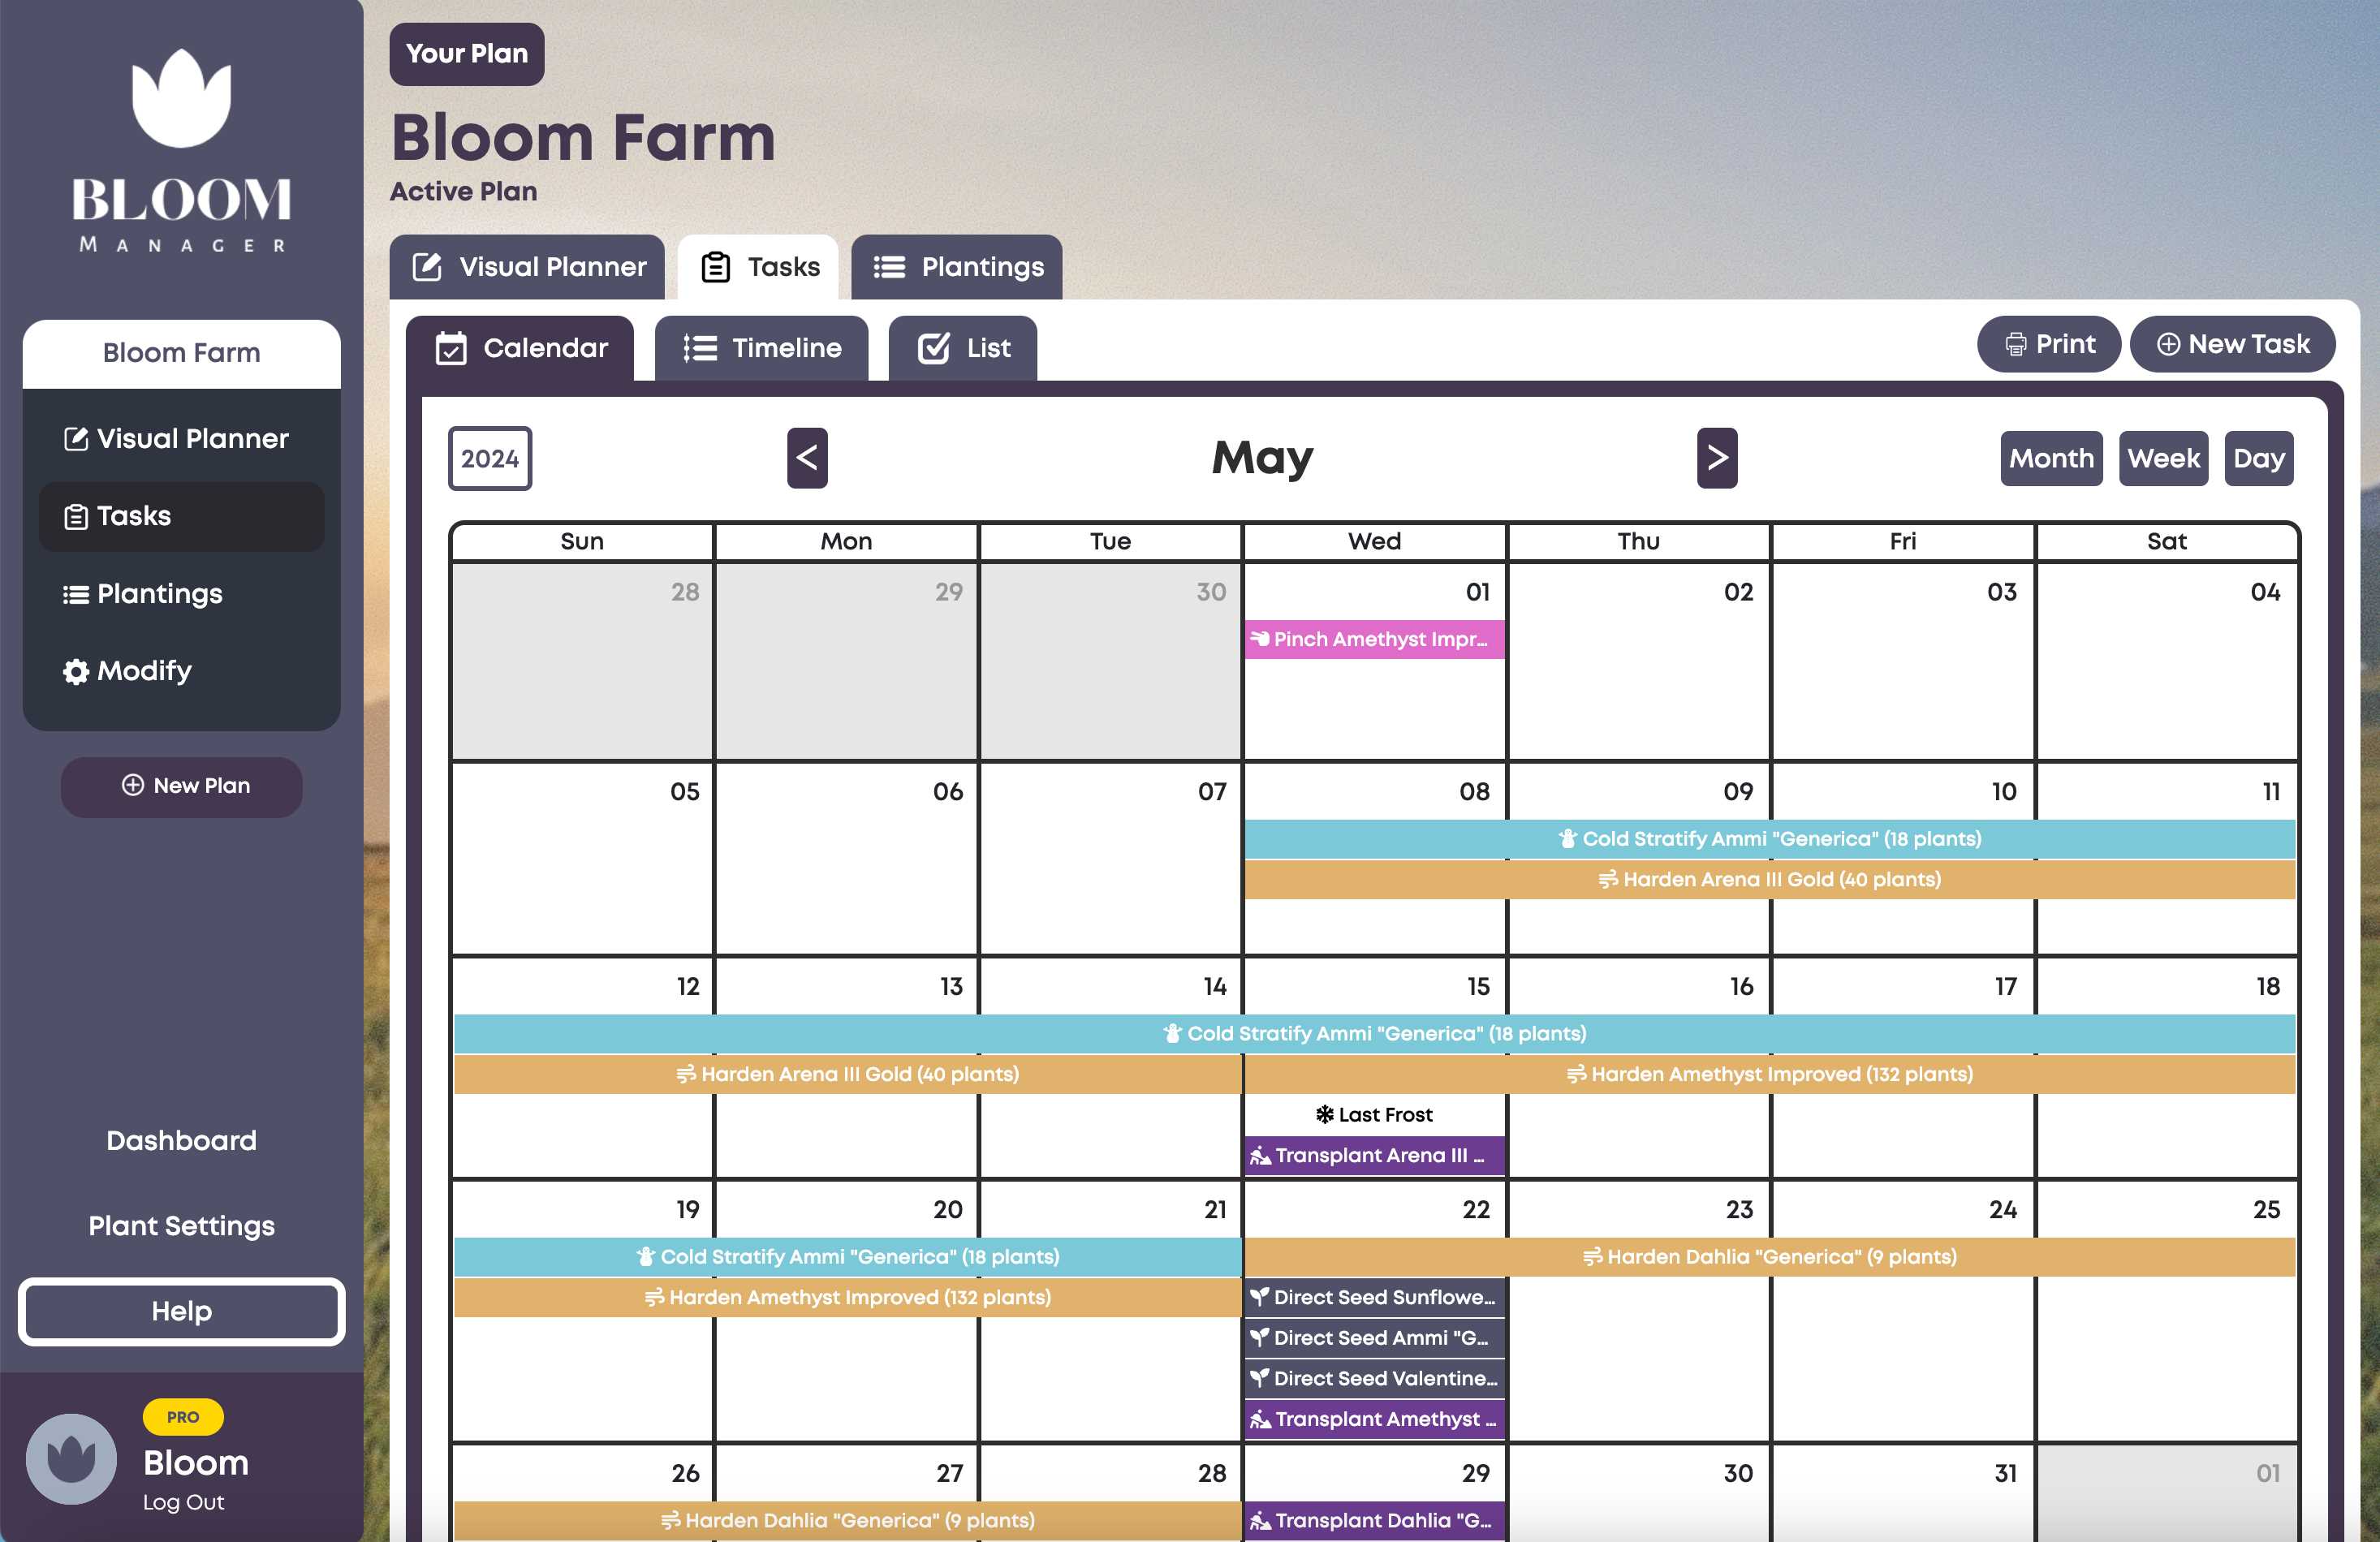
Calendar View
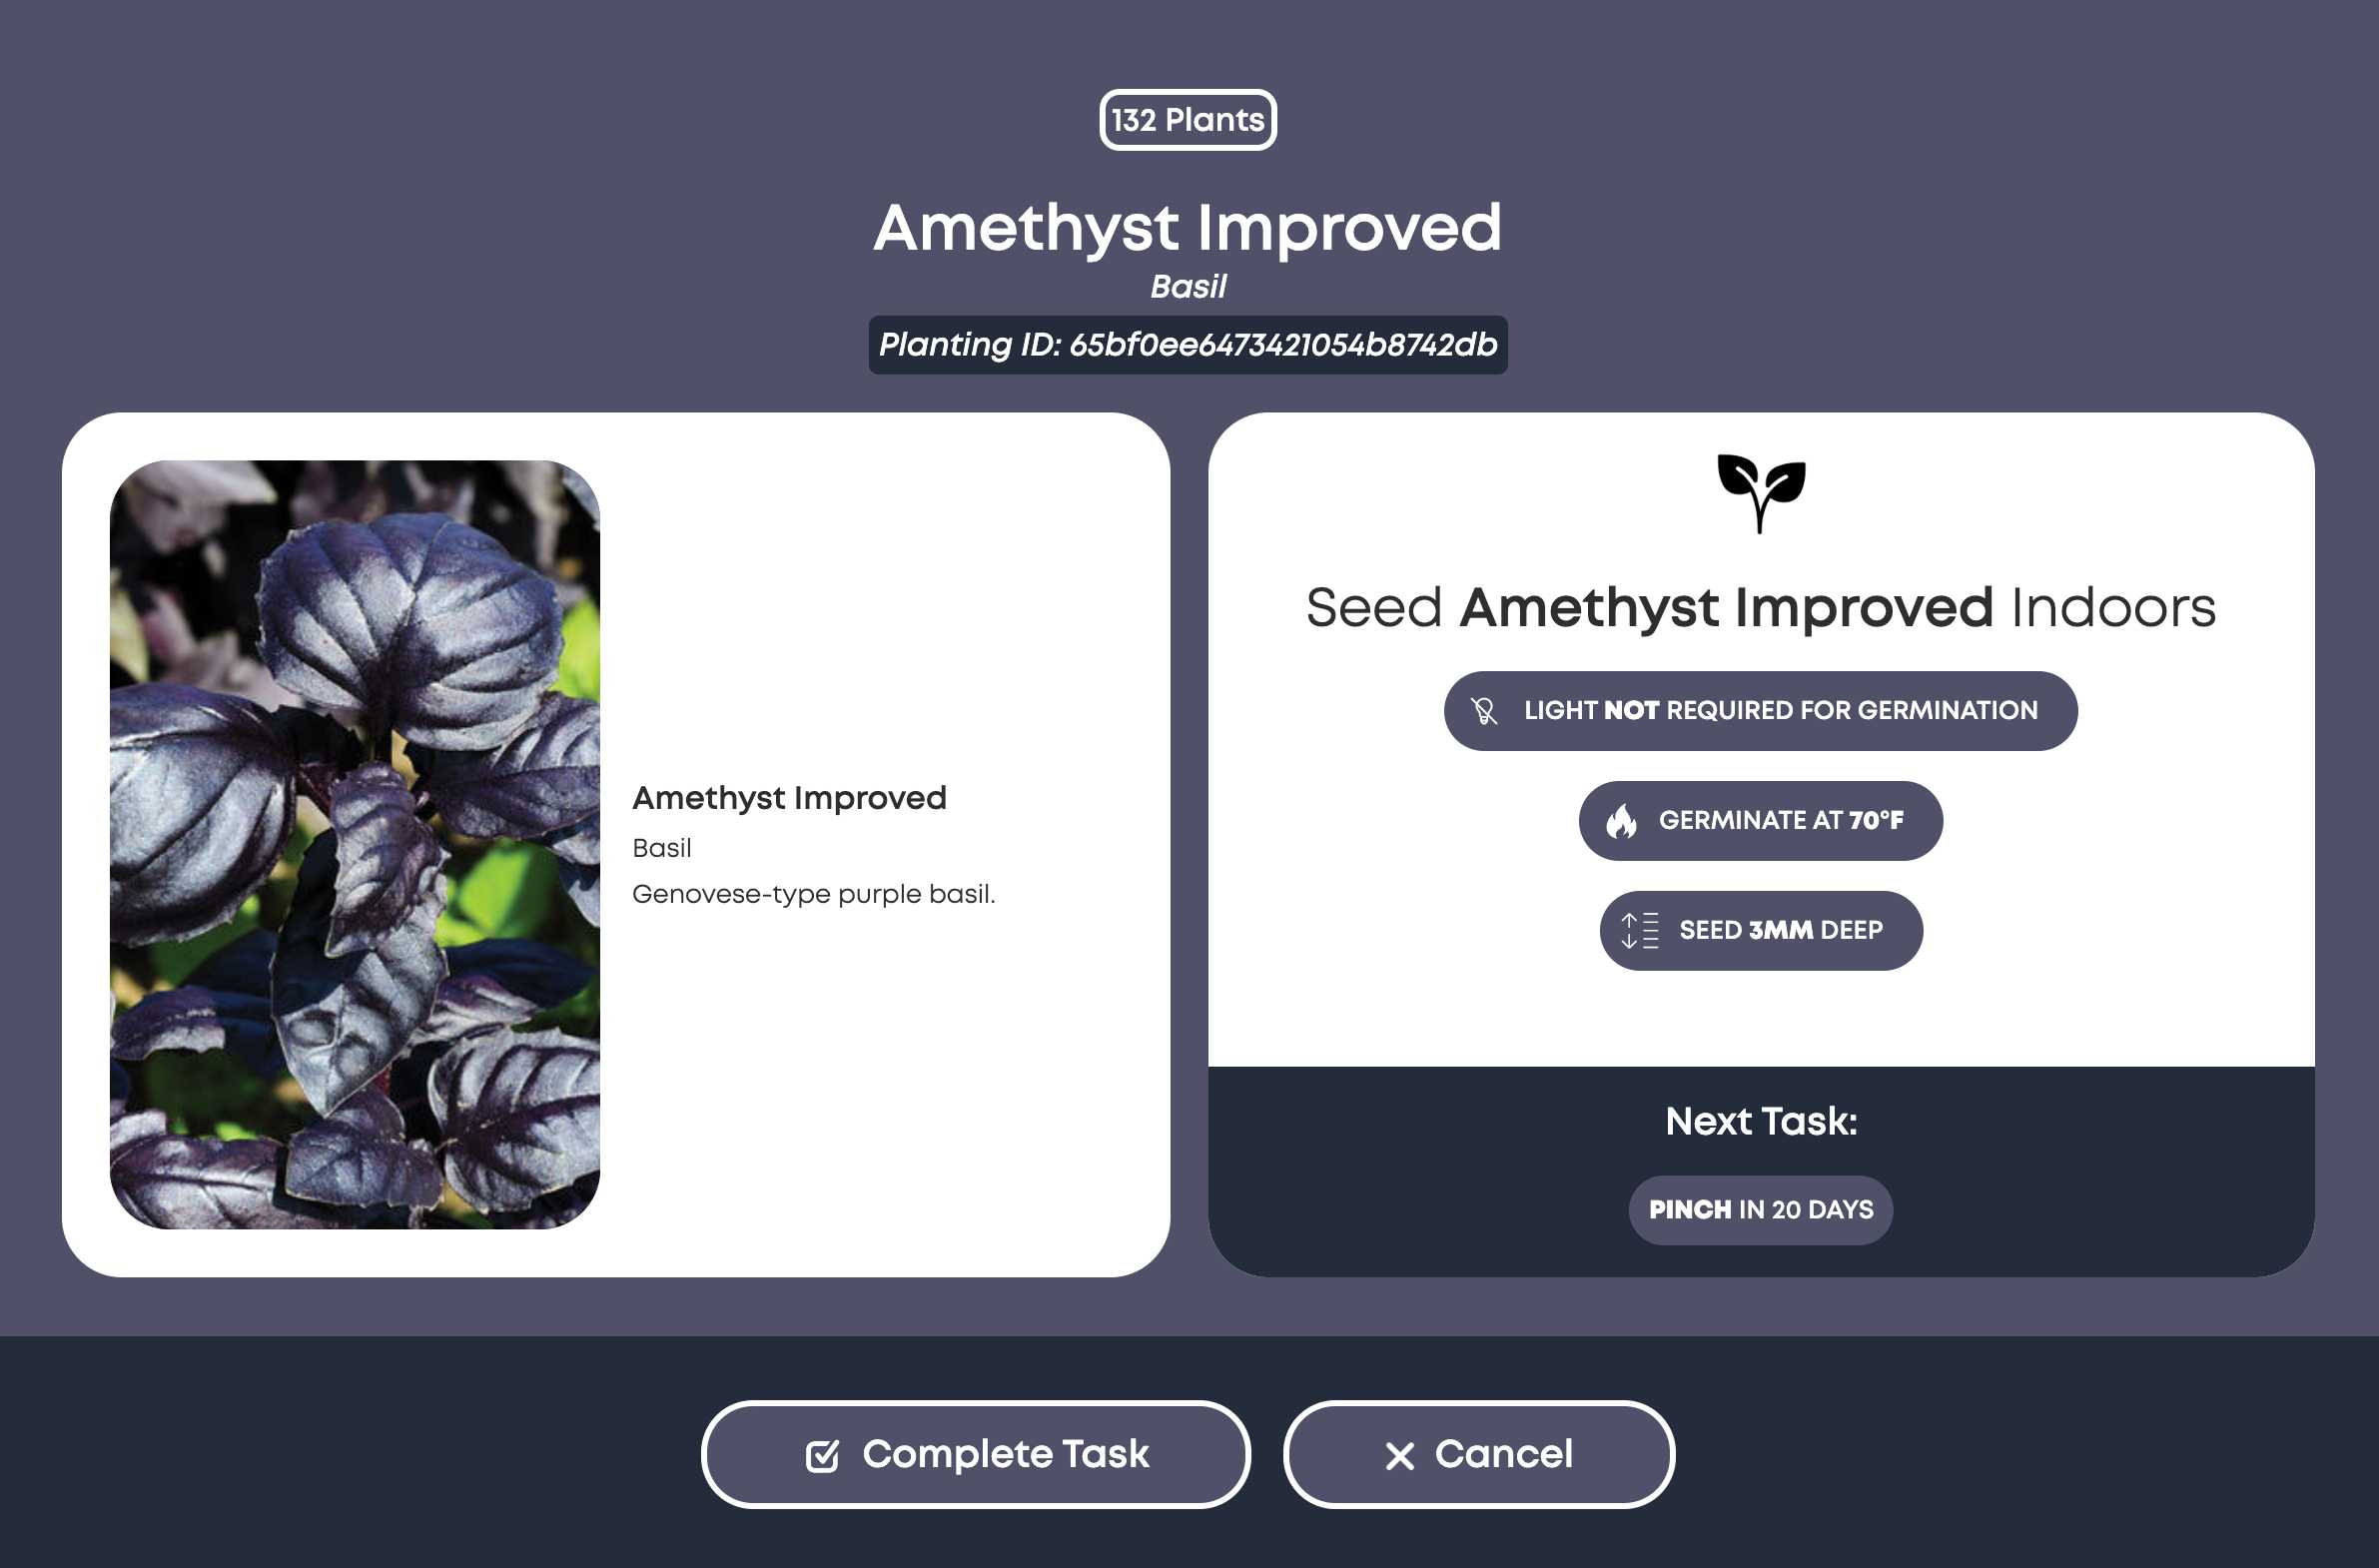
With the calendar view, you can easily see a month-by-month overview of your growing tasks. Tasks are colour-coded by type, and you can select a task to view details and to mark it as complete.
Any notes related to the task will appear when you select the task.
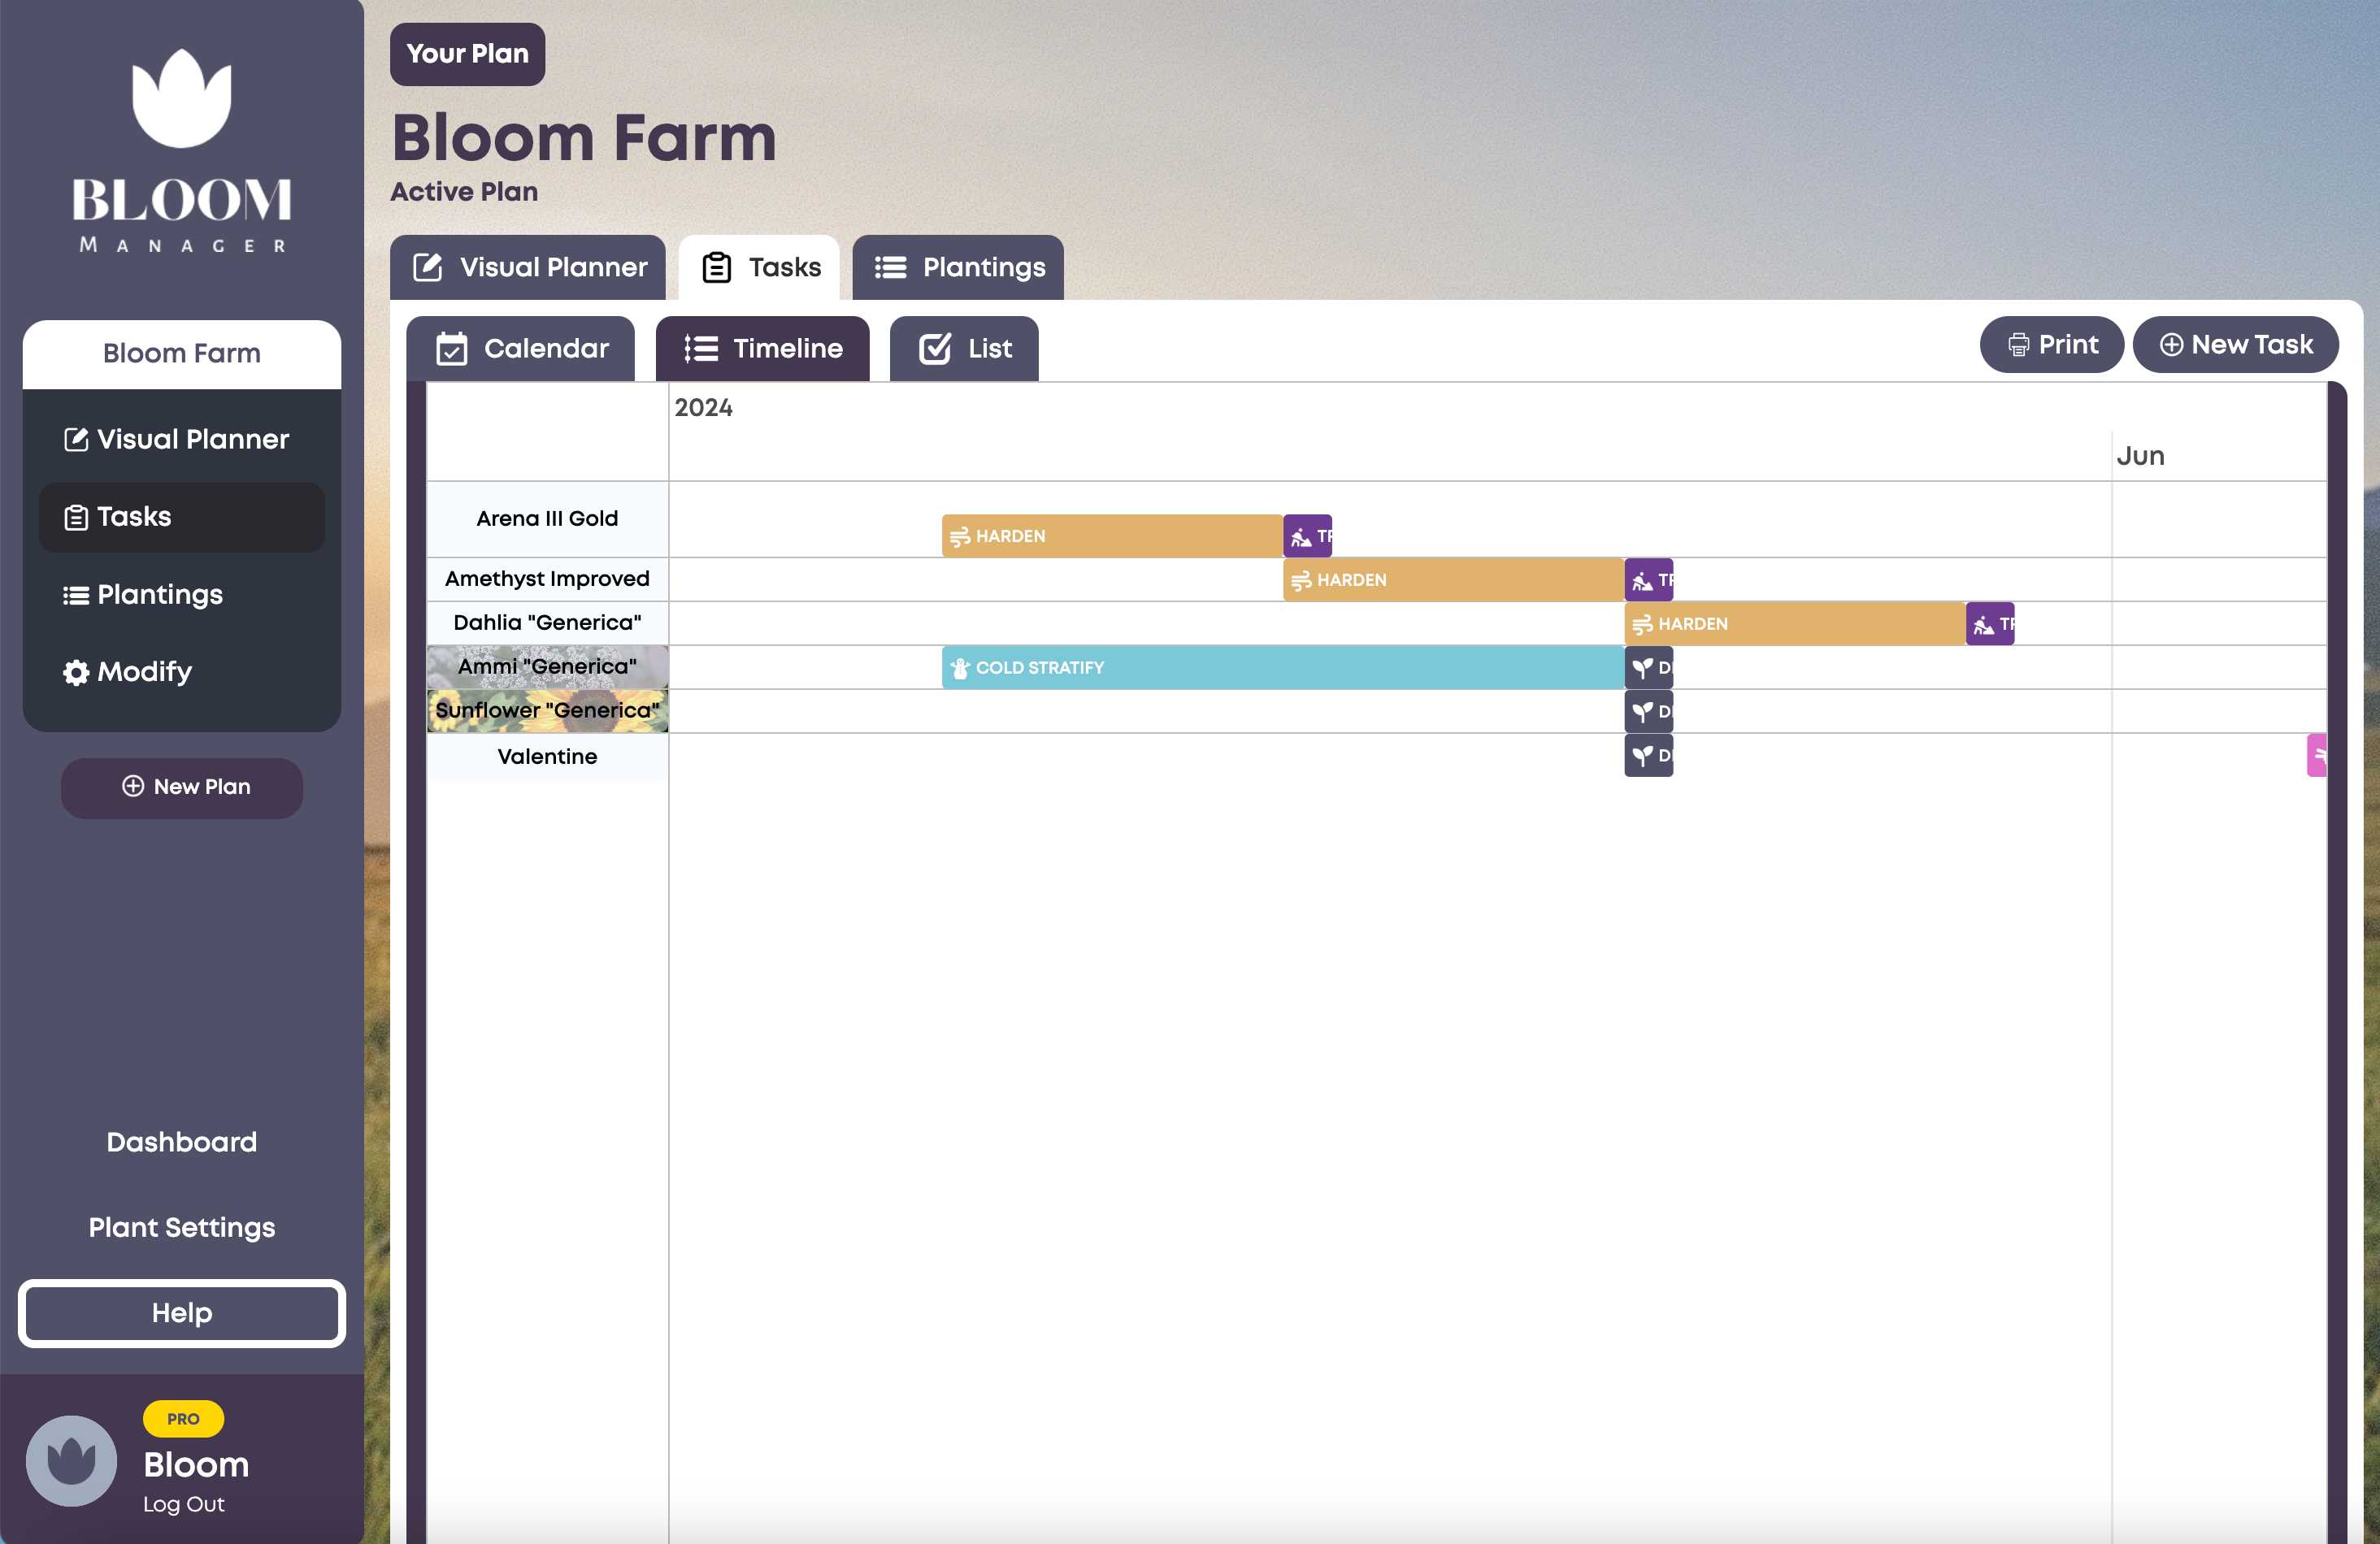
Timeline View
The timeline view allows for a high-level overview of your plan, viewing all of your plantings and tasks at once. It's helpful to view gaps in harvest and to get an idea of what your season will look like. Similarly to the calendar view, tasks are colour-coded and you can view task details and mark as complete from this view.
List View
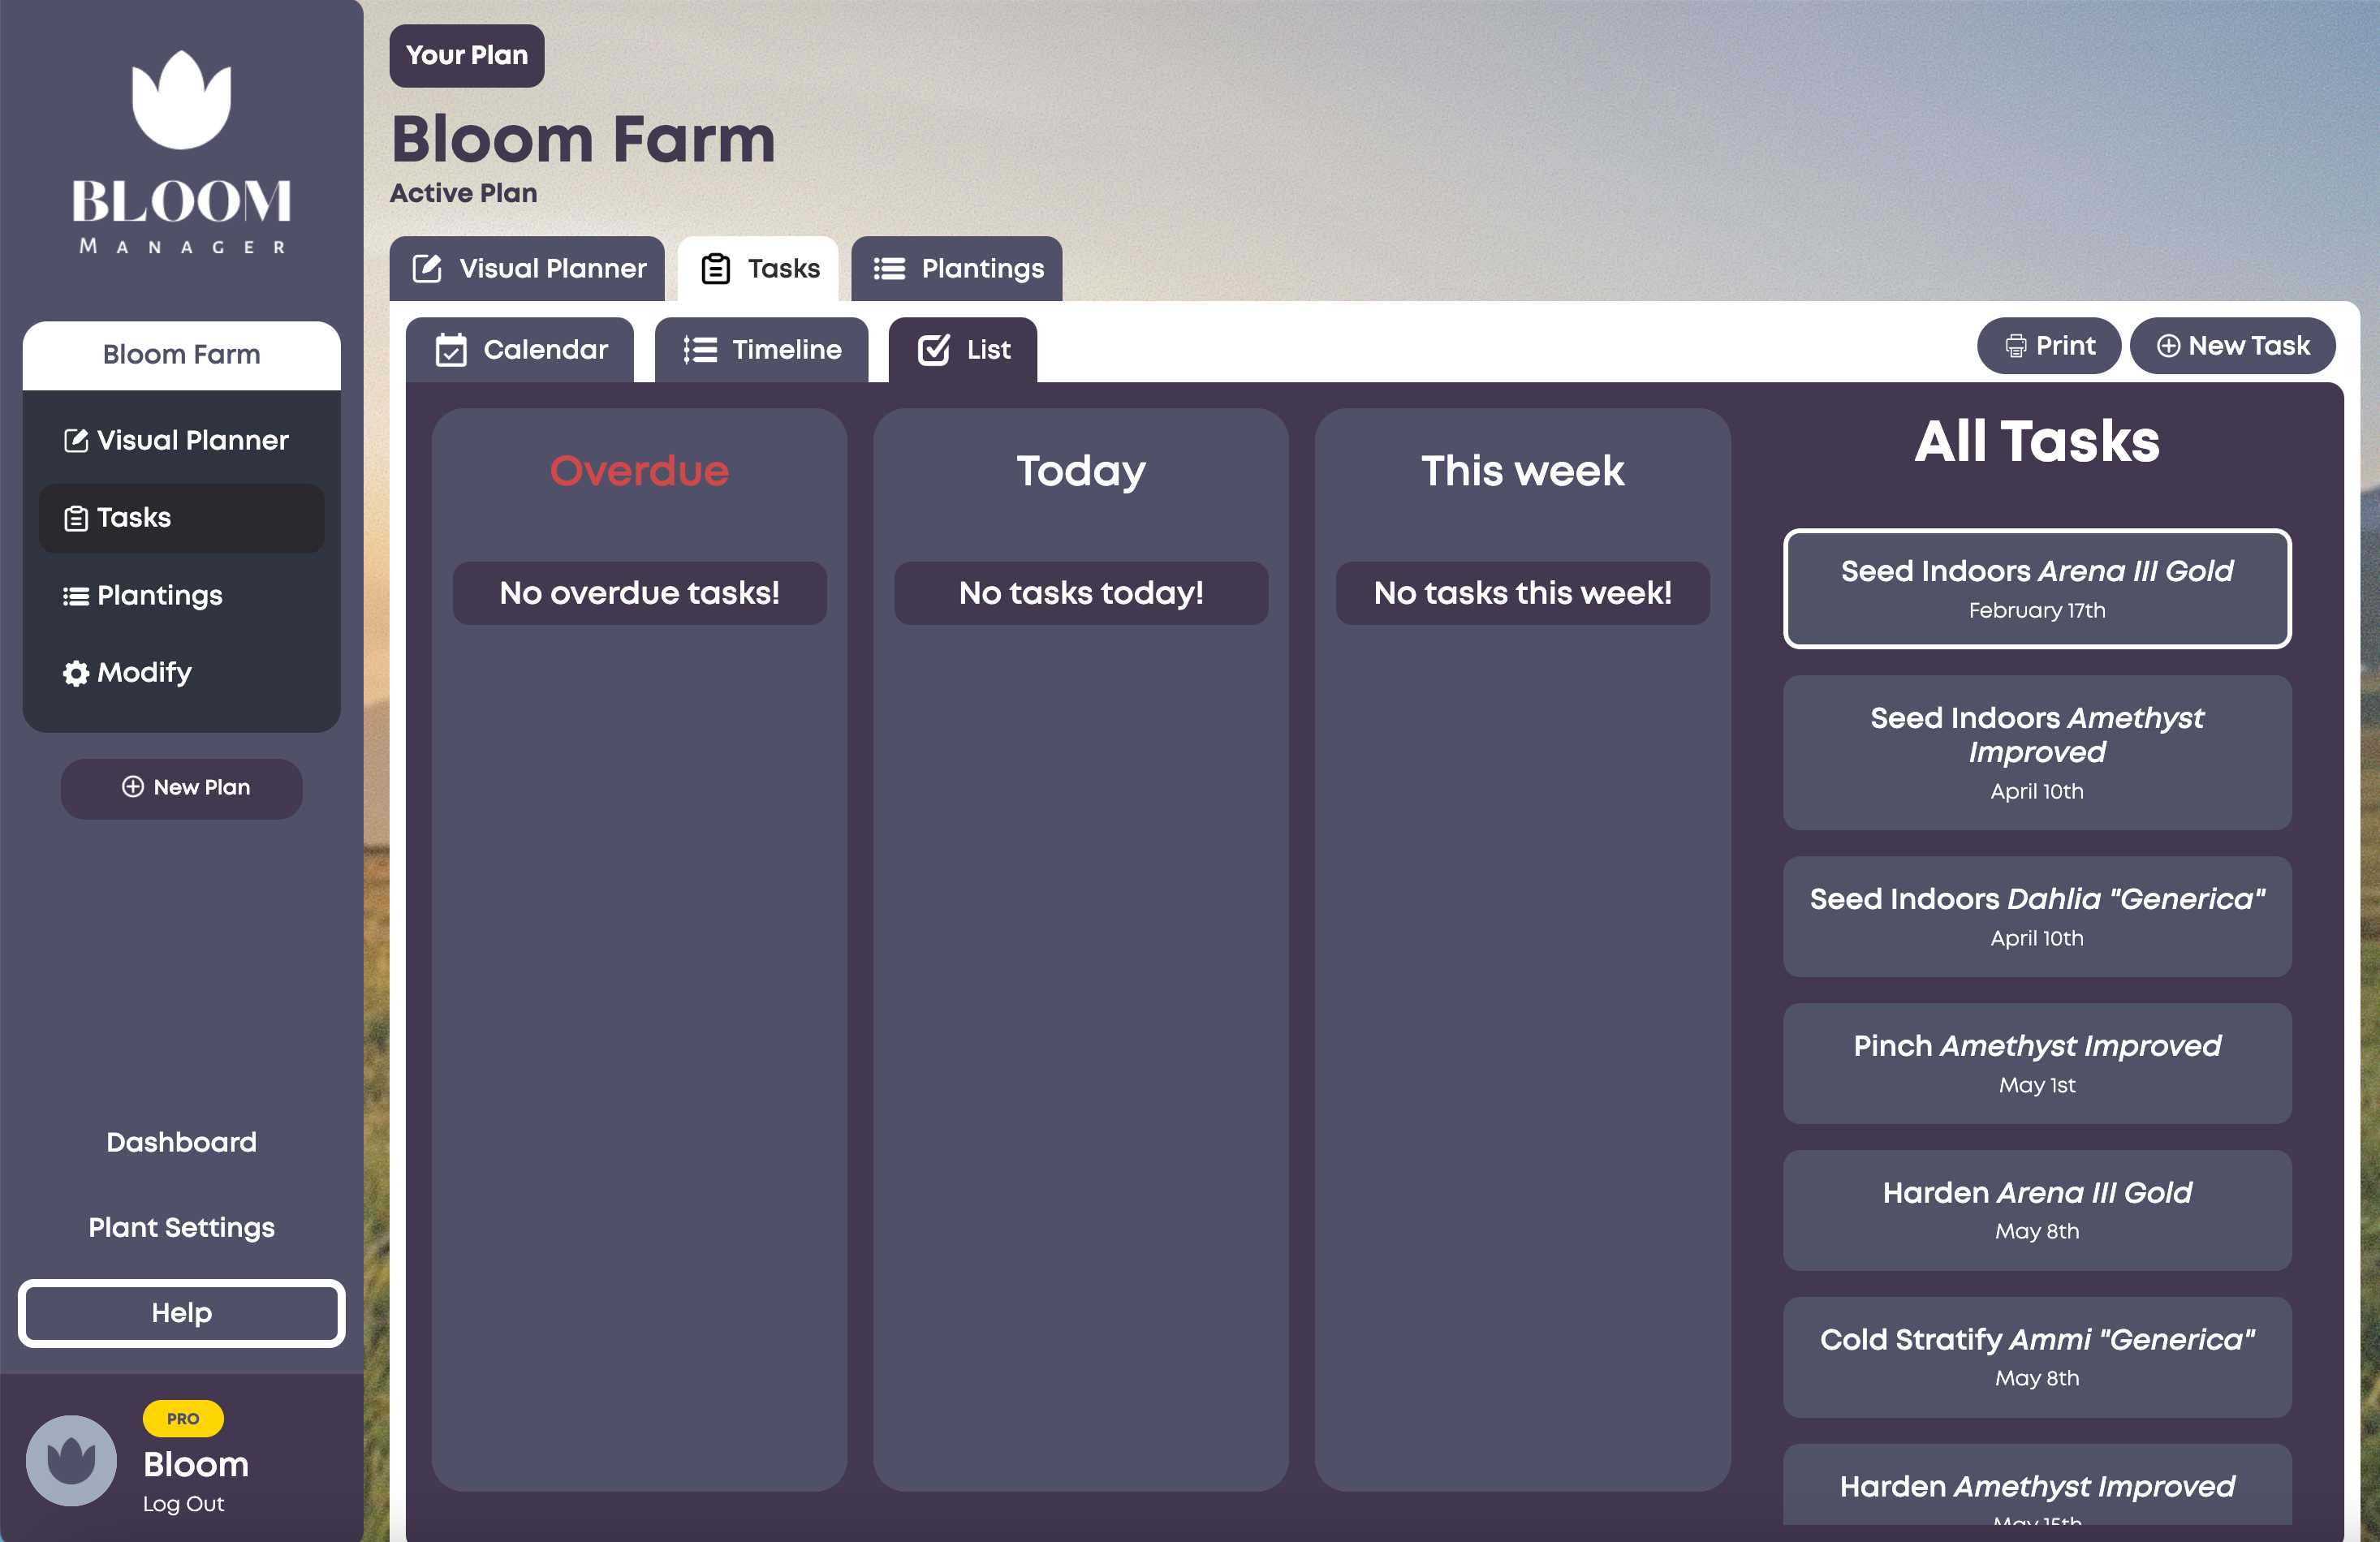
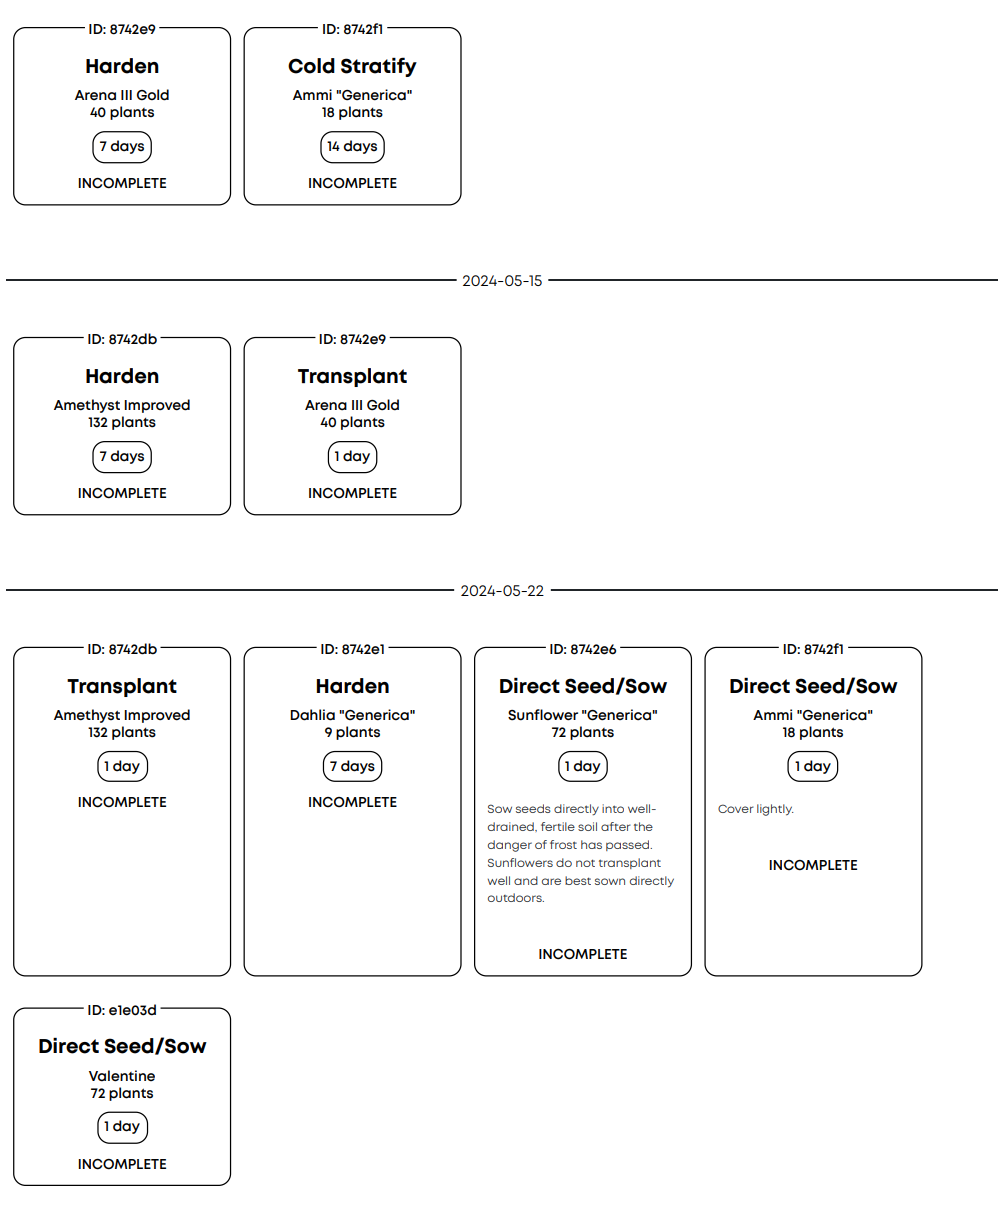
The list view is sorted by overdue tasks, tasks due today and tasks due this week. The "All Tasks" column displays a high-level overview of all tasks in the season plan sorted by date and completion status. Tasks can be marked complete by clicking on the items in this list.
Other Features
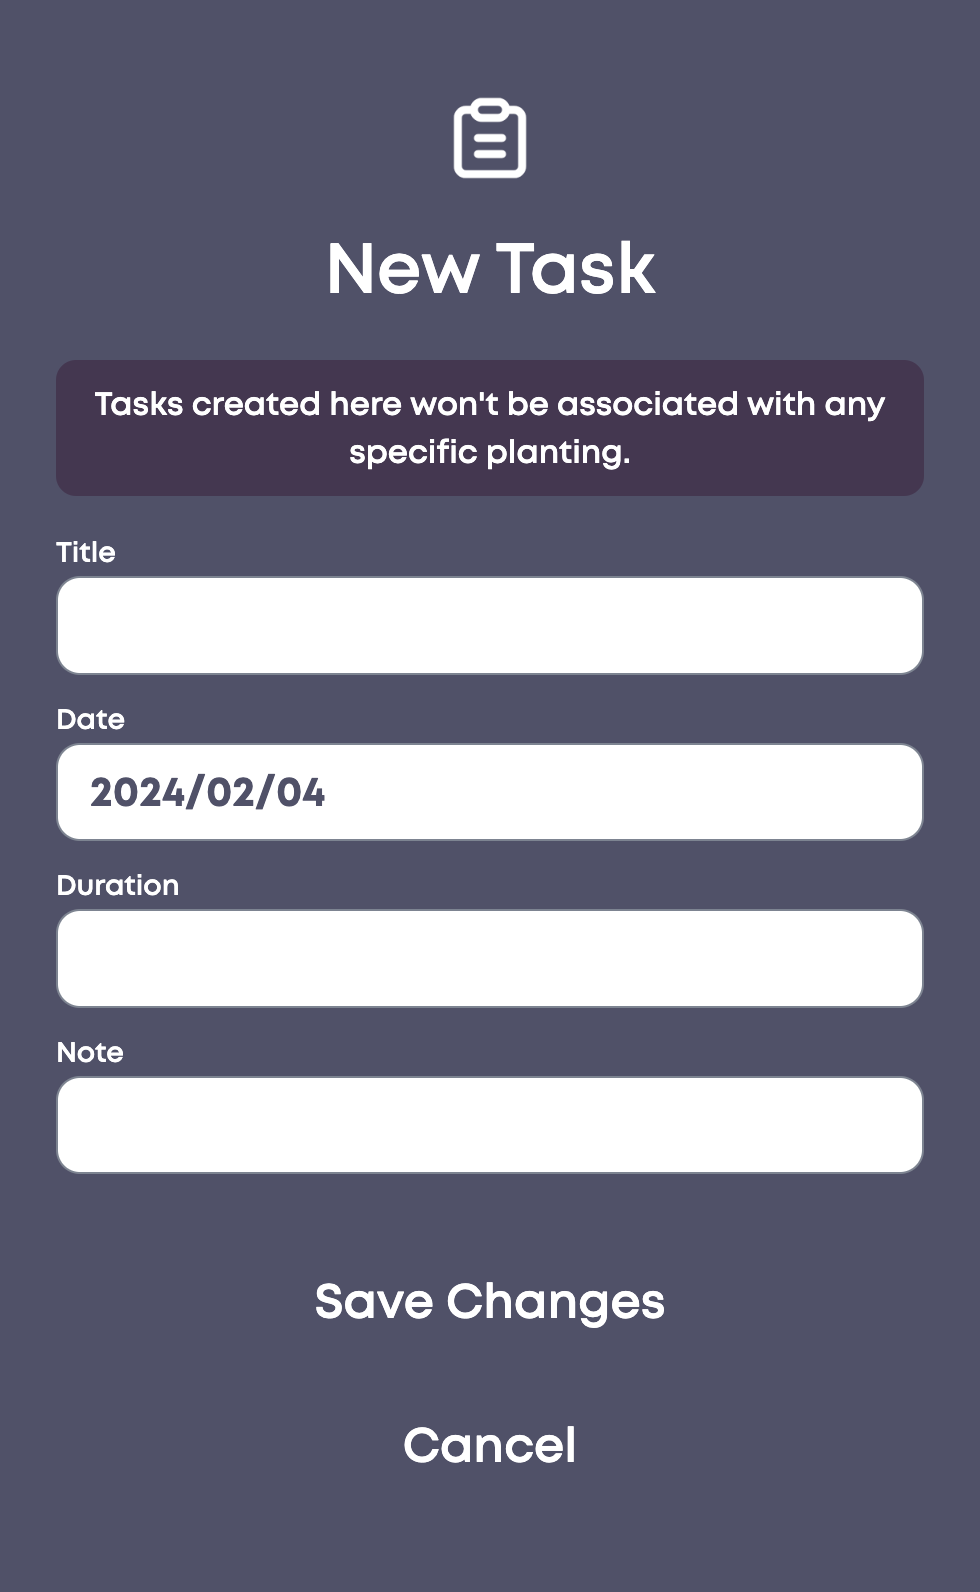
You can also create new tasks, not linked to any planting. To do so, click "New Task" and fill out the required fields.
PRO users have access to additional features, including the ability to print their tasks by clicking the "Print" icon.
Plantings View
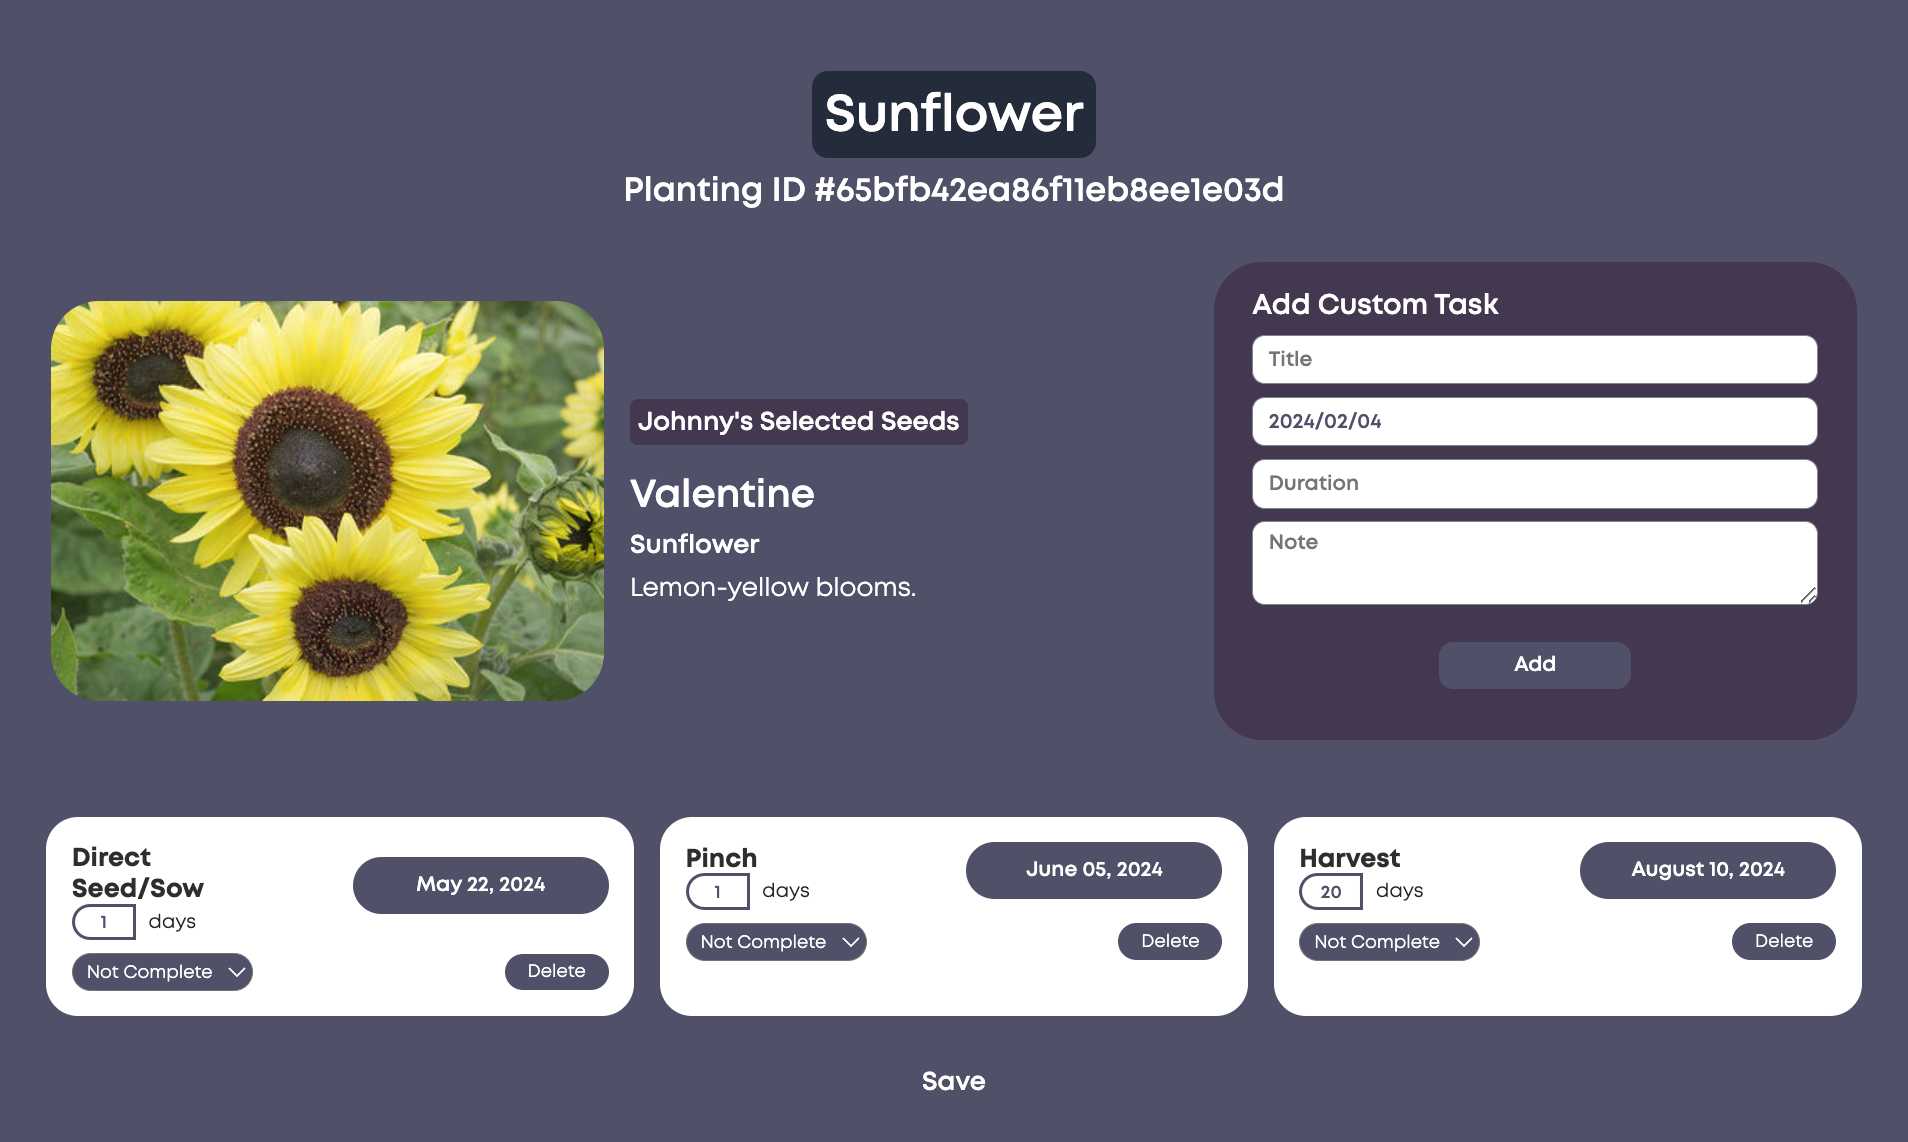
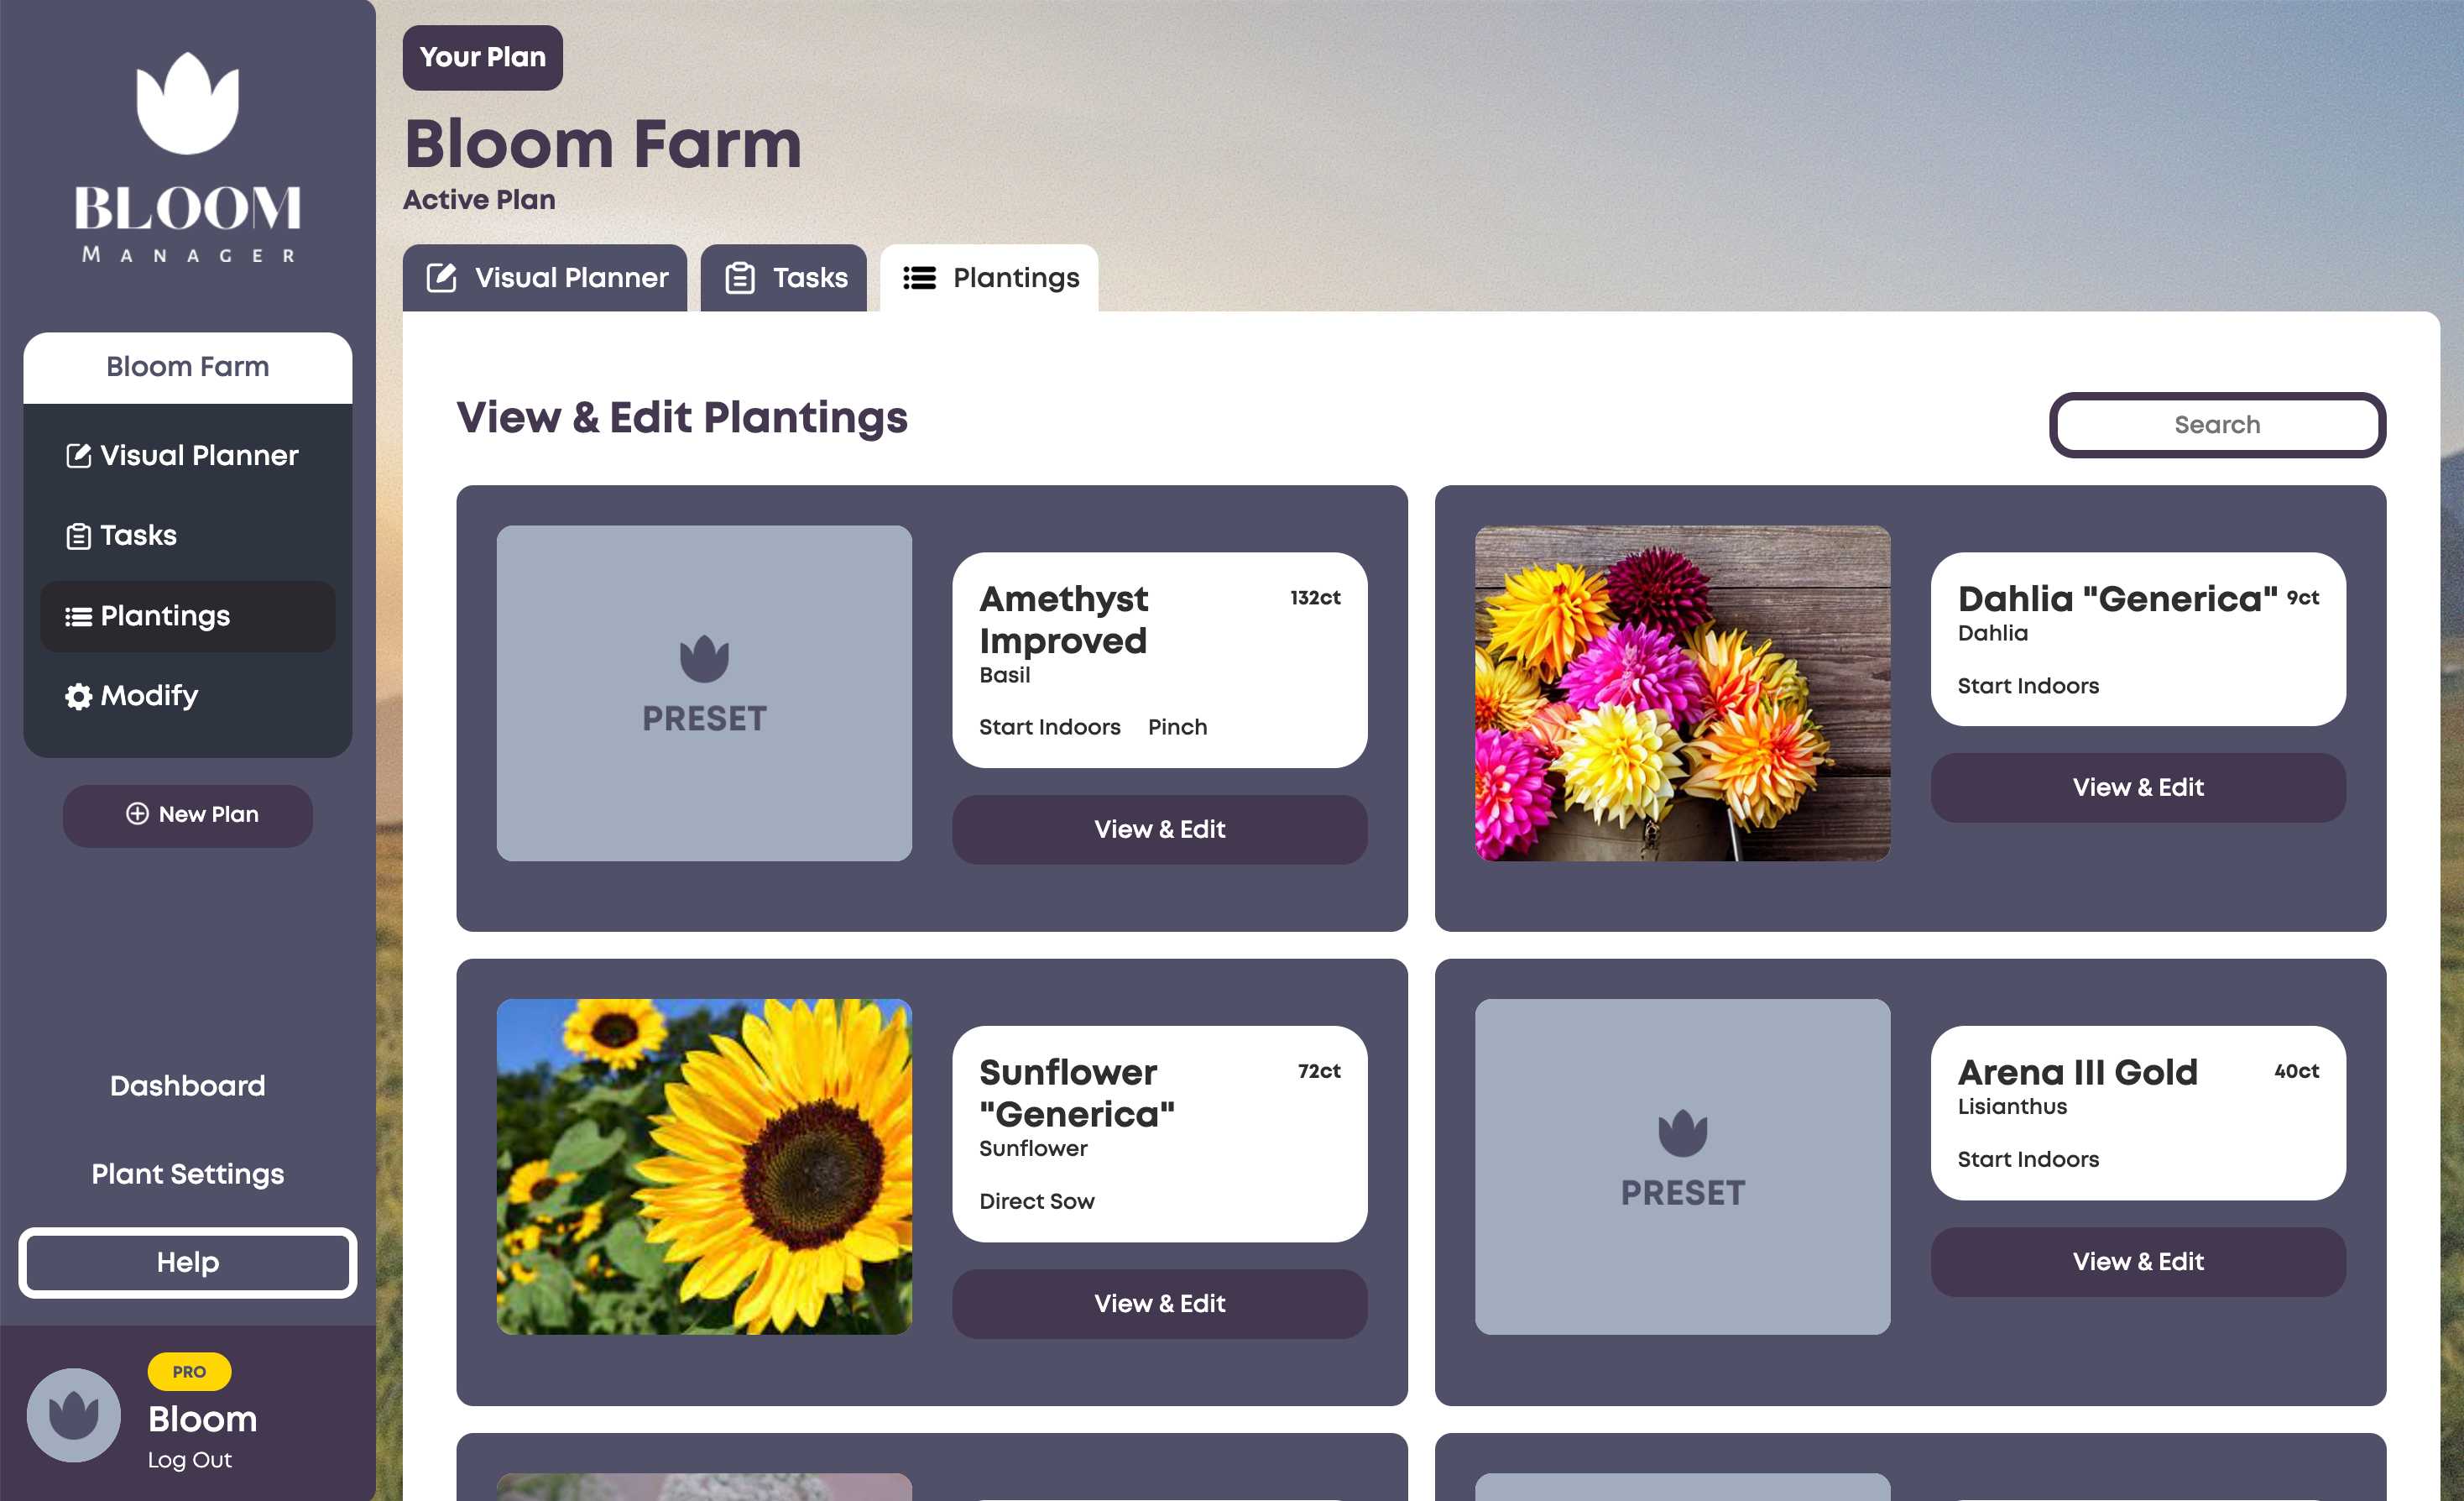
The Plantings view allows you to view all plantings individually, along with the tasks created for each one.
Selecting one of the plantings allows you to view all the tasks, change the date, duration, completion status or even add a new custom task to the planting.
Make sure you hit "save" after you make any changes!
Add Growing Space
To add a planting with Visual Planner, you first need to create a growing space.
Simply enter a name for your growing space (e.g. Field #1 or Back Garden) and define a length and height, in feet. This should be the length and height of your growing space. We recommend erring on the side of making the space larger rather than making many smaller spaces.
Define Options
Click on the gear icon in the bottom right to manage different options while using Visual Planner.
We recommend enabling Snap-to-Grid to make creating your selections easier. You can also specify the grid size.
You can also enable Update Quantity on Resize; this is important for later, after you have created your plantings. Having this option enabled will automatically update the plant quantity when you resize the planting.
Other options include Adjust Dimensions, Print and Delete Growing Space.
Create Planting
Once you've created a growing space, click and drag your mouse to create a planting. Or, if you're on mobile, double-tap and drag your finger to create a planting.
Once you've created a planting, you have a few options.
|
Desktop |
Mobile |
| Add Planting |
Click "Add Planting" |
Tap "Add Planting" |
| Resize |
Click and drag the resize icon in the bottom right OR click the resize icon in the top right to manually enter dimensions. |
Tap the resize icon in the top right to manually enter dimensions. |
| Move |
Click and drag the move icon in the bottom left to move. |
Not Available |
| Reorder |
Click the swap icon in top left to move the planting backwards, in case it's overtop of another planting. |
Tap the swap icon in top left to move the planting backwards, in case it's overtop of another planting. |
| Delete |
Click the trash icon in the top right to delete the planting. |
Tap the trash icon in the top right to delete the planting. |
After clicking "Add Planting", you can choose to add a New Planting or link an existing one. Existing plantings will be available if you've created succession plantings (only the first planting will be linked to the physical planting, the remaining plantings will be unlinked) or if you've created plantings manually through Modify Plan.
Now, choose from available plants to add to the planting. Plants are sorted alphabetically and can be searched; they can also be filtered by presets and your custom plants.
